Hunter Ceiling Fans

  • Home
  • Hunter Manuals
  • Hunter Fan Parts
    • Hunter Ceiling Fan Remotes
    • Hunter Ceiling Fan Light Kits
    • Hunter Ceiling Fan Blade Arms
    • Hunter Ceiling Fan Blades
    • Hunter Ceiling Fan Downrods
    • Hunter Ceiling Fan Pull Chains
    • Hunter Ceiling Fan Wall Controls
    • Hunter Ceiling Fans Replacement Globes
  • Hunter Support
  • Hunter Commercial Ceiling Fans

Hunter Swanson Ceiling Fan: A Stylish, Reliable, and Efficient Cooling Solution

April 9, 2025 by admin Leave a Comment

When it comes to choosing the perfect ceiling fan for your home, Hunter Swanson Ceiling Fan offers a blend of elegance, performance, and durability. Whether you’re outfitting a large living room or a cozy bedroom, this fan from Hunter’s Professional Series is designed to offer superior cooling with minimal noise. Featuring reversible blades, LED lighting, and a whisper-quiet motor, the Hunter Swanson Ceiling Fan delivers reliable performance for years to come.
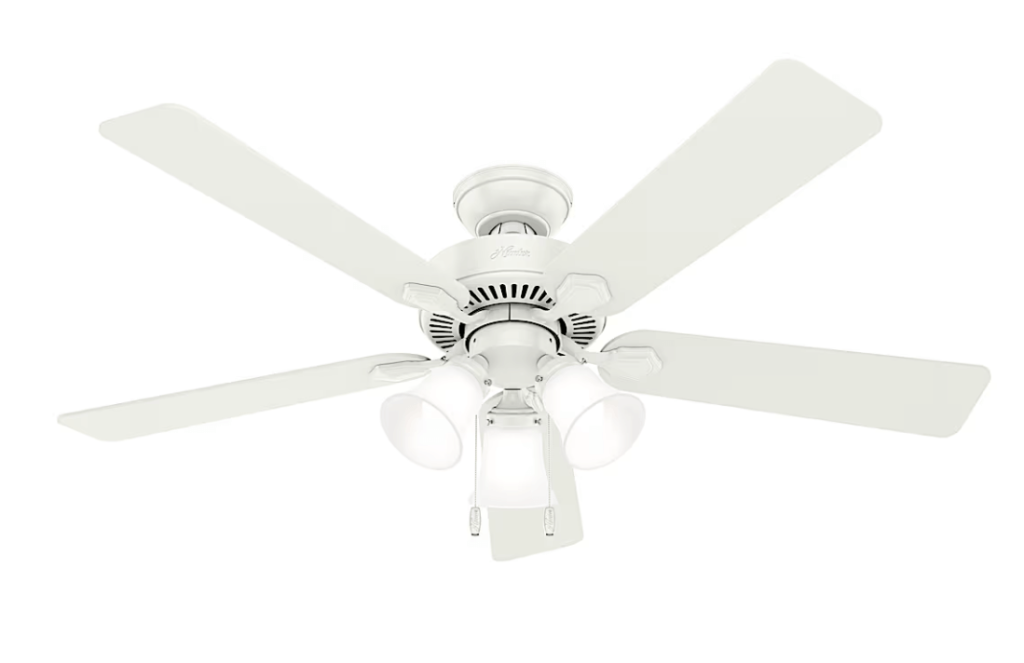
Hunter Swanson Ceiling Fan

Key Features of the Hunter Swanson Ceiling Fan

  1. Indoor Use Only
    • The Hunter Swanson Ceiling Fan is rated for indoor use only, making it a perfect choice for spaces like living rooms, bedrooms, or any room inside your home. With this fan, you can create a comfortable and stylish atmosphere in your home, regardless of the season.
  2. LED Lighting for Efficient Illumination
    • The Hunter Swanson Ceiling Fan comes with 3 LED bulbs included, providing excellent lighting that brightens up your space. LED lighting is not only energy-efficient but also long-lasting, reducing the need for frequent bulb replacements. Whether you’re looking for soft ambiance or brighter light for reading, the fan offers the ideal lighting solution.
  3. Pull Chain Control for Easy Operation
    • This model features pull chains for both the fan and light controls, ensuring simple and convenient operation. Whether you’re adjusting the speed or switching the lights on and off, the pull chain control makes it effortless to customize the fan’s settings.
  4. Wobble-Free Operation
    • One of the standout features of the Hunter Swanson Ceiling Fan is its wobble-free design. Hunter fans are engineered to operate without the annoying wobble often associated with ceiling fans, ensuring that your fan stays stable and quiet, even at higher speeds. This makes it an ideal fan for any room where comfort and quietness are essential.
  5. Reversible Blades for Versatility
    • The Hunter Swanson Ceiling Fan comes with 5 reversible blades in a combination of Fresh White and Natural Wood finishes. This gives you the flexibility to change the fan’s look depending on your room’s decor. The reversible blades also allow for a reversible motor, meaning you can adjust the direction of airflow for both cooling in the summer and air circulation in the winter, which helps maintain a consistent temperature year-round.
  6. Whisper-Quiet Motor
    • Equipped with a WhisperWind™ reversible motor, the Hunter Swanson Ceiling Fan ensures optimal performance with minimal noise. This motor is engineered to be whisper-quiet, allowing you to enjoy the cooling effects without any distracting humming or buzzing. Whether you’re relaxing in your bedroom or hosting guests in the living room, the quiet operation adds to the overall comfort.
  7. Ideal for Large Rooms
    • With a 52-inch blade span, the Hunter Swanson Ceiling Fan is the perfect size for large rooms, such as living rooms, master bedrooms, or even larger spaces. The fan’s size ensures efficient air circulation, making your space comfortable no matter the weather.
  8. Standard Profile Mounting
    • The Hunter Swanson Ceiling Fan includes a 2-inch downrod, making it suitable for standard ceiling heights. This makes it a versatile option for many home setups, and the standard profile mounting ensures that the fan fits seamlessly into your living space.
  9. Compatible Accessories
    • The Hunter Swanson Ceiling Fan is compatible with a variety of Hunter and Casablanca accessories, excluding Hunter Original® accessories. This allows you to further customize your fan, whether you want to add a remote control or different lighting options.
  10. Limited Lifetime Motor Warranty
    • The Hunter Swanson Ceiling Fan comes with a Limited Lifetime Motor Warranty, offering peace of mind for many years of use. As one of the oldest ceiling fan manufacturers with over 135 years in the business, Hunter stands behind its products and ensures long-lasting performance and reliability.

Why Choose the Hunter Swanson Ceiling Fan?

The Hunter Swanson Ceiling Fan combines classic design with modern technology to provide superior comfort and efficiency in your home. Whether you’re looking to add a stylish fan to a large room or need a reliable cooling solution that works year-round, this fan delivers on all fronts.

  • Energy-Efficient: With LED lighting and an energy-efficient motor, the Hunter Swanson Ceiling Fan helps reduce your energy consumption while providing excellent lighting and airflow.
  • Durability and Reliability: Backed by a limited lifetime warranty, the Hunter Swanson Ceiling Fan is built to last and is designed for years of smooth, quiet operation.
  • Stylish Design: The reversible blades and modern finishes make the Hunter Swanson Ceiling Fan a great addition to a variety of room styles, adding both style and comfort to your space.

PDF Manual for the Hunter Swanson Ceiling Fan

For detailed installation instructions and guidance on how to use the Hunter Swanson Ceiling Fan, you can access the PDF manual below. The manual provides step-by-step instructions, troubleshooting tips, and helpful diagrams to ensure your fan is set up and operating correctly.

Download Hunter Swanson Ceiling Fan PDF Manual

By referring to the manual, you’ll be able to:

  • Install the fan with ease using the provided installation instructions.
  • Understand how to properly use the pull chain controls for the fan and lights.
  • Learn about maintenance and cleaning tips to ensure long-lasting performance.
  • Troubleshoot any potential issues that may arise during setup or use.

Note: The manual is designed to provide all the information you need to get the most out of your Hunter Swanson Ceiling Fan, including safety precautions, care instructions, and warranty information.

Conclusion:

The Hunter Swanson Ceiling Fan is a fantastic option for those who need a reliable, stylish, and energy-efficient fan for larger rooms. With features like LED lighting, a whisper-quiet motor, and a wobble-free design, it stands out as an ideal choice for creating a comfortable, quiet, and energy-efficient environment in your home.

Shop the Hunter Swanson Ceiling Fan today for an unbeatable combination of style, performance, and durability!
Filed Under: Hunter Ceiling Fan Reviews, Hunter Ceiling Fans, Hunter Fan Manuals

Hunter Presto Ceiling Fan: Modern Simplicity and High-Speed Cooling Performance

April 9, 2025 by admin Leave a Comment

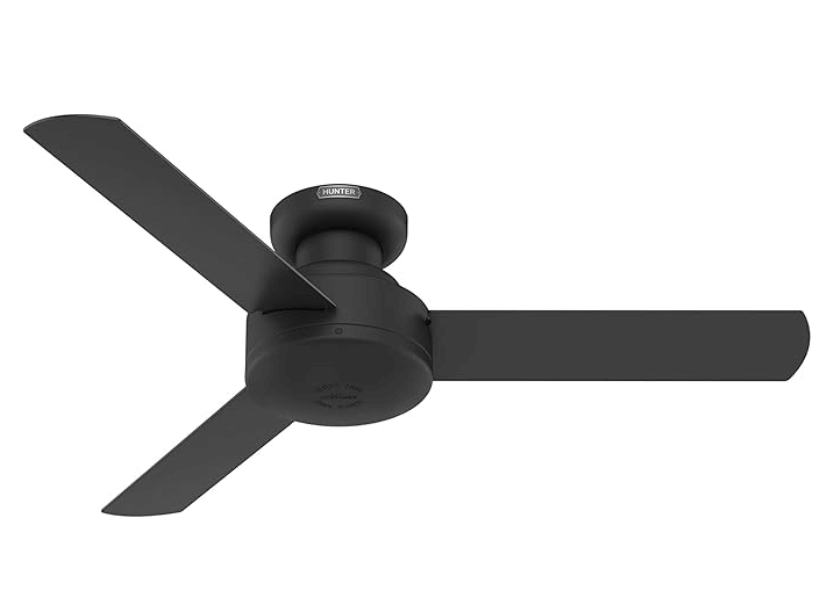
The Hunter Presto Ceiling Fan offers an elegant yet simple design that seamlessly blends into a variety of home styles, from Scandinavian to modern industrial. Equipped with Hunter’s SureSpeed® Guarantee, this fan delivers optimized, high-speed cooling performance, making it perfect for larger spaces like living rooms, bedrooms, and home offices. Whether you need efficient airflow for a hot summer day or year-round comfort, the Hunter Presto Ceiling Fan is built to perform.

Hunter Fan 52401 Presto 44-Inch Low Profile Ceiling Fan

Key Features of the Hunter Presto Ceiling Fan

  1. SureSpeed® Guarantee for High-Speed Cooling
    • The Hunter Presto Ceiling Fan is built with SureSpeed® technology, ensuring that it delivers over 33% higher air velocity than leading competitors. This high-speed cooling performance provides more powerful airflow, helping to keep your room comfortable even on the hottest days.
    • Why It Matters: The SureSpeed® Guarantee means faster, more efficient airflow. Whether you’re looking to cool down a room quickly or maintain a comfortable breeze, the Hunter Presto Ceiling Fan ensures that your space stays cool and breezy.
  2. Indoor Use Only
    • The Hunter Presto Ceiling Fan is rated for indoor use only, making it a great option for spaces like living rooms, bedrooms, or home offices. Designed to enhance your indoor environment, this fan delivers the perfect balance of style and function.
  3. No Light Kit or Bulbs Included
    • The Hunter Presto Ceiling Fan does not include a light kit or bulbs, making it a simple and sleek option for those who don’t require additional lighting. This fan focuses entirely on cooling performance, which is ideal for homeowners who want a fan-only solution.
    • Why It Matters: If you’re looking for a minimalist fan without the need for integrated lighting, the Hunter Presto Ceiling Fan offers a clean, functional design without the extra lighting features.
  4. Wobble-Free Operation
    • Engineered for wobble-free performance, the Hunter Presto Ceiling Fan ensures smooth operation, even at high speeds. This stability is key for creating a comfortable environment, as a wobbly fan can cause vibrations, noise, and potential damage over time.
    • Why It Matters: The wobble-free design ensures that your Hunter Presto Ceiling Fan operates silently and steadily, contributing to a peaceful atmosphere in your home.
  5. Flexible Mounting Options
    • The Hunter Presto Ceiling Fan offers flexible mounting options, making it compatible with a range of ceiling heights. Whether you have a standard or slightly angled ceiling, this fan comes with a 2-inch downrod for easy installation.
    • Why It Matters: The flexible mounting ensures that the Hunter Presto Ceiling Fan is easy to install in various room setups, accommodating different ceiling types and ensuring that it fits seamlessly into your space.
  6. Whisper-Quiet WhisperWind® Motor
    • Equipped with Hunter’s signature WhisperWind® motor, the Hunter Presto Ceiling Fan provides optimal performance with minimal noise. The 3-speed reversible motor allows you to adjust the airflow direction for both cooling in the summer and air circulation in the winter.
    • Why It Matters: The WhisperWind® motor ensures that you can enjoy quiet operation while still benefiting from high airflow, making this fan ideal for bedrooms or areas where silence is essential.
  7. Ideal for Large Rooms
    • The Hunter Presto Ceiling Fan features a large 52-inch blade span, making it perfect for larger rooms such as living rooms, master bedrooms, or home offices. Its size ensures efficient air circulation even in spaces that require extra cooling power.
    • Why It Matters: For larger spaces, you need a fan that can cover more area. The 52-inch blade span ensures that the Hunter Presto Ceiling Fan is ideal for larger rooms, providing uniform cooling and comfort.
  8. Standard Profile Mounting
    • The Hunter Presto Ceiling Fan comes with a 2-inch downrod for standard profile mounting, making it perfect for rooms with normal ceiling heights. This ensures that the fan is positioned optimally for the best airflow and cooling efficiency.
    • Why It Matters: The standard profile mounting ensures that the fan is installed at the ideal height for proper air circulation and performance in most rooms.
  9. Compatible Accessories
    • The Hunter Presto Ceiling Fan is compatible with various Hunter and Casablanca accessories (excluding Hunter Original® accessories). You can further enhance the fan with additional options like remote controls or lighting kits if desired.
    • Why It Matters: The accessory compatibility allows you to customize the Hunter Presto Ceiling Fan based on your specific needs, making it even more versatile and adaptable to different environments.
  10. Limited Lifetime Motor Warranty
    • As with all Hunter Ceiling Fans, the Hunter Presto Ceiling Fan is backed by a Limited Lifetime Motor Warranty. This warranty provides peace of mind, knowing that the motor is guaranteed to perform for years to come.
  • Why It Matters: The limited lifetime motor warranty is a testament to the quality and durability of the Hunter Presto Ceiling Fan, offering long-term reliability and protection for your investment.

PDF Manual for the Hunter Presto Ceiling Fan

For easy installation and optimal usage of your Hunter Presto Ceiling Fan, you can download the PDF manual below. The manual includes step-by-step instructions, maintenance tips, and troubleshooting solutions to ensure your fan operates smoothly for years.

Download Hunter Presto Ceiling Fan PDF Manual

By referring to the manual, you’ll be able to:

  • Follow the easy installation process with Hunter’s 3D InterActive Guide.
  • Adjust the fan speed using the wall control.
  • Troubleshoot any issues and learn about motor maintenance.
  • Learn how to maximize airflow efficiency and ensure long-lasting performance.

Note: The manual is designed to offer all the essential details for setting up, maintaining, and troubleshooting your Hunter Presto Ceiling Fan.

Conclusion:

The Hunter Presto Ceiling Fan is an excellent choice for homeowners seeking a modern, energy-efficient fan that provides high-speed cooling with whisper-quiet operation. With features like SureSpeed® technology, a flexible mounting system, and wobble-free performance, the Hunter Presto stands out as a reliable and stylish option for larger rooms. Plus, with a Limited Lifetime Motor Warranty, you can trust that your fan will provide long-term comfort.

Shop the Hunter Presto Ceiling Fan today for a combination of elegance, performance, and energy efficiency that enhances any room in your home!

Filed Under: Hunter Ceiling Fan Reviews, Hunter Ceiling Fans, Hunter Fan Manuals

Hunter Ceiling Fan Light Kit Assembly: A Step-by-Step Guide

April 9, 2025 by admin Leave a Comment

Understanding Hunter Ceiling Fan Light Kit Assembly

Hunter ceiling fans are designed to provide efficient air circulation while complementing your home’s decor with their sleek, stylish designs. Many of these fans come with the option to add a light kit, which not only enhances the aesthetic appeal of the fan but also adds much-needed illumination to your space. If you’re installing a new Hunter fan or upgrading an existing one with a light kit, proper assembly is crucial for both functionality and safety.

In this guide, we will walk you through the assembly process for a Hunter ceiling fan light kit, ensuring that it’s installed correctly to maximize performance and energy efficiency. We’ll also cover troubleshooting tips, maintenance suggestions, and key considerations for a smooth installation experience.

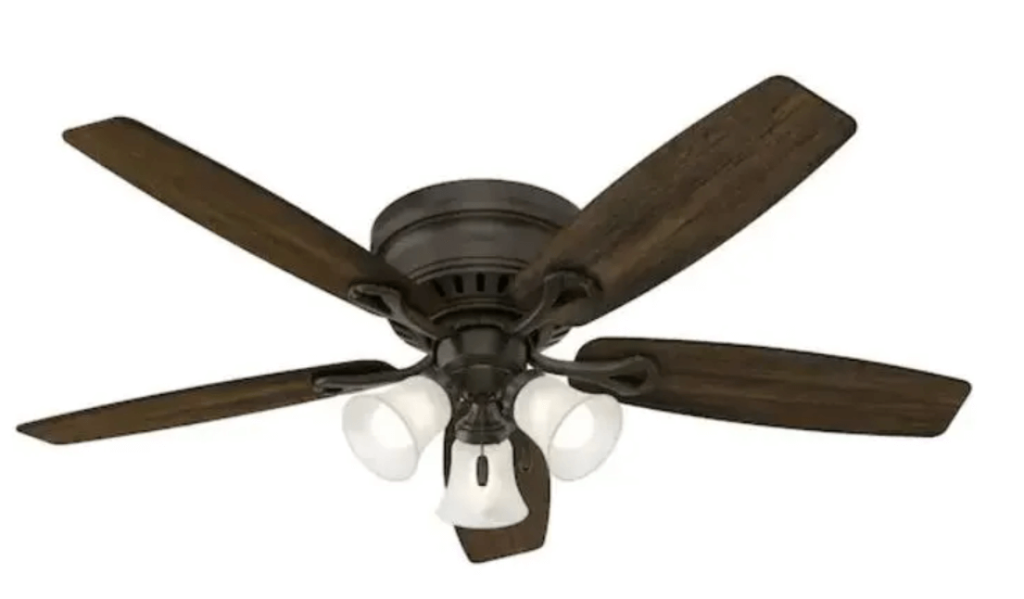
Hunter Oakhurst Ceiling Fan

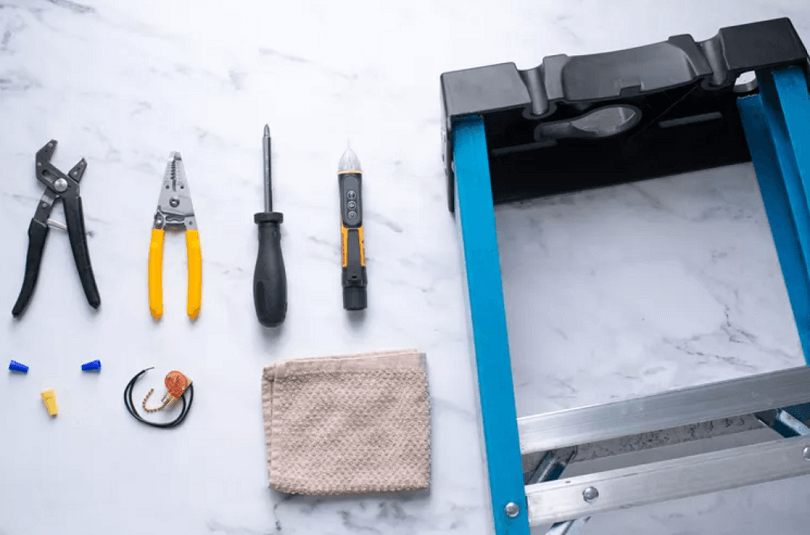
1. Tools You’ll Need for Hunter Ceiling Fan Light Kit Assembly

Before starting the assembly, make sure you have all the necessary tools and components. This will ensure the installation goes smoothly and quickly.

Required Tools:

  • Phillips screwdriver: For tightening screws.
  • Flathead screwdriver: For disconnecting electrical connections if necessary.
  • Wrench: For tightening nuts or bolts.
  • Ladder: To reach the ceiling and work comfortably.
  • Electrical tape: To ensure secure wire connections.
  • Wire nuts: To secure wiring connections.
  • Voltage tester: To check if the power is completely off.
  • Step stool or ladder: To safely reach the ceiling for installation.
ceiling fan tools

2. Preparing for Assembly

Preparation is key to ensuring a safe and effective ceiling fan light kit assembly. Follow these steps:

  • Turn off the power: Always ensure that the power is turned off at the circuit breaker before starting the installation process to avoid electrical hazards.
  • Clear the work area: Ensure that your work area is clean and free of obstacles, with enough space to move around and work comfortably.
  • Check the ceiling fan: Make sure that your Hunter ceiling fan is installed and securely mounted to the ceiling before proceeding with the light kit installation.

3. Assembly Steps for Hunter Ceiling Fan Light Kit

Step 1: Unbox and Inspect the Light Kit Components

Start by unboxing the Hunter ceiling fan light kit. Check to ensure that all components are present and undamaged. Components should include:

  • Light kit assembly (shade, light bulbs, etc.)
  • Wiring harness and connection wires
  • Mounting hardware
  • Instructions manual (which is highly recommended for specific model compatibility)

Carefully inspect the parts to ensure you have everything you need before beginning assembly.

Step 2: Attach the Light Kit to the Ceiling Fan

Hunter ceiling fans often come with a pre-attached mounting bracket, which simplifies the light kit installation. Follow these steps to attach the light kit:

  • Align the light kit mounting holes: Most Hunter ceiling fan light kits are designed to attach directly to the fan’s mounting bracket. Align the light kit’s holes with the holes on the fan.
  • Secure the light kit with screws: Use the provided screws to secure the light kit in place. Tighten the screws carefully without over-tightening to avoid damaging the fan or the kit.

Step 3: Connect the Wires

The light kit will have wiring that needs to be connected to the fan’s wiring. This is a crucial step to ensure the fan and light function correctly.

  • Identify the wires: The fan’s electrical connections should include a black (hot) wire, a white (neutral) wire, and a green or bare copper wire for grounding. The light kit will have matching wires.
  • Connect the wires using wire nuts: Securely twist the fan’s wires with the light kit’s matching wires using wire nuts. Ensure there is no exposed wire. Electrical tape can be used as an extra measure to keep the connections secure.
  • Check for proper grounding: Attach the ground wire from the fan to the ground wire in the light kit, ensuring they are securely connected.

Step 4: Install Light Bulbs or LED Kit

Depending on the light kit model, you may need to install bulbs or LEDs into the light kit.

  • Install the bulbs: If using traditional bulbs, install the recommended light bulbs according to the fan’s manual. Hunter ceiling fans typically recommend using energy-efficient LED bulbs, which will provide longer-lasting performance.
  • Attach the glass shade: If your light kit has a glass shade, carefully attach it over the bulbs according to the instructions, securing it in place with screws or clips.

Step 5: Test the Light Kit

Once everything is connected, it’s time to test your work:

  • Turn on the power: Flip the circuit breaker back on to restore power to the fan and light kit.
  • Test the fan: Pull the pull chain (if applicable) to ensure the fan is working correctly.
  • Test the light: Check the light by turning it on and off with the pull chain, wall control, or remote (depending on the fan model).

4. Troubleshooting Common Light Kit Issues

While Hunter ceiling fans and light kits are designed to be durable and easy to install, issues may arise during or after installation. Here are a few common problems and troubleshooting tips:

Problem 1: Light Not Turning On

If the light isn’t working, follow these troubleshooting steps:

  • Check the bulb: Make sure the bulb is not burned out.
  • Inspect the wiring: Double-check the wiring connections to ensure everything is securely attached and connected correctly.
  • Reset the circuit breaker: If the power was interrupted during installation, reset the circuit breaker.

Problem 2: Light Flickering

Flickering lights can be caused by loose connections or a malfunctioning light kit.

  • Check the light bulb: Sometimes, a loose bulb can cause flickering. Tighten or replace the bulb.
  • Inspect the wiring: Loose wiring connections can cause the light to flicker. Ensure all connections are secure.

Problem 3: Fan Speed Controls Not Working

If the fan is working, but the light kit’s fan speed controls aren’t, you may need to:

  • Check the wall control: If you’re using a wall-mounted control, ensure it’s properly wired and functioning.
  • Check the pull chain: Ensure the pull chain is correctly connected to the fan and switches.

5. Tips for Maintaining Your Hunter Ceiling Fan Light Kit

Proper maintenance can help keep your fan light kit functioning smoothly over the long term. Here are some key maintenance tips:

  • Clean the light kit regularly: Dust and dirt can build up on the glass shades or bulbs, reducing the light’s brightness. Use a microfiber cloth to wipe down the light kit and fan blades regularly.
  • Check the wiring: Every few months, inspect the wiring connections for signs of wear or loosening. Tighten any loose screws or connections.
  • Lubricate the fan motor: If your fan light kit is making noise, it may be an indication that the fan motor needs lubrication.

Conclusion

Installing a Hunter ceiling fan light kit can enhance the functionality and aesthetics of your room, offering both lighting and cooling in one package. By following the assembly steps carefully and maintaining your fan regularly, you can ensure that your ceiling fan continues to perform effectively for years to come.

If you encounter any issues during the assembly process, remember to consult the user manual or reach out to a professional for assistance. With the right care, your Hunter ceiling fan light kit will be a reliable and stylish addition to your home.

Filed Under: Hunter Ceiling Fans

Hunter Ceiling Fan Balancing Kit

April 8, 2025 by admin Leave a Comment

Why You Need the Hunter Ceiling Fan Balancing Kit

If you own a ceiling fan, you know how important it is for it to operate smoothly and quietly. A well-balanced fan ensures even airflow, reduces energy consumption, and operates quietly, providing comfort to your home. However, if your fan starts wobbling, making noise, or running unevenly, it can disrupt your comfort and even cause damage over time.

balance ceiling fan blades

Hunter ceiling fans, known for their durability and performance, can sometimes experience these common issues, especially as they age or accumulate dust and debris. Fortunately, there’s a simple solution: the Hunter Ceiling Fan Balancing Kit.

In this guide, we’ll walk you through what the Hunter Ceiling Fan Balancing Kit is, how it can fix common issues like wobbling, and why it’s a must-have for anyone experiencing performance problems with their fan. Plus, we’ll give you tips on how to use it effectively and prevent these issues in the future, ensuring that your Hunter fan continues to provide comfort for years to come.

Whether you’ve noticed your fan making an annoying clicking sound or vibrating during operation, this guide will help you address these problems quickly and easily. Let’s get started by exploring the basics of the Hunter Ceiling Fan Balancing Kit and how it can transform your fan’s performance.

What Is the Hunter Ceiling Fan Balancing Kit?

The Hunter Ceiling Fan Balancing Kit is a specially designed toolset created to help you achieve smooth and balanced operation of your Hunter ceiling fan. It’s an essential accessory for fixing common fan issues, particularly when the fan begins to wobble or vibrate during use. This imbalance often leads to noise, reduced airflow efficiency, and a less-than-ideal overall experience.

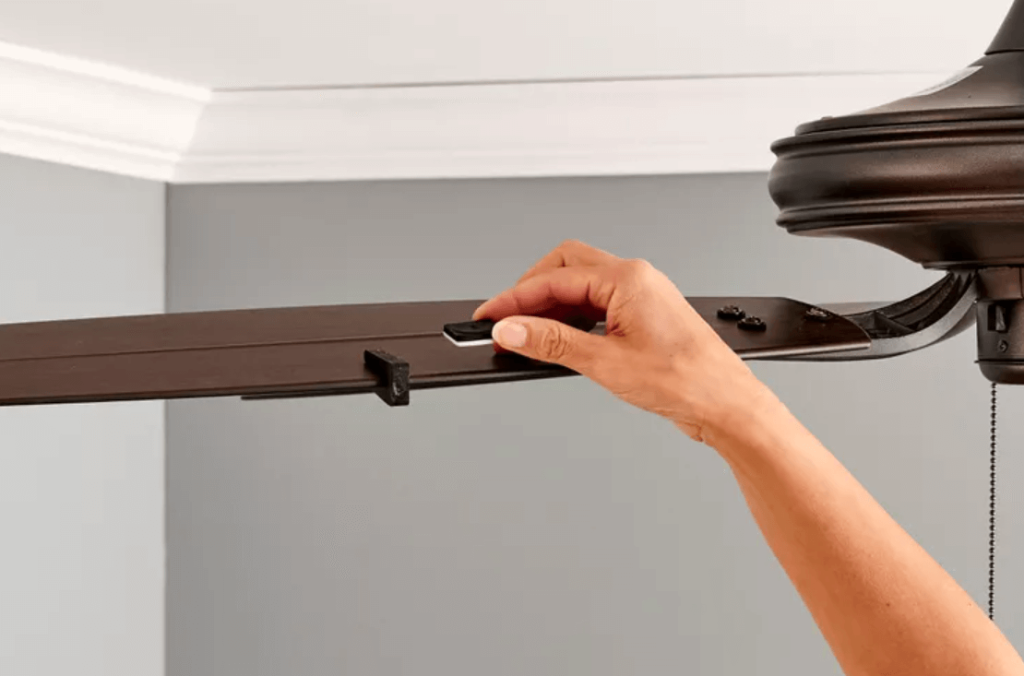
tighten the fan blades

A balanced ceiling fan operates quietly and efficiently, while an imbalanced fan can cause issues such as excessive noise, vibrations, and even damage to the fan’s motor. The Hunter Ceiling Fan Balancing Kit addresses these issues by providing the tools necessary to balance the blades and correct any wobbling or shaking.

Typically, the kit includes:

  • Balancing Clips: These clips are attached to the fan blades to test for the source of the wobble.
  • Weights: Small weights are included to attach to specific areas of the fan blades, helping to evenly distribute weight and achieve balance.
  • Instructions: Easy-to-follow guidance that walks you through the balancing process, ensuring the fan is properly adjusted.

The kit is compatible with many Hunter ceiling fan models, offering a simple and cost-effective solution to a common issue that can affect the comfort and performance of your ceiling fan.

By using the Hunter Ceiling Fan Balancing Kit, you can restore the fan’s balance, improve its performance, and extend its lifespan. Whether you’re dealing with a noisy fan or an unsteady one, this kit ensures your ceiling fan runs smoothly, without the need for a professional repair technician.

Why You Should Use the Hunter Ceiling Fan Balancing Kit

1. Eliminates Wobbling and Noise Wobbling is one of the most common issues that ceiling fan owners face. An imbalanced fan doesn’t just wobble; it also creates unwanted noise that can be irritating, especially in rooms where you need peace and quiet. Using the Hunter Ceiling Fan Balancing Kit helps you eliminate this wobbling by balancing the blades, leading to a quieter fan operation.

2. Improves Airflow Efficiency An imbalanced ceiling fan doesn’t circulate air effectively, which can result in uneven temperatures in your room. By restoring balance to your fan, you ensure even airflow, enhancing your fan’s cooling and heating capabilities. A well-balanced fan can make your home feel more comfortable, especially in the summer or winter months.

3. Prevents Wear and Tear Wobbling and vibrations put undue stress on your ceiling fan’s motor and other components. Over time, this strain can cause the motor to wear out or other parts to break down, leading to costly repairs. By balancing the fan early on, you reduce the risk of these issues, helping your fan last longer and perform at its best.

4. Easy to Use and Cost-Effective The Hunter Ceiling Fan Balancing Kit is designed to be user-friendly, so you don’t need to be an expert to use it. You can quickly address wobbling and noise issues on your own, saving you time and money that you would have spent calling in a professional.

By using this balancing kit, you ensure your ceiling fan continues to operate smoothly, and you maintain the comfort and performance you expect from your Hunter fan. It’s a simple investment that can prevent more serious (and expensive) problems down the road.

Now that you know the importance of using the Hunter Ceiling Fan Balancing Kit, let’s dive into how to use it effectively to restore balance and performance to your fan.

Benefits of Using the Hunter Ceiling Fan Balancing Kit

  1. Eliminates Wobbling and Shaking The primary benefit of using a Hunter ceiling fan balancing kit is that it eliminates the wobbling and shaking that can occur when fan blades are out of balance. A balanced fan will spin evenly, making less noise and improving airflow efficiency.
  2. Reduces Wear and Tear When your ceiling fan is unbalanced, the motor has to work harder to keep the blades spinning. This added strain can lead to premature wear and tear on the motor and other internal components. Balancing the fan reduces the strain on the motor, helping it run more efficiently and extend the fan’s lifespan.
  3. Improved Noise Reduction Unbalanced blades often result in loud rattling or humming noises. The Hunter ceiling fan balancing kit helps fix these issues by stabilizing the fan blades, making your ceiling fan operate quietly—ideal for bedrooms, living rooms, or offices.
  4. Enhanced Comfort and Efficiency When your ceiling fan is balanced, it operates more efficiently. The airflow will be more consistent, providing a comfortable environment throughout the room. Plus, your fan will use less energy since it’s not working harder to compensate for imbalance.

How to Use the Hunter Ceiling Fan Balancing Kit

Using the Hunter Ceiling Fan Balancing Kit is a simple and straightforward process that can be completed in a few easy steps. Whether you’re a seasoned DIY enthusiast or someone new to fan maintenance, you’ll find this kit easy to use. Here’s a step-by-step guide to help you achieve a perfectly balanced ceiling fan:

Step 1: Turn Off the Power to Your Ceiling Fan

Before you begin, always ensure the power to the fan is turned off. This is a crucial safety step to prevent any electrical accidents while handling the fan blades and the balancing kit components.

  • Tip: Use the wall switch or circuit breaker to turn off the fan’s power completely.

Step 2: Inspect the Fan Blades

Take a close look at the fan blades to see if they show any obvious signs of damage or wear. Sometimes, the issue could be that one or more blades are bent or cracked, which can lead to imbalances. If any blades are visibly damaged, they should be replaced before proceeding with the balancing process.

Step 3: Attach the Balancing Clip

The Hunter Ceiling Fan Balancing Kit includes balancing clips that help identify the source of the wobble. To begin, take the balancing clip and attach it to the center of one of the fan blades. The clip should be placed at the middle of the blade, where it has the most effect on testing.

  • Note: Attach the clip to the blade while the fan is stationary, and avoid spinning it while adjusting.

Step 4: Turn the Fan Back On and Test for Wobbling

Once the balancing clip is securely attached to the blade, turn the fan back on to its lowest setting. Watch closely for any wobbling or uneven movement as the fan runs. The clip will help you identify whether one specific blade is causing the wobble.

  • Tip: If the wobbling doesn’t stop, move the balancing clip to a different blade. You may need to try several blades to identify the source of the imbalance.

Step 5: Add Weights to the Fan Blades

After identifying which blade is causing the imbalance, it’s time to add the provided weights. Start by placing a small weight on the center of the problematic blade. Gradually increase the weight in small increments until you find the optimal balance that stops the wobbling.

  • Important: Always add the weights one at a time and test the fan after each adjustment to ensure you are not overcompensating with too much weight.

Step 6: Remove the Balancing Clip

Once the wobble is eliminated, remove the balancing clip and any weights from the blade. This will return the fan to its normal appearance and performance.

  • Tip: Double-check that the fan runs smoothly without any noise or wobbling before completing the process.

Step 7: Final Test

With the fan now balanced, run the fan on different speed settings to ensure it operates evenly. If the fan is running smoothly without any wobble or excessive noise, you’ve successfully balanced your Hunter ceiling fan.

  • Pro Tip: Regularly inspect your ceiling fan and perform maintenance, including cleaning the blades and motor, to keep it operating efficiently.

By following these simple steps, you can restore the smooth, quiet operation of your Hunter ceiling fan, ensuring it continues to provide optimal comfort in your home. The Hunter Ceiling Fan Balancing Kit is an easy-to-use solution that can save you time, money, and the hassle of hiring a professional technician.

When to Call a Professional

While using the Hunter Ceiling Fan Balancing Kit is usually enough to fix minor wobbling issues, there are cases where the problem might be more complex. If you’ve followed the steps and the fan continues to wobble or make noise, it might indicate other underlying issues, such as:

  • Motor malfunction: If the motor is worn or damaged, it could cause the fan to vibrate or operate inefficiently, even after balancing.
  • Improper installation: If the fan wasn’t installed properly or securely, it could lead to persistent issues, including wobbling.
  • Damaged blades: If any blades are cracked or warped, they may need to be replaced to restore proper functionality.

In these cases, it’s best to call a professional technician who specializes in ceiling fan repairs. They can diagnose the issue and ensure your fan is running at its best.

By regularly maintaining your Hunter ceiling fan and using the balancing kit as needed, you can extend the life of your fan and enjoy smoother, quieter performance for years to come.

Tips for Maintaining Your Hunter Ceiling Fan

Regular maintenance is key to keeping your Hunter ceiling fan running efficiently and smoothly. By taking the time to care for your fan, you can avoid future wobbling issues, extend the lifespan of the fan, and ensure it continues to provide optimal performance. Here are some essential tips to keep your Hunter ceiling fan in top condition:

1. Regularly Clean the Fan Blades

Dust and debris can accumulate on your ceiling fan blades, which not only affects its performance but can also contribute to wobbling if the build-up is uneven. Clean your fan blades every few months to prevent this from happening.

  • How to clean: Use a microfiber cloth or a duster with an extension handle to gently wipe the blades. For tougher dirt, dampen the cloth slightly with warm water (but avoid soaking it) and wipe down the blades to remove any build-up.
  • Tip: To prevent dust from accumulating too quickly, you can use a fan blade cleaner or dust-repellent spray.

2. Lubricate the Motor Regularly

The motor in your Hunter ceiling fan should be lubricated every 6 to 12 months. Lubrication ensures that the motor runs smoothly without strain, which can reduce the chance of performance issues, including wobbling and noisy operation.

  • How to lubricate: Refer to your fan’s manual for the type of oil recommended for lubrication. Most ceiling fans use a light motor oil. Carefully remove the fan’s canopy, locate the motor’s bearings, and apply the recommended oil to keep the motor functioning properly.
  • Pro Tip: Be cautious not to over-lubricate as excess oil can attract dust and debris.

3. Tighten All Screws and Connections

Loose screws or bolts can cause your Hunter ceiling fan to wobble or make noise. Over time, screws can become loose due to normal wear and tear. Periodically check the screws and connections to ensure everything is secure.

  • How to check: Use a screwdriver to tighten all visible screws, including those on the fan blades, motor housing, and the ceiling mount. Don’t forget to check the pull chain and wall control switch to ensure they’re tightly connected.
  • Tip: After tightening, give the fan a quick spin to see if it operates smoothly.

4. Inspect the Fan for Signs of Wear or Damage

Regularly inspect your Hunter ceiling fan for any signs of wear or damage, such as cracks in the blades, rust on the motor housing, or frayed wires. Catching these issues early can help prevent bigger problems later on.

  • How to inspect: Turn off the power and visually check the fan blades for any cracks or warping. Check the motor for any rust or wear. If the blades are damaged or warped, it may be time to replace them.
  • Tip: If your fan blades are in poor condition, replace them with the appropriate Hunter ceiling fan blades to restore balance and efficiency.

5. Check for Balanced Operation After Every Adjustment

After making any adjustments to the fan—whether it’s cleaning the blades, tightening screws, or replacing parts—always check that the fan is still balanced and operating smoothly. This will help you catch any issues right away.

  • How to check: Turn on the fan and observe its operation. Look for any wobbling or irregular noises. If you notice an imbalance, use the Hunter Ceiling Fan Balancing Kit to correct the issue.

6. Keep the Area Around the Fan Free of Obstructions

Ensure that nothing is obstructing your Hunter ceiling fan or interfering with the airflow. Objects, such as light fixtures, curtains, or decorations, can restrict airflow and cause the fan to work harder than necessary, which can affect performance.

  • Tip: Keep a safe distance of at least 3 feet around the fan to allow for proper airflow and efficient cooling.

7. Reset the Remote Control (if applicable)

If your Hunter ceiling fan has a remote control, it’s a good idea to reset it every few months to ensure proper communication between the fan and the remote. This can help resolve any remote-related issues that might be affecting the fan’s performance.

  • How to reset: Most Hunter ceiling fans with remotes have a reset button. Refer to the user manual for specific instructions on how to reset the remote.

8. Schedule Professional Maintenance

If you’re unsure about any of the maintenance steps or if your fan continues to experience issues like wobbling or strange noises, it may be time to call in a professional. A ceiling fan technician can inspect the motor, wiring, and components to ensure everything is in working order.

  • Tip: Many technicians offer regular maintenance packages that include cleaning, lubrication, and inspection of all fan components.

Where to Buy the Hunter Ceiling Fan Balancing Kit

The Hunter ceiling fan balancing kit is available for purchase on Amazon. If you’re looking for a reliable and affordable solution to fix your fan’s wobbling or uneven operation, this kit is an excellent choice. You can buy the Hunter ceiling fan balancing kit here: [Amazon link].

Conclusion: Restore Your Hunter Ceiling Fan to Its Best

A Hunter ceiling fan balancing kit is an easy and effective way to fix common ceiling fan issues like wobbling, shaking, and noise. By using the kit, you can restore your fan’s smooth operation, improve its efficiency, and reduce wear and tear on the motor.

If your Hunter ceiling fan is exhibiting speed problems or wobbling, investing in a balancing kit can help prolong its life and ensure you enjoy cool, quiet, and efficient air circulation for years to come.

Ready to fix your fan? Order your Hunter ceiling fan balancing kit today on Amazon and get back to enjoying a perfectly balanced fan in no time.

Filed Under: Hunter Ceiling Fan Parts

Hunter Ceiling Fan Humming: Causes and Solutions

April 8, 2025 by admin 2 Comments

Introduction: A humming ceiling fan is a common issue that can be both annoying and disruptive, especially when you’re trying to enjoy a quiet, comfortable space. If you’ve noticed a persistent humming sound coming from your Hunter ceiling fan, you’re not alone. Many homeowners encounter this problem, but the good news is that it’s often fixable with some basic troubleshooting.

In this guide, we’ll explore the most common causes of a Hunter ceiling fan humming and provide solutions to help you eliminate the noise. Whether it’s an issue with the fan blades, motor, or electrical components, we’ll walk you through each step to get your fan back to running smoothly and quietly.

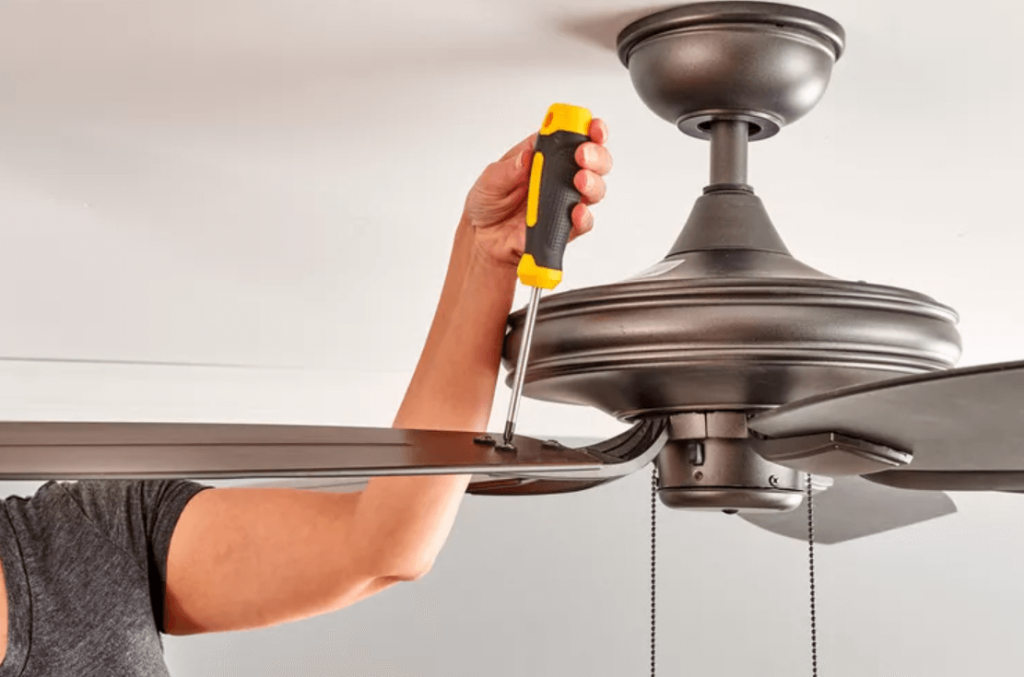
tighten the fan blades

Possible Causes of Humming in Your Hunter Ceiling Fan

1. Fan Blade Issues: One of the primary causes of a humming ceiling fan is the condition of the fan blades. Over time, blades may become warped, loose, or misaligned, resulting in unnecessary vibrations that can lead to a humming sound.

2. Motor Problems: The motor is the heart of your ceiling fan, and a humming sound may indicate that the motor is struggling or malfunctioning. This could be due to a lack of lubrication, wear and tear, or loose components inside the motor housing.

3. Electrical Issues: A humming sound can also occur if there’s a problem with the fan’s electrical wiring or if the fan is receiving inconsistent voltage. Faulty wiring or improper installation can create electrical interference that leads to humming.

4. Loose or Misaligned Components: If any part of the fan—such as the light kit, pull chain, or mounting hardware—is loose, it can cause vibrations that result in a humming noise. Even something as simple as a loose screw can contribute to the problem.

5. Speed Control Issues: Some fans have a speed control feature that can cause a humming sound if it’s malfunctioning. If your fan is connected to a dimmer or a speed control switch, this could also lead to electrical interference that causes a humming sound.

Step-by-Step Solutions for Fixing a Humming Hunter Ceiling Fan

Step 1: Turn Off the Power and Inspect the Fan Blades

Why: Safety is always the first priority when working with electrical appliances.

  1. Start by switching off the fan and turning off the power at the circuit breaker.
  2. Once the power is off, check the blades for any visible signs of damage, such as warping or bending. If the blades are warped or damaged, they may need to be replaced.
  3. Check if the blades are securely attached to the fan. Loose blades can cause vibrations that lead to humming noises. Tighten any loose screws or bolts that attach the blades to the motor.

Pro Tip: If the blades are uneven or misaligned, adjust them so that they are all properly balanced. You can use a blade balancing kit to ensure that the fan blades are properly balanced and aligned.

balance ceiling fan blades

Step 2: Inspect the Fan Motor for Issues

Why: The motor is the most critical part of the fan, and any malfunction can result in a humming sound.

  1. With the power off, remove the fan’s cover and inspect the motor for any visible signs of wear or damage. If you notice any rust, dirt, or dust buildup, it may be causing friction and leading to the humming noise.
  2. Use a can of compressed air to clean out any dust or debris from the motor housing.
  3. Check if the motor is properly lubricated. If it’s not, apply a few drops of oil to the motor shaft to reduce friction and improve performance. Make sure you use the proper lubricant recommended by Hunter for your model.

Pro Tip: Avoid over-lubricating the motor, as too much oil can cause more problems. Follow the manufacturer’s instructions for lubrication.

Step 3: Check for Electrical Issues

Why: Faulty wiring or voltage issues can cause humming sounds due to electrical interference.

  1. Check all electrical connections to make sure they are properly tightened and secure. Look for any loose or frayed wires that could cause problems.
  2. If your fan is wired to a dimmer or speed control switch, ensure that it is compatible with ceiling fans. Some dimmer switches can cause electrical interference and lead to humming.
  3. If you suspect there’s a voltage issue or improper wiring, it’s best to contact a professional electrician to inspect and correct the wiring.

Pro Tip: If your fan is connected to a dimmer switch, replace it with a standard on/off switch to see if it resolves the humming issue. Ceiling fans typically don’t work well with dimmer switches, especially when paired with energy-efficient lighting.

Step 4: Tighten Loose Components

Why: Loose components can create vibrations that result in humming.

  1. Inspect the fan for any loose screws or bolts, especially around the mounting hardware, light kit, and pull chains. Tighten any loose parts carefully.
  2. Ensure that the fan is securely mounted to the ceiling. If it’s wobbling, this could contribute to the humming sound.
  3. If the light kit is loose, it can cause vibrations that lead to noise. Tighten the screws holding the light kit in place.

Pro Tip: If you notice any worn-out or damaged parts, such as light sockets or pull chains, consider replacing them to avoid future issues.

Step 5: Adjust the Speed Control

Why: If your fan has a speed control or is connected to a dimmer switch, it may cause electrical interference and a humming sound.

  1. If your fan has a speed control switch, try adjusting the speed to see if it affects the humming noise. Some fans are sensitive to the way their speed controls function, and adjusting the setting may reduce the noise.
  2. As mentioned earlier, if you have a dimmer switch, consider replacing it with a standard switch. Dimmer switches often cause problems with ceiling fans, especially those with LED lights.

Pro Tip: If the humming only occurs at specific speeds, this could indicate an issue with the fan’s motor or capacitor. In that case, it’s best to contact Hunter support or a licensed electrician for further troubleshooting.

Additional Tips to Prevent Humming in Hunter Ceiling Fans

  • Ensure Proper Installation: Improper installation can cause the fan to vibrate and hum. Make sure the fan is installed according to the manufacturer’s instructions and is securely mounted to the ceiling.
  • Use a Fan Balancing Kit: If the fan blades are not balanced correctly, they can cause humming and wobbling. Use a balancing kit to ensure smooth operation.
  • Regular Maintenance: Keep your fan clean and well-maintained to prevent dust buildup and motor strain. Regularly inspect the blades and motor for signs of wear and tear.

Conclusion: Fixing the Humming Sound in Your Hunter Ceiling Fan

A humming Hunter ceiling fan can be frustrating, but with the right troubleshooting steps, you can often resolve the issue yourself. By checking the fan blades, motor, electrical connections, and speed control, you can eliminate the sound and enjoy your fan in peace. If the problem persists despite your efforts, don’t hesitate to contact Hunter customer service or seek help from a professional electrician. By following the steps above, you can restore the quiet operation of your Hunter ceiling fan and prevent future humming issues. A well-maintained ceiling fan will provide years of reliable performance and comfort without the distracting noise.

Filed Under: Hunter Ceiling Fan Troubleshooting

  • « Previous Page
  • 1
  • …
  • 9
  • 10
  • 11
  • 12
  • 13
  • …
  • 27
  • Next Page »


Best Hunter Ceiling Fans

Bestseller No. 1 Hunter 59244 Dempsey Ceiling Fan 44 inches Fresh White
Hunter 59244 Dempsey Ceiling Fan 44 inches Fresh White
Check Price
Bestseller No. 2 Hunter 53090 Builder Deluxe Ceiling Fan 52 inches Brushed Nickel
Hunter 53090 Builder Deluxe Ceiling Fan 52 inches Brushed Nickel
Check Price
Bestseller No. 3 Hunter Fan Company Fan Builder Elite Indoor Ceiling Fan with Pull Chain Control, Metal, New...
Hunter Fan Company Fan Builder Elite Indoor Ceiling Fan with Pull Chain Control, Metal, New...
Check Price

Recent Posts

  • Hunter Ceiling Fan Remote Control Manual
  • Hunter Ceiling Fan Flickering Lights: Causes and Fixes
  • Hunter vs Kichler Ceiling Fans — The Ultimate Battle for Your Ceiling
  • Hunter Fan Company Phone Number & Contact Information (Official Guide)
  • Hunter HVLS Fans: The Definitive Guide to High-Volume, Low-Speed Airflow
  • Hunter 99373 vs 99375: What’s the Difference Between These Remotes?
  • Hunter Fan Remote Battery Replacement
  • Hunter 99123 Fan Remote Troubleshooting & Manual
  • How to Unpair Your Hunter Fan Remote
  • How to Install Hunter Low Profile Ceiling Fan

Legal Information

This site is owned and operated by HunterCeilingfans. Hunter ceiling fans is a participant in the Google Adsense Program, an advertising program designed to provide a means for sites to earn advertising fees by displaying related advertisements.

Hunter ceiling fans also is a participant in Amazon Associates Program. “As an Amazon Associate, I earn from qualifying purchases.”

Hunter ceiling fan is compensated for referring traffic to these companies. Hunter ceiling fans is an independent site with no connections to Hunter and is operated entirely by independent volunteers and writers to provide information.

We are not the manufacturer of Hunter Ceiling Fans, nor are we associated with Hunter in any way. We are a third-party resource website that tries to help site visitors to find valuable information.

Categories

  • Discontinued Hunter Ceiling Fans
  • Hunter Ceiling Fan Parts
  • Hunter Ceiling Fan Reviews
  • Hunter Ceiling Fan Support
  • Hunter Ceiling Fan Troubleshooting
  • Hunter Ceiling Fans
  • Hunter Fan Manuals

Partners

Harbor Breeze