Understanding Hunter Ceiling Fan Light Kit Assembly
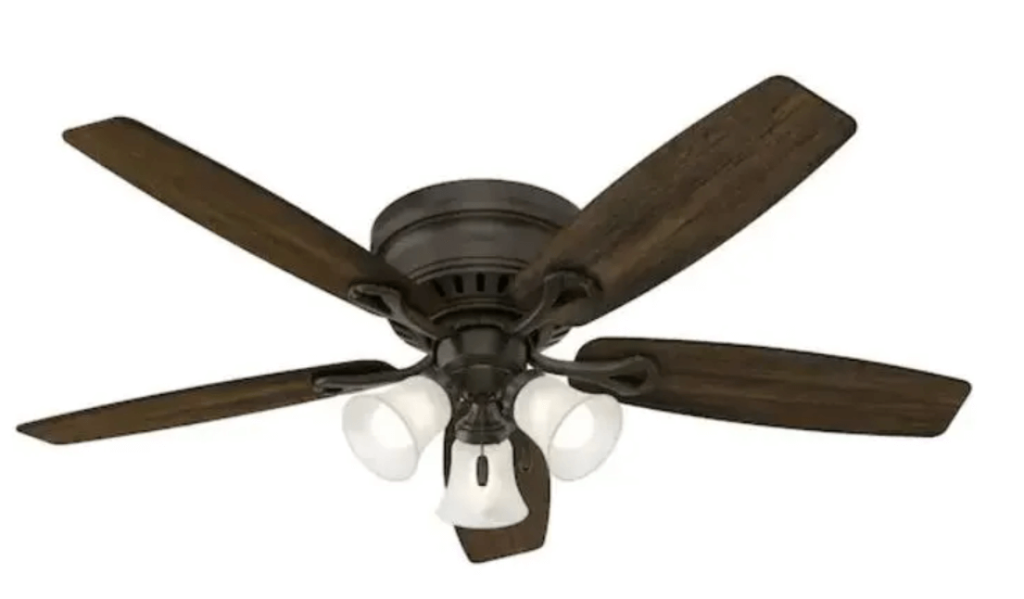
Hunter ceiling fans are designed to provide efficient air circulation while complementing your home’s decor with their sleek, stylish designs. Many of these fans come with the option to add a light kit, which not only enhances the aesthetic appeal of the fan but also adds much-needed illumination to your space. If you’re installing a new Hunter fan or upgrading an existing one with a light kit, proper assembly is crucial for both functionality and safety.
In this guide, we will walk you through the assembly process for a Hunter ceiling fan light kit, ensuring that it’s installed correctly to maximize performance and energy efficiency. We’ll also cover troubleshooting tips, maintenance suggestions, and key considerations for a smooth installation experience.
1. Tools You’ll Need for Hunter Ceiling Fan Light Kit Assembly
Before starting the assembly, make sure you have all the necessary tools and components. This will ensure the installation goes smoothly and quickly.
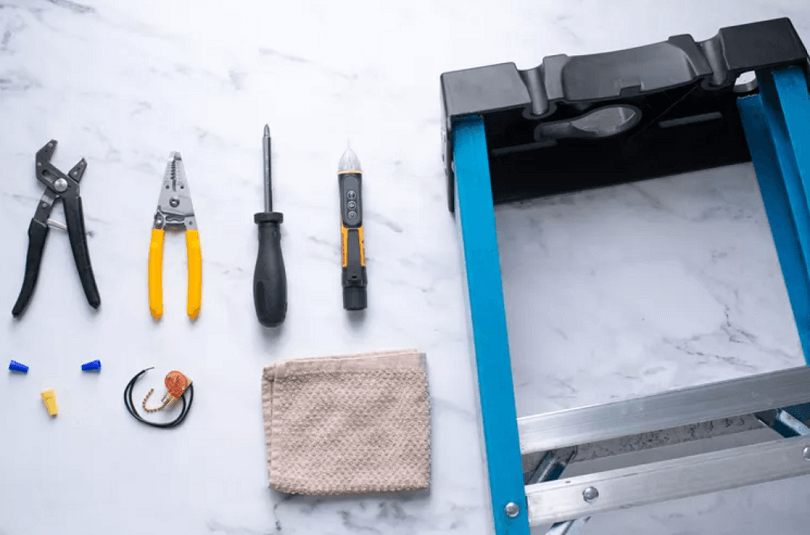
Required Tools:
- Phillips screwdriver: For tightening screws.
- Flathead screwdriver: For disconnecting electrical connections if necessary.
- Wrench: For tightening nuts or bolts.
- Ladder: To reach the ceiling and work comfortably.
- Electrical tape: To ensure secure wire connections.
- Wire nuts: To secure wiring connections.
- Voltage tester: To check if the power is completely off.
- Step stool or ladder: To safely reach the ceiling for installation.
2. Preparing for Assembly
Preparation is key to ensuring a safe and effective ceiling fan light kit assembly. Follow these steps:
- Turn off the power: Always ensure that the power is turned off at the circuit breaker before starting the installation process to avoid electrical hazards.
- Clear the work area: Ensure that your work area is clean and free of obstacles, with enough space to move around and work comfortably.
- Check the ceiling fan: Make sure that your Hunter ceiling fan is installed and securely mounted to the ceiling before proceeding with the light kit installation.
3. Assembly Steps for Hunter Ceiling Fan Light Kit
Step 1: Unbox and Inspect the Light Kit Components
Start by unboxing the Hunter ceiling fan light kit. Check to ensure that all components are present and undamaged. Components should include:
- Light kit assembly (shade, light bulbs, etc.)
- Wiring harness and connection wires
- Mounting hardware
- Instructions manual (which is highly recommended for specific model compatibility)
Carefully inspect the parts to ensure you have everything you need before beginning assembly.
Step 2: Attach the Light Kit to the Ceiling Fan
Hunter ceiling fans often come with a pre-attached mounting bracket, which simplifies the light kit installation. Follow these steps to attach the light kit:
- Align the light kit mounting holes: Most Hunter ceiling fan light kits are designed to attach directly to the fan’s mounting bracket. Align the light kit’s holes with the holes on the fan.
- Secure the light kit with screws: Use the provided screws to secure the light kit in place. Tighten the screws carefully without over-tightening to avoid damaging the fan or the kit.
Step 3: Connect the Wires
The light kit will have wiring that needs to be connected to the fan’s wiring. This is a crucial step to ensure the fan and light function correctly.
- Identify the wires: The fan’s electrical connections should include a black (hot) wire, a white (neutral) wire, and a green or bare copper wire for grounding. The light kit will have matching wires.
- Connect the wires using wire nuts: Securely twist the fan’s wires with the light kit’s matching wires using wire nuts. Ensure there is no exposed wire. Electrical tape can be used as an extra measure to keep the connections secure.
- Check for proper grounding: Attach the ground wire from the fan to the ground wire in the light kit, ensuring they are securely connected.
Step 4: Install Light Bulbs or LED Kit
Depending on the light kit model, you may need to install bulbs or LEDs into the light kit.
- Install the bulbs: If using traditional bulbs, install the recommended light bulbs according to the fan’s manual. Hunter ceiling fans typically recommend using energy-efficient LED bulbs, which will provide longer-lasting performance.
- Attach the glass shade: If your light kit has a glass shade, carefully attach it over the bulbs according to the instructions, securing it in place with screws or clips.
Step 5: Test the Light Kit
Once everything is connected, it’s time to test your work:
- Turn on the power: Flip the circuit breaker back on to restore power to the fan and light kit.
- Test the fan: Pull the pull chain (if applicable) to ensure the fan is working correctly.
- Test the light: Check the light by turning it on and off with the pull chain, wall control, or remote (depending on the fan model).
4. Troubleshooting Common Light Kit Issues
While Hunter ceiling fans and light kits are designed to be durable and easy to install, issues may arise during or after installation. Here are a few common problems and troubleshooting tips:
Problem 1: Light Not Turning On
If the light isn’t working, follow these troubleshooting steps:
- Check the bulb: Make sure the bulb is not burned out.
- Inspect the wiring: Double-check the wiring connections to ensure everything is securely attached and connected correctly.
- Reset the circuit breaker: If the power was interrupted during installation, reset the circuit breaker.
Problem 2: Light Flickering
Flickering lights can be caused by loose connections or a malfunctioning light kit.
- Check the light bulb: Sometimes, a loose bulb can cause flickering. Tighten or replace the bulb.
- Inspect the wiring: Loose wiring connections can cause the light to flicker. Ensure all connections are secure.
Problem 3: Fan Speed Controls Not Working
If the fan is working, but the light kit’s fan speed controls aren’t, you may need to:
- Check the wall control: If you’re using a wall-mounted control, ensure it’s properly wired and functioning.
- Check the pull chain: Ensure the pull chain is correctly connected to the fan and switches.
5. Tips for Maintaining Your Hunter Ceiling Fan Light Kit
Proper maintenance can help keep your fan light kit functioning smoothly over the long term. Here are some key maintenance tips:
- Clean the light kit regularly: Dust and dirt can build up on the glass shades or bulbs, reducing the light’s brightness. Use a microfiber cloth to wipe down the light kit and fan blades regularly.
- Check the wiring: Every few months, inspect the wiring connections for signs of wear or loosening. Tighten any loose screws or connections.
- Lubricate the fan motor: If your fan light kit is making noise, it may be an indication that the fan motor needs lubrication.
Conclusion
Installing a Hunter ceiling fan light kit can enhance the functionality and aesthetics of your room, offering both lighting and cooling in one package. By following the assembly steps carefully and maintaining your fan regularly, you can ensure that your ceiling fan continues to perform effectively for years to come.
If you encounter any issues during the assembly process, remember to consult the user manual or reach out to a professional for assistance. With the right care, your Hunter ceiling fan light kit will be a reliable and stylish addition to your home.
Leave a Reply