Hunter Ceiling Fans

  • Home
  • Hunter Manuals
  • Hunter Fan Parts
    • Hunter Ceiling Fan Remotes
    • Hunter Ceiling Fan Light Kits
    • Hunter Ceiling Fan Blade Arms
    • Hunter Ceiling Fan Blades
    • Hunter Ceiling Fan Downrods
    • Hunter Ceiling Fan Pull Chains
    • Hunter Ceiling Fan Wall Controls
    • Hunter Ceiling Fans Replacement Globes
  • Hunter Support
  • Hunter Commercial Ceiling Fans

Hunter Ceiling Fan Chain Broke – Causes and Solutions

April 6, 2025 by admin Leave a Comment

If you’re a proud owner of a Hunter ceiling fan, you likely know how valuable it is in keeping your home comfortable. With the gentle hum of the blades circulating air during hot summer months or helping to distribute warmth during winter, your ceiling fan is an essential part of your home’s comfort. However, like any appliance, things don’t always go as planned.

pull chain not working

One common issue you may face is a broken pull chain. Whether it’s a fan speed control chain or a light pull chain, a broken chain can cause a frustrating disruption to your comfort. If your fan isn’t responding as expected or if the lights won’t turn on or off, it might be time to assess the condition of your pull chain. Unfortunately, wear and tear, misuse, or age can cause the chain to snap, leaving your fan stuck on one speed or preventing you from controlling the light settings.

This guide will walk you through everything you need to know about dealing with a broken Hunter ceiling fan chain. We’ll explore the common causes, give you clear instructions on how to fix or replace the chain, and offer tips for preventing future issues. By the end of this article, you’ll be empowered to troubleshoot and restore your Hunter fan’s functionality, keeping your home comfortable and stylish once again.

Let’s dive into understanding why your pull chain may have broken and how to fix it, so your fan can work seamlessly once again.

Common Causes of a Broken Hunter Ceiling Fan Chain

Understanding the root cause of your Hunter ceiling fan chain breaking is key to fixing it efficiently and preventing it from happening again. Here are some of the most common reasons a pull chain may break:

1. Wear and Tear Over Time

Just like any other mechanical component in your home, the pull chain is subject to wear and tear. With frequent use, the chain can become loose, stretched, or even weakened to the point of snapping. Over time, the internal mechanism that controls the fan’s speed or light might also degrade, making it more susceptible to failure.

2. Excessive Force or Pulling

Using excessive force when adjusting the fan or light settings can strain the pull chain. Pulling the chain too hard or yanking it abruptly can cause the internal components to become misaligned, break, or snap. This is especially true if the chain is already a bit old or if it’s been subjected to consistent force.

3. Improper Installation

In some cases, the pull chain can break due to improper installation. If the fan’s pull chain switch was installed incorrectly or if the fan was improperly wired, this could lead to increased strain on the pull chain mechanism. Incorrect installation might also lead to the fan chain not being aligned properly, making it more prone to breakage.

4. Cheap or Low-Quality Parts

If your Hunter ceiling fan is an older model or if the pull chain mechanism wasn’t of high quality to begin with, this can increase the likelihood of a break. Sometimes, lower-grade parts don’t hold up as well as premium-quality components, which can contribute to the pull chain’s breakdown.

5. Age of the Ceiling Fan

Ceiling fans, like any appliance, can age over time. If your Hunter ceiling fan has been in use for many years, the pull chain switch might naturally wear out. The internal components of the switch, such as the small gears that control the fan speed or light, might become worn down after extensive use.

6. Accumulation of Dust or Debris

Over time, dust and dirt can accumulate inside the pull chain switch mechanism. If dust or grime gets into the internal workings, it can cause friction, making it harder to pull and possibly leading to the chain breaking. Regular cleaning can help prevent this issue, ensuring that your ceiling fan operates smoothly.

Understanding the reason for the breakage will help you determine whether a quick fix or a more involved repair is necessary. Now that you know what might have caused your Hunter ceiling fan pull chain to break, let’s move on to how you can fix it.

How to Fix a Broken Hunter Ceiling Fan Pull Chain

Now that we’ve identified some common causes of a broken pull chain, let’s walk through the steps to fix it. Whether you’re an experienced DIYer or this is your first time dealing with a broken ceiling fan pull chain, we’ll make sure the process is as simple and clear as possible. Follow these steps to restore your Hunter ceiling fan to full functionality.

1. Turn Off the Power

Before doing anything, always ensure your safety first. Turn off the power to the ceiling fan at the circuit breaker. This will prevent any accidental electric shocks while you’re working on the fan.

2. Remove the Fan Canopy

In most cases, the pull chain mechanism is housed inside the fan’s canopy. You’ll need to carefully remove the canopy to access the switch.

  • Use a ladder to reach the ceiling fan safely.
  • Unscrew the canopy using a screwdriver and gently pull it down.
  • Be careful not to damage any electrical wires. If the wiring seems complicated, take a picture or note of the wiring connections before disconnecting anything.

3. Inspect the Pull Chain Mechanism

Once the canopy is removed, look inside the fan’s switch housing. The pull chain should be attached to a switch that controls the fan’s operation. You’ll need to inspect the switch to figure out what part is broken.

  • Look for the broken chain: Check if the chain is snapped or detached. If so, you may need a replacement chain.
  • Examine the switch mechanism: If the switch mechanism is the problem (e.g., it’s worn out, corroded, or damaged), it will likely need to be replaced as well.

4. Replace the Pull Chain

If the chain itself is broken, you can replace it by purchasing a new pull chain replacement kit that matches your Hunter ceiling fan model.

  • Simply detach the old chain and install the new one by threading it through the switch mechanism.
  • Make sure the chain is securely attached to avoid it coming loose in the future.

5. Replace the Switch Mechanism (If Necessary)

If the switch mechanism is the issue, you’ll need to replace it entirely. Here’s how to do that:

  • Disconnect the wires from the old switch. Take note of how they are connected (you may want to take a picture for reference).
  • Remove the old switch and replace it with the new one. Ensure the new switch matches the old one in terms of functionality (e.g., fan speed control or light control).
  • Reconnect the wires to the new switch, ensuring they are securely attached.

6. Reassemble the Fan

Once the pull chain and/or switch mechanism are replaced, reassemble the fan by reversing the steps you followed to remove the canopy.

  • Carefully screw the canopy back into place.
  • Make sure the wiring is properly tucked away and nothing is exposed.

7. Test the Fan

Turn the power back on at the circuit breaker and test the fan to ensure everything works correctly.

  • Pull the new chain to check if the fan speeds and light settings are adjusting properly.
  • Make sure the new chain doesn’t feel loose or get stuck when pulled.

When to Call a Professional

If after attempting these steps you find that your Hunter ceiling fan still isn’t working properly, or if you are uncomfortable doing the repairs yourself, it’s a good idea to call a professional. Ceiling fans can be tricky to work with, and improper repairs could lead to more serious damage or even safety hazards.

A licensed technician can help with more complex repairs, such as electrical issues or replacing the motor, ensuring your fan is fixed safely and correctly.

Preventing Future Pull Chain Problems

Once your fan is up and running again, it’s important to take steps to avoid future issues with the pull chain. Here are some tips:

  1. Avoid Excessive Force: Always pull the chain gently, avoiding yanking it or putting unnecessary strain on it.
  2. Regular Maintenance: Periodically check the pull chain for any signs of wear and clean the fan’s components to prevent dust and dirt buildup.
  3. Check for Worn Parts: If the fan starts to show signs of malfunction, consider replacing the pull chain or switch before it breaks completely.

Conclusion

Fixing a broken Hunter ceiling fan chain is manageable if you follow the right steps. Whether you’re replacing a broken pull chain or a malfunctioning switch mechanism, you can restore your fan to full functionality with a little DIY effort. However, if you run into issues that seem more complex, don’t hesitate to consult a professional.

With the above steps, you should be able to fix your Hunter ceiling fan pull chain and keep your fan operating smoothly for years to come. If you need parts, consider checking our ceiling fan parts section.

Filed Under: Hunter Ceiling Fan Troubleshooting

Hunter Ceiling Fan Assembly: A Step-by-Step Guide

April 6, 2025 by admin Leave a Comment

Introduction: Understanding Hunter Ceiling Fan Assembly

Hunter ceiling fans are a top choice for homeowners due to their quiet operation, energy efficiency, and stylish designs. However, to enjoy the full benefits of your Hunter ceiling fan, proper assembly is essential. Incorrect installation can result in poor performance, increased noise, or even potential damage to the fan over time. Whether you’re a first-time DIYer or experienced with home projects, understanding the assembly process will ensure your fan operates at its peak efficiency and adds a touch of elegance to your space.

how to remove hunter ceiling fan light cover

This guide walks you through the entire Hunter ceiling fan assembly process, covering everything from unboxing the fan to troubleshooting common issues after installation. You’ll also find tips on how to keep your fan working smoothly for years to come.

1. Tools You’ll Need for Assembly

Before diving into the assembly process, ensure you have all the necessary tools to complete the job. Having the right tools on hand will help you save time and ensure a safe and successful installation. Here’s a list of tools you’ll need:

  • Screwdriver: A Phillips screwdriver and flathead screwdriver will be required for securing screws throughout the assembly.
  • Wrench: For tightening bolts or securing the fan in place.
  • Ladder: To safely reach the ceiling and work comfortably.
  • Electrical Tape: For ensuring that exposed wires are secure.
  • Power Drill (optional): If you prefer to use a power drill to speed up the installation process.
  • Wire Stripper (optional): To strip wires when necessary if you’re doing more in-depth electrical work.

Having these tools ready will ensure your assembly goes smoothly and safely.

2. Preparing the Space for Assembly

Before starting the installation, it’s important to prepare your space:

  • Turn Off the Power: Always ensure the power is turned off at the circuit breaker to prevent any electrical shocks. This is essential for safety.
  • Clear Your Workspace: Make sure there’s enough room to work, and you have clear access to the ceiling where the fan will be installed.
  • Safety Measures: Wear safety gear such as goggles and gloves for protection while working with electrical components.

Having a clean, organized workspace ensures that you’ll be able to focus on the assembly without distractions or obstacles.

3. Step-by-Step Guide to Assembling Your Hunter Ceiling Fan

Now, let’s dive into the step-by-step assembly process for your Hunter ceiling fan.

Step 1: Unboxing and Inspection

Start by carefully unboxing the fan and inspecting all the components. Ensure that all parts are present and undamaged. Check for the following:

  • Fan blades (and the necessary screws for attachment)
  • Motor housing
  • Mounting bracket
  • Downrod (if applicable)
  • Light kit (if included)
  • Pull chain or remote control
  • Manual and installation instructions

By checking everything beforehand, you’ll save time during the assembly process and ensure you’re not missing any essential parts.

Step 2: Attaching the Fan Blades

Once you’ve ensured all the components are intact, proceed to attach the fan blades to the motor housing. Follow these guidelines:

  • Attach the blades using the provided screws: Secure each blade to the motor. Ensure each screw is tight, but do not over-tighten to avoid damaging the blades.
  • Balance the blades: Make sure all blades are attached evenly. This step is crucial for preventing wobbling once the fan is in motion.

Step 3: Mounting the Ceiling Fan

Now it’s time to mount the fan to the ceiling. This step involves securing the fan’s motor housing to the ceiling’s electrical box.

  • Attach the mounting bracket: Install the bracket provided in the kit, ensuring it’s securely fixed to the ceiling. If you’re working with a ceiling that’s high, use a sturdy ladder and take your time.
  • Hang the motor housing: Hang the motor housing from the bracket. This should be a simple procedure, but ensure it’s securely in place before continuing.

Step 4: Wiring the Ceiling Fan

After the fan is mounted securely, the next step is wiring it to the electrical box in the ceiling. This step can be tricky, so if you’re unfamiliar with electrical work, you may want to consult a professional.

  • Connect the wires: Each wire has a matching color, so ensure the black wire (hot) connects to the black wire of the ceiling, the white wire (neutral) connects to the white wire in the ceiling, and the green or copper wire (ground) connects to the ceiling’s grounding system.
  • Secure the wires: Use wire nuts to secure the connections, and ensure there’s no exposed wire. Use electrical tape to cover any exposed ends.

Step 5: Installing the Light Kit (If Applicable)

If your Hunter ceiling fan comes with a light kit, install it as follows:

  • Mount the light kit: Typically, the light kit attaches directly to the fan’s motor. Align the kit’s mounting holes with the motor housing and secure it in place.
  • Wiring the light kit: If your fan has a light kit, it will have its own wires that need to be connected to the main fan wiring.
  • Attach the light bulbs: Install energy-efficient LED bulbs into the light kit for optimal brightness and energy savings.

Step 6: Installing the Pull Chain or Remote Control

Most Hunter ceiling fans come with a pull chain for speed and light control. If your model uses a remote, follow the instructions provided to install it.

  • Attach the pull chain: If you are installing a pull chain, it should be connected to the fan’s speed control mechanism.
  • Sync the remote: For fans with a remote control, make sure to sync the remote with the fan, following the specific instructions provided in the manual.

Step 7: Testing the Fan

Once the installation is complete, turn the power back on at the breaker and test the fan. Check the fan speed settings, ensure the light kit works, and verify that the pull chain or remote control adjusts the settings correctly.

4. Common Mistakes to Avoid During Assembly

  • Not securing fan blades properly: Loose blades can cause wobbling and noise. Ensure they are all securely attached.
  • Improper wiring: Always double-check the wiring connections to ensure they’re correct. Incorrect wiring can lead to malfunction or even be dangerous.
  • Forgetting to balance the fan: An unbalanced fan will wobble and cause noise. Check the fan blades and make sure they’re aligned correctly.

5. Troubleshooting Common Assembly Issues

If your fan is wobbling, not turning on, or making unusual noises after assembly, here are some possible fixes:

  • Wobbling: Ensure the fan blades are properly balanced and tightened.
  • Not turning on: Double-check your wiring connections and ensure the power is on.
  • Unusual noises: Tighten any loose components, especially the fan blades and motor housing.

6. Maintenance Tips for Keeping Your Hunter Ceiling Fan Running Smoothly

  • Clean the fan regularly: Dust can accumulate on the blades, affecting performance. Use a microfiber cloth to clean the blades and motor.
  • Check for loose components: Periodically check the fan for any loose screws or parts and tighten them as necessary.
  • Lubricate the motor: Consult the manual for guidance on how to lubricate the fan motor to keep it running smoothly.

Conclusion: Enjoy Your Hunter Ceiling Fan

Once your fan is assembled and running smoothly, you can sit back and enjoy the cool air it provides. Regular maintenance will ensure your Hunter ceiling fan continues to perform at its best for years to come. If you encounter any issues, refer back to this guide or contact a professional technician to help with more complex repairs.

By following the right assembly steps, troubleshooting issues, and performing routine maintenance, your Hunter ceiling fan will provide you with optimal comfort and performance for a long time.

Filed Under: Hunter Ceiling Fans

Coupons for Hunter Ceiling Fans: How to Save Big on Your Purchase

April 5, 2025 by admin Leave a Comment

If you’re looking for a high-quality ceiling fan for your home or office, Hunter ceiling fans are often a top choice due to their durability, energy efficiency, and sleek designs. While Hunter fans are already a fantastic value, you can make your purchase even better by using coupons, promo codes, and special discounts. In this article, we’ll guide you through how to find the best Hunter ceiling fan coupons and take advantage of discounts that can save you money. Let’s explore some of the most popular deals, where to find them, and how to apply them to your next Hunter fan purchase.

Exclusive 15% Discount for Military, Healthcare Workers, and Educators!

At Hunter, we value the dedication of our heroes, healthcare workers, and educators. To show our appreciation, we offer 15% off on your next purchase of Hunter ceiling fans and accessories when you verify your ID. Simply use the code “FOOLS15” during checkout on orders over $249 to receive this exclusive offer.

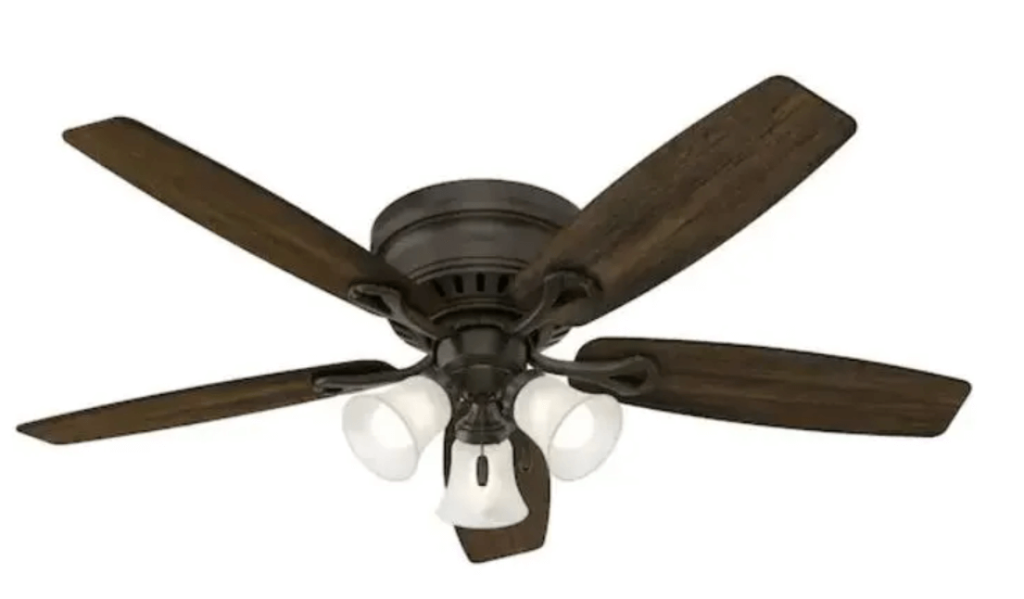
Hunter Oakhurst Ceiling Fan

Exclusive Coupons for Hunter Ceiling Fans

One of the easiest ways to save on your Hunter ceiling fan purchase is by using exclusive coupon codes that are released periodically. These coupon codes can offer significant savings, sometimes as much as 20% off your total order. Whether you’re upgrading your home’s existing ceiling fan or installing a new one, coupon codes can make a huge difference in the final cost.

Hunter ceiling fan coupon codes are typically available during special events such as Black Friday, Cyber Monday, Spring Sales, or seasonal promotions. Keep an eye out for these offers, as they can help you save on everything from classic ceiling fans to modern, smart ceiling fan models.

How to Use Hunter Ceiling Fan Coupons

Using Hunter fan coupons is straightforward. All you need to do is:

  1. Browse the Hunter Fan Selection: Whether you’re on Hunter’s official website or a major retailer like Amazon, Home Depot, or Walmart, start by adding your chosen items to your cart.
  2. Find the Coupon Code: Search online for valid coupon codes for Hunter ceiling fans. You can find these on the Hunter website, retailer-specific promotions, or websites that specialize in discount codes.
  3. Enter the Coupon at Checkout: Once you have the coupon code, head to the checkout page, and there will be an option to enter the promo code. After entering the code, you’ll see the discount applied to your order.

Featured Ceiling Fan Promotions

To maximize your savings, check out the featured promotions on Hunter ceiling fans. Retailers often run time-limited deals on specific fan models or fan styles. These promotions can offer discounted prices or bundled offers that make upgrading your home even more affordable.

Some of the most popular categories of ceiling fan promotions include:

  • Modern, Classic, and Industrial Styles: Whether you prefer contemporary designs or rustic farmhouse looks, you can find a Hunter ceiling fan to suit your style, often at discounted prices.
  • Fans for Specific Rooms: Ceiling fans for the living room, bedroom, kitchen, or even outdoor spaces like patios and garages can often be found in special promotions. These fans are often built to handle specific conditions, such as humid environments or low ceilings.
  • Ceiling Fans with Lights: Combine lighting and air circulation with ceiling fans that feature integrated light kits. These fans not only keep your room cool but also provide the necessary illumination, and promotions on these models can save you even more.

Coupon Codes for Hunter Ceiling Fan Accessories

Hunter ceiling fans are known for their high quality and reliable performance, but their range of accessories is equally impressive. If you’re looking to upgrade your fan with additional features like remote controls, light kits, or fan blades, you can find discounts on accessories as well.

Here’s where to look for discounts on Hunter fan accessories:

  • Remote Control Offers: Hunter ceiling fans that come with remote controls often have bundles or deals where you can get extra remotes or smart home compatibility accessories at a reduced price.
  • Light Kit Discounts: If you’re purchasing a Hunter fan with a light kit, look out for coupons that provide discounts on LED light kits or dimmable lights to enhance your fan’s functionality and aesthetics.
  • Blades and Other Spare Parts: Occasionally, Hunter will offer discounts on replacement fan blades or other spare parts to ensure your fan stays in top shape.

Where to Find Hunter Ceiling Fan Promo Codes

While you can find Hunter ceiling fan coupons directly from Hunter’s official website, there are other places where these deals and promo codes are regularly updated:

  1. Official Hunter Fan Website: The best place to start is often the official Hunter website, where they may have seasonal sales or exclusive promo codes available for use at checkout.
  2. Retailers: Large retailers such as Home Depot, Amazon, and Walmart regularly offer coupon codes or discounts for Hunter products, often tied to flash sales, clearance events, or new product releases.
  3. Coupon Websites: Websites like RetailMeNot, Coupons.com, or Honey offer a wide selection of valid promo codes that you can apply when shopping for Hunter ceiling fans. Simply search for “Hunter ceiling fan promo code” or similar keywords on these platforms to find the latest deals.

How to Save More: Take Advantage of Limited-Time Offers

Hunter frequently updates their promotional calendar with limited-time offers such as military discounts, teacher appreciation sales, or special holiday sales. By staying proactive and checking for new deals, you can save even more on your purchase.

For example, some Hunter fan promotions may offer:

  • 10% – 15% off for military members, healthcare workers, or educators.
  • Free shipping during special promotions or on select products.
  • Bundle deals that allow you to purchase multiple fans or accessories at a discounted rate.

Final Thoughts: Maximize Your Savings on Hunter Ceiling Fans

Hunter ceiling fans offer fantastic performance, but by using the right coupons and promo codes, you can make them even more affordable. Whether you’re shopping for a stylish modern fan, an outdoor ceiling fan, or a smart Hunter fan, there are plenty of ways to save big without compromising on quality. Be sure to regularly check Hunter’s official website, retail partner sites, and deal websites to take advantage of the best discounts available.

Shop Now for Hunter Ceiling Fans and Accessories and enjoy your home’s new cooling system for less!

Filed Under: Hunter Ceiling Fans

How Long Do Hunter Ceiling Fans Last?

April 4, 2025 by admin Leave a Comment

The Longevity of Your Hunter Ceiling Fan

Hunter ceiling fans are known for their durability, reliability, and stylish designs, making them a popular choice for homeowners. But like any home appliance, you may wonder, how long do Hunter ceiling fans last?

Hunter Indoor Low Profile IV Ceiling Fan

Whether you’ve just installed one or have had your fan for years, understanding its expected lifespan and the factors that can affect it is crucial for ensuring optimal performance and longevity. A well-maintained Hunter ceiling fan can serve your home for many years, but like any mechanical device, it may eventually show signs of wear and tear. In this article, we’ll explore how long Hunter ceiling fans typically last, the factors that influence their longevity, and tips for maximizing their lifespan to keep your home cool and comfortable for years to come.

1. Average Lifespan of a Hunter Ceiling Fan

Hunter ceiling fans are built to last, with most models having a lifespan of 10 to 15 years or even longer with proper care and maintenance. The lifespan can vary depending on the model, usage, and care you give your fan. Regular maintenance can help extend the fan’s life, ensuring it continues to provide efficient cooling and lighting for as long as possible.

Hunter’s reputation for producing high-quality fans backed by advanced technology, like the WhisperWind® motor, contributes to the longevity of their ceiling fans. These motors are designed for long-lasting performance and efficiency, making them an excellent investment in terms of durability.

2. Factors That Affect the Lifespan of a Hunter Ceiling Fan

Several factors influence how long your Hunter ceiling fan will last. Here are the most important ones:

A. Frequency of Use

The more often you use your ceiling fan, the more wear it will experience. While Hunter fans are built to withstand daily use, heavy usage over time can cause parts to wear out faster. Fans that are used year-round, especially in climates with extreme temperatures, may require more maintenance and replacements than those used seasonally.

B. Maintenance and Care

Proper care and maintenance are essential for maximizing the lifespan of your ceiling fan. Neglecting regular cleaning, lubrication, and inspections can shorten the fan’s life. Dust and debris buildup on the blades and motor can cause friction and strain, leading to reduced efficiency or even motor failure over time. A well-maintained fan will run smoothly and last longer.

C. Quality of Installation

Proper installation is crucial for the long-term performance of your fan. If a Hunter ceiling fan is installed incorrectly or not balanced properly, it may experience excessive strain that can shorten its lifespan. For instance, a fan that is not installed securely may wobble, causing damage to the motor and other components.

D. Environmental Conditions

The environment in which your Hunter ceiling fan is installed can also affect its lifespan. Humid or salty environments (such as coastal areas) can cause rust and corrosion on metal components, which may reduce the fan’s lifespan. If you live in such an area, you may want to consider models designed for outdoor use or use fans in areas with minimal exposure to moisture.

E. Quality of Parts and Model Type

The materials used in manufacturing and the specific model of your Hunter ceiling fan can also impact its durability. Higher-end models often come with premium components and advanced technology, such as energy-efficient motors and durable finishes, which can help the fan last longer. In contrast, budget models may not have the same lifespan due to cheaper components.

3. Signs Your Hunter Ceiling Fan May Need Repairs or Replacement

While Hunter ceiling fans are durable, certain signs may indicate that your fan is nearing the end of its lifespan or that specific parts need attention. Here are some common signs that your fan may require repairs or replacement:

A. Unusual Noises

If your ceiling fan starts making loud or strange noises, such as grinding, clicking, or buzzing, it could indicate an issue with the motor, blades, or other internal components. These noises often mean that the fan is experiencing mechanical issues that need to be addressed.

B. Inconsistent Speed or Wobbling

If your fan is not working at the correct speed or is wobbling while operating, this could be a sign that the blades are unbalanced, or there may be issues with the motor. Wobbling can cause further damage to the fan if not addressed, so it’s important to balance the fan blades and ensure the motor is functioning properly.

C. Light or Fan Not Turning On

If your Hunter ceiling fan has a light kit and it stops working or if the fan itself refuses to turn on, it could indicate electrical issues or a malfunction in the wiring or control system. If these issues persist after checking the power supply, it’s a good idea to have a professional inspect the fan.

D. Excessive Heat

If the motor of your ceiling fan starts overheating, it’s an indication that the fan may be malfunctioning. Overheating could be due to a lack of lubrication, dust buildup, or a damaged motor. Overheating should be addressed immediately to avoid further damage.

4. How to Extend the Lifespan of Your Hunter Ceiling Fan

To maximize the lifespan of your Hunter ceiling fan, here are some maintenance tips you can follow:

A. Regular Cleaning

Regularly cleaning your fan is essential to keep it running smoothly. Dust and dirt can accumulate on the blades and motor, which can cause friction and reduce the fan’s efficiency. Use a soft cloth or microfiber duster to clean the blades, and use a can of compressed air to clean the motor and other hard-to-reach areas.

B. Lubricate the Motor

Hunter ceiling fans with motors that require lubrication should be serviced annually. Consult the fan’s manual to determine if the motor requires lubrication, and use the appropriate type of oil recommended for your fan model. Lubrication helps prevent the motor from overheating and reduces wear on internal components.

C. Check for Balance

Ensure your fan blades are properly balanced to prevent wobbling, which can strain the motor and other components. If the fan is wobbling, use a blade balancing kit to correct the issue. Also, check that the fan is securely mounted to the ceiling.

D. Annual Inspections

Inspect your fan once a year to check for any signs of wear, loose parts, or electrical issues. Tighten any loose screws, replace worn-out pull chains or switches, and ensure the fan is functioning correctly.

E. Hire a Professional for Repairs

If you notice any significant issues with your fan or if it’s nearing the end of its lifespan, consider calling a professional technician. They can help with more complex repairs, such as motor replacements or wiring issues, ensuring the fan runs efficiently for years to come.

5. Conclusion

In conclusion, Hunter ceiling fans can last anywhere from 10 to 15 years or more, depending on factors like usage, maintenance, and environmental conditions. By performing regular care, cleaning, and inspections, you can extend the lifespan of your fan and ensure it continues to operate smoothly. If you’re experiencing issues like noise, inconsistent speeds, or a non-working fan, it might be time for a repair or replacement of certain components.

Hunter ceiling fans are a long-term investment in comfort, and with proper care, they’ll provide efficient cooling and lighting for many years. Keep your fan maintained and address any issues promptly, and you’ll be able to enjoy reliable performance from your Hunter ceiling fan for the foreseeable future.

Filed Under: Hunter Ceiling Fans

Hunter Ceiling Fan Fuse Location: A Comprehensive Guide

April 4, 2025 by admin Leave a Comment

Understanding the Role of a Fuse in Your Hunter Ceiling Fan

Hunter ceiling fans are known for their durability, efficient performance, and stylish designs. Like any electrical appliance, however, there may be occasions when your ceiling fan malfunctions. One common issue that homeowners encounter is a blown fuse. Understanding where the fuse is located in your Hunter ceiling fan and how to replace it can save you both time and money.

In this guide, we will explore the importance of the fuse in your Hunter ceiling fan, how to locate it, and how to replace it if necessary. Whether your ceiling fan isn’t working properly, or you suspect a blown fuse, we’ll walk you through everything you need to know to troubleshoot the issue efficiently.

1. What Is a Fuse in a Hunter Ceiling Fan?

Before diving into the fuse location and replacement process, let’s first understand the role of the fuse in your Hunter ceiling fan.

A fuse is an essential component of your ceiling fan’s electrical system. It serves as a safety device designed to protect the fan’s motor and other internal components from power surges or electrical overloads. If the fan experiences a sudden surge of electricity, the fuse will “blow,” interrupting the power flow and preventing further damage to the fan. Essentially, the fuse is a fail-safe mechanism that helps to prevent costly repairs or permanent damage to your fan’s motor.

2. How to Identify a Blown Fuse in Your Hunter Ceiling Fan

When a fuse blows, the fan will stop working. However, it’s not always obvious that the problem is related to the fuse. Here are some common signs that your Hunter ceiling fan may have a blown fuse:

  • No Power: The most obvious sign is that the fan won’t turn on, even if it’s connected to power.
  • Lights Not Working: If your Hunter ceiling fan is equipped with a light kit, and the lights aren’t turning on but the fan is still running, it could indicate a blown fuse in the light circuit.
  • Intermittent Power: If the fan is running intermittently or cutting off unexpectedly, a fuse might have blown due to an electrical surge.
  • Unusual Sounds: In some cases, a blown fuse may cause the fan to make odd sounds, indicating a malfunction in the power supply.

If you experience any of these symptoms, a blown fuse could be the culprit. Let’s move on to how you can find and replace it.

3. Locating the Fuse in Your Hunter Ceiling Fan

Hunter ceiling fans are designed with safety and ease of repair in mind. The fuse is typically located within the fan’s motor housing or control board. The exact location can vary depending on the model of the fan. Here’s how to find it:

A. Turn Off the Power

Before working on any electrical appliance, safety should be your priority. Always turn off the power to the ceiling fan at the circuit breaker. This will ensure that there is no power running to the fan while you are working on it.

B. Remove the Fan’s Canopy

Most Hunter ceiling fans have a canopy that covers the fan’s motor and wiring. To access the fuse, you’ll need to remove this canopy. Follow these steps:

  • Use a ladder to reach the ceiling fan safely.
  • Remove the screws holding the canopy in place using a screwdriver.
  • Gently pull the canopy down to expose the motor and wiring.

C. Locate the Fuse

Once you have removed the canopy, you should be able to see the fan’s motor and wiring. The fuse is usually located near the fan’s motor or control circuit. Depending on the model, it might be part of the fan’s control board or a small component on the wiring.

Look for a small, cylindrical piece, often marked with a voltage rating. In some cases, the fuse may be attached to the fan’s motor, while in others, it may be near the switch housing.

4. How to Replace a Blown Fuse in Your Hunter Ceiling Fan

Replacing a blown fuse in your Hunter ceiling fan is a relatively simple process, provided you have the correct tools and a replacement fuse. Follow these steps:

A. Disconnect the Fuse

  • Once you’ve located the blown fuse, use a pair of needle-nose pliers or your fingers to gently remove the fuse from its holder.
  • If the fuse is attached to the motor or wiring, gently disconnect any connectors or clips holding it in place.

B. Replace with a New Fuse

  • Take a new fuse that matches the specifications of the old one. Check the voltage rating to ensure it’s the correct replacement for your Hunter ceiling fan model.
  • Insert the new fuse into the fuse holder, ensuring that it is properly secured. If the fuse was connected to the wiring, make sure the connections are tight and secure.

C. Reassemble the Fan

  • After replacing the fuse, carefully reassemble the fan by reversing the steps you took to remove the canopy.
  • Ensure all the wires and components are properly secured and that no parts are loose.

D. Test the Fan

  • Turn the power back on at the circuit breaker and test the fan. The fan should now be functioning properly, with both the fan and light settings working as expected.

5. When to Call a Professional

While replacing a fuse is a relatively simple task, there are situations when it’s best to consult a professional:

  • Persistent Issues: If you replace the fuse and the fan still doesn’t work, or if it blows again soon after replacing it, there could be a more significant electrical issue at play. It may be a sign that there is a wiring problem, or the motor could be faulty.
  • Complex Electrical Problems: If you’re uncomfortable working with electrical components or if you’re unsure about the repair process, it’s always a good idea to call a licensed electrician. Electrical work can be dangerous if not done properly, and it’s better to leave it to the experts.

6. How to Prevent Future Fuse Issues

Preventing future fuse problems is essential to ensure the longevity of your Hunter ceiling fan. Here are some tips:

A. Install a Surge Protector

Power surges are one of the most common causes of blown fuses. Installing a surge protector for your ceiling fan can help prevent electrical spikes that may damage the fan’s fuse or other components.

B. Regular Maintenance

Regularly cleaning and inspecting your ceiling fan can help prevent issues that could lead to a blown fuse. Ensure the motor and wiring are free of dust and debris, as these can cause the fan to overheat or malfunction.

C. Avoid Overloading the Fan Circuit

Ensure that your ceiling fan is on its own dedicated circuit and not overloaded with other electrical devices. Overloading can cause the fan to experience power surges, potentially leading to blown fuses.

7. Conclusion

A blown fuse in your Hunter ceiling fan is a common issue, but it’s one that’s easy to fix with the right tools and knowledge. By understanding how to locate and replace the fuse, you can quickly restore your fan’s functionality and avoid the frustration of a malfunctioning ceiling fan.

Remember, if you’re uncomfortable performing the repair or if the problem persists, it’s always a good idea to call in a professional. With proper care and maintenance, your Hunter ceiling fan will continue to provide reliable cooling and lighting for years to come. If you’re looking for parts, be sure to check out our ceiling fan parts section for the correct replacement fuses for your Hunter ceiling fan.

Filed Under: Hunter Ceiling Fan Troubleshooting

  • « Previous Page
  • 1
  • …
  • 11
  • 12
  • 13
  • 14
  • 15
  • …
  • 27
  • Next Page »


Best Hunter Ceiling Fans

Bestseller No. 1 Hunter 59244 Dempsey Ceiling Fan 44 inches Fresh White
Hunter 59244 Dempsey Ceiling Fan 44 inches Fresh White
Check Price
Bestseller No. 2 Hunter 53090 Builder Deluxe Ceiling Fan 52 inches Brushed Nickel
Hunter 53090 Builder Deluxe Ceiling Fan 52 inches Brushed Nickel
Check Price
Bestseller No. 3 Hunter Fan Company Fan Builder Elite Indoor Ceiling Fan with Pull Chain Control, Metal, New...
Hunter Fan Company Fan Builder Elite Indoor Ceiling Fan with Pull Chain Control, Metal, New...
Check Price

Recent Posts

  • Hunter Ceiling Fan Remote Control Manual
  • Hunter Ceiling Fan Flickering Lights: Causes and Fixes
  • Hunter vs Kichler Ceiling Fans — The Ultimate Battle for Your Ceiling
  • Hunter Fan Company Phone Number & Contact Information (Official Guide)
  • Hunter HVLS Fans: The Definitive Guide to High-Volume, Low-Speed Airflow
  • Hunter 99373 vs 99375: What’s the Difference Between These Remotes?
  • Hunter Fan Remote Battery Replacement
  • Hunter 99123 Fan Remote Troubleshooting & Manual
  • How to Unpair Your Hunter Fan Remote
  • How to Install Hunter Low Profile Ceiling Fan

Legal Information

This site is owned and operated by HunterCeilingfans. Hunter ceiling fans is a participant in the Google Adsense Program, an advertising program designed to provide a means for sites to earn advertising fees by displaying related advertisements.

Hunter ceiling fans also is a participant in Amazon Associates Program. “As an Amazon Associate, I earn from qualifying purchases.”

Hunter ceiling fan is compensated for referring traffic to these companies. Hunter ceiling fans is an independent site with no connections to Hunter and is operated entirely by independent volunteers and writers to provide information.

We are not the manufacturer of Hunter Ceiling Fans, nor are we associated with Hunter in any way. We are a third-party resource website that tries to help site visitors to find valuable information.

Categories

  • Discontinued Hunter Ceiling Fans
  • Hunter Ceiling Fan Parts
  • Hunter Ceiling Fan Reviews
  • Hunter Ceiling Fan Support
  • Hunter Ceiling Fan Troubleshooting
  • Hunter Ceiling Fans
  • Hunter Fan Manuals

Partners

Harbor Breeze