Hunter Ceiling Fans

  • Home
  • Hunter Manuals
  • Hunter Fan Parts
    • Hunter Ceiling Fan Remotes
    • Hunter Ceiling Fan Light Kits
    • Hunter Ceiling Fan Blade Arms
    • Hunter Ceiling Fan Blades
    • Hunter Ceiling Fan Downrods
    • Hunter Ceiling Fan Pull Chains
    • Hunter Ceiling Fan Wall Controls
    • Hunter Ceiling Fans Replacement Globes
  • Hunter Support
  • Hunter Commercial Ceiling Fans

Hunter Ceiling Fan Fuse Location: A Comprehensive Guide

April 4, 2025 by admin Leave a Comment

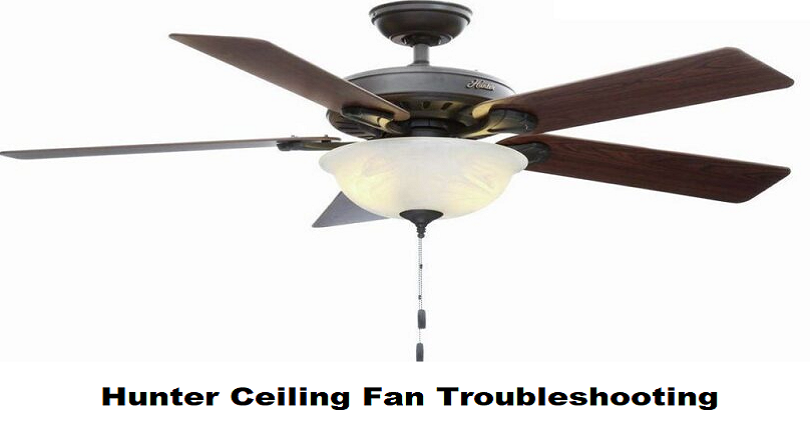
Understanding the Role of a Fuse in Your Hunter Ceiling Fan

Hunter ceiling fans are known for their durability, efficient performance, and stylish designs. Like any electrical appliance, however, there may be occasions when your ceiling fan malfunctions. One common issue that homeowners encounter is a blown fuse. Understanding where the fuse is located in your Hunter ceiling fan and how to replace it can save you both time and money.

In this guide, we will explore the importance of the fuse in your Hunter ceiling fan, how to locate it, and how to replace it if necessary. Whether your ceiling fan isn’t working properly, or you suspect a blown fuse, we’ll walk you through everything you need to know to troubleshoot the issue efficiently.

1. What Is a Fuse in a Hunter Ceiling Fan?

Before diving into the fuse location and replacement process, let’s first understand the role of the fuse in your Hunter ceiling fan.

A fuse is an essential component of your ceiling fan’s electrical system. It serves as a safety device designed to protect the fan’s motor and other internal components from power surges or electrical overloads. If the fan experiences a sudden surge of electricity, the fuse will “blow,” interrupting the power flow and preventing further damage to the fan. Essentially, the fuse is a fail-safe mechanism that helps to prevent costly repairs or permanent damage to your fan’s motor.

2. How to Identify a Blown Fuse in Your Hunter Ceiling Fan

When a fuse blows, the fan will stop working. However, it’s not always obvious that the problem is related to the fuse. Here are some common signs that your Hunter ceiling fan may have a blown fuse:

  • No Power: The most obvious sign is that the fan won’t turn on, even if it’s connected to power.
  • Lights Not Working: If your Hunter ceiling fan is equipped with a light kit, and the lights aren’t turning on but the fan is still running, it could indicate a blown fuse in the light circuit.
  • Intermittent Power: If the fan is running intermittently or cutting off unexpectedly, a fuse might have blown due to an electrical surge.
  • Unusual Sounds: In some cases, a blown fuse may cause the fan to make odd sounds, indicating a malfunction in the power supply.

If you experience any of these symptoms, a blown fuse could be the culprit. Let’s move on to how you can find and replace it.

3. Locating the Fuse in Your Hunter Ceiling Fan

Hunter ceiling fans are designed with safety and ease of repair in mind. The fuse is typically located within the fan’s motor housing or control board. The exact location can vary depending on the model of the fan. Here’s how to find it:

A. Turn Off the Power

Before working on any electrical appliance, safety should be your priority. Always turn off the power to the ceiling fan at the circuit breaker. This will ensure that there is no power running to the fan while you are working on it.

B. Remove the Fan’s Canopy

Most Hunter ceiling fans have a canopy that covers the fan’s motor and wiring. To access the fuse, you’ll need to remove this canopy. Follow these steps:

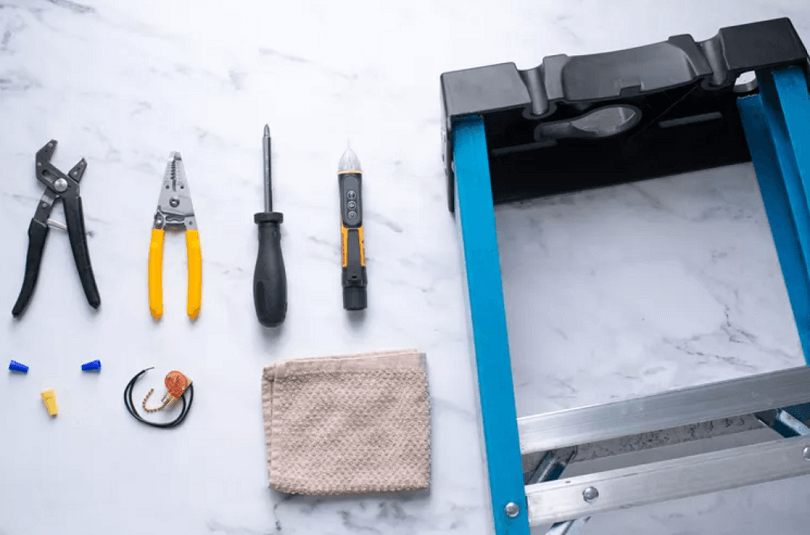
  • Use a ladder to reach the ceiling fan safely.
  • Remove the screws holding the canopy in place using a screwdriver.
  • Gently pull the canopy down to expose the motor and wiring.

C. Locate the Fuse

Once you have removed the canopy, you should be able to see the fan’s motor and wiring. The fuse is usually located near the fan’s motor or control circuit. Depending on the model, it might be part of the fan’s control board or a small component on the wiring.

Look for a small, cylindrical piece, often marked with a voltage rating. In some cases, the fuse may be attached to the fan’s motor, while in others, it may be near the switch housing.

4. How to Replace a Blown Fuse in Your Hunter Ceiling Fan

Replacing a blown fuse in your Hunter ceiling fan is a relatively simple process, provided you have the correct tools and a replacement fuse. Follow these steps:

A. Disconnect the Fuse

  • Once you’ve located the blown fuse, use a pair of needle-nose pliers or your fingers to gently remove the fuse from its holder.
  • If the fuse is attached to the motor or wiring, gently disconnect any connectors or clips holding it in place.

B. Replace with a New Fuse

  • Take a new fuse that matches the specifications of the old one. Check the voltage rating to ensure it’s the correct replacement for your Hunter ceiling fan model.
  • Insert the new fuse into the fuse holder, ensuring that it is properly secured. If the fuse was connected to the wiring, make sure the connections are tight and secure.

C. Reassemble the Fan

  • After replacing the fuse, carefully reassemble the fan by reversing the steps you took to remove the canopy.
  • Ensure all the wires and components are properly secured and that no parts are loose.

D. Test the Fan

  • Turn the power back on at the circuit breaker and test the fan. The fan should now be functioning properly, with both the fan and light settings working as expected.

5. When to Call a Professional

While replacing a fuse is a relatively simple task, there are situations when it’s best to consult a professional:

  • Persistent Issues: If you replace the fuse and the fan still doesn’t work, or if it blows again soon after replacing it, there could be a more significant electrical issue at play. It may be a sign that there is a wiring problem, or the motor could be faulty.
  • Complex Electrical Problems: If you’re uncomfortable working with electrical components or if you’re unsure about the repair process, it’s always a good idea to call a licensed electrician. Electrical work can be dangerous if not done properly, and it’s better to leave it to the experts.

6. How to Prevent Future Fuse Issues

Preventing future fuse problems is essential to ensure the longevity of your Hunter ceiling fan. Here are some tips:

A. Install a Surge Protector

Power surges are one of the most common causes of blown fuses. Installing a surge protector for your ceiling fan can help prevent electrical spikes that may damage the fan’s fuse or other components.

B. Regular Maintenance

Regularly cleaning and inspecting your ceiling fan can help prevent issues that could lead to a blown fuse. Ensure the motor and wiring are free of dust and debris, as these can cause the fan to overheat or malfunction.

C. Avoid Overloading the Fan Circuit

Ensure that your ceiling fan is on its own dedicated circuit and not overloaded with other electrical devices. Overloading can cause the fan to experience power surges, potentially leading to blown fuses.

7. Conclusion

A blown fuse in your Hunter ceiling fan is a common issue, but it’s one that’s easy to fix with the right tools and knowledge. By understanding how to locate and replace the fuse, you can quickly restore your fan’s functionality and avoid the frustration of a malfunctioning ceiling fan.

Remember, if you’re uncomfortable performing the repair or if the problem persists, it’s always a good idea to call in a professional. With proper care and maintenance, your Hunter ceiling fan will continue to provide reliable cooling and lighting for years to come. If you’re looking for parts, be sure to check out our ceiling fan parts section for the correct replacement fuses for your Hunter ceiling fan.

Filed Under: Hunter Ceiling Fan Troubleshooting

Hunter Ceiling Fan Pull Chain not Working – How to Fix

April 4, 2025 by admin Leave a Comment

Troubleshooting Your Hunter Ceiling Fan Pull Chain

Having a Hunter ceiling fan is a great way to maintain comfort in your home, but like all mechanical systems, they can run into issues from time to time. One common problem many homeowners face is when the pull chain stops working. If you find that your fan’s pull chain isn’t responding as it should — whether it’s stuck, not switching speeds, or not turning the fan on or off — it can be frustrating.

But don’t worry! A malfunctioning pull chain is a common issue and is usually simple to fix with a bit of troubleshooting. Whether the problem lies in the chain itself, the switch, or something deeper within the fan’s electrical system, we’ll walk you through the steps to get your fan back in working order.

In this guide, we’ll dive into the possible causes of the problem, offer you a clear, step-by-step troubleshooting guide, and give you tips on how to fix it yourself. If you’re ready to tackle this issue and restore full control to your Hunter ceiling fan, keep reading. We’re here to help you resolve this problem safely and efficiently!

With the right approach, you’ll not only fix the pull chain, but you’ll also be able to take better care of your fan to prevent similar issues from occurring in the future. Let’s get started!

Understanding the Common Causes of a Non-Working Pull Chain

Before diving into the steps to fix your Hunter ceiling fan pull chain, it’s important to understand the potential causes behind the issue. This will help you accurately pinpoint the problem and decide the best course of action. The pull chain on your fan typically operates the fan’s motor speed or turns the light on and off. When it’s not working, one of the following causes may be responsible:

  1. Worn or Damaged Pull Chain: Over time, the pull chain can become worn out from repeated use. If the chain is physically broken or the mechanism inside the switch is damaged, it may fail to function properly.
  2. Faulty Pull Chain Switch: The pull chain switch inside the fan can wear out, especially if it’s been used frequently or exposed to dust and grime. A faulty switch may not send the correct signal to the fan’s motor, which results in malfunctioning behavior.
  3. Internal Wiring Issues: Occasionally, wiring problems within the fan can prevent the pull chain from properly connecting to the fan’s motor or light switch. If the wires are loose, corroded, or broken, it may interrupt the pull chain’s functionality.
  4. Debris or Obstructions: Dirt, dust, or other debris can build up around the pull chain switch over time, causing it to get stuck or unable to move properly. Cleaning the fan and switch can sometimes solve the problem.
  5. Electrical Malfunctions: In some cases, the pull chain issue may be related to an electrical malfunction or power surge, affecting the fan’s performance. If the fan is not receiving proper power, the pull chain won’t function as expected.

By understanding the potential causes of a malfunctioning pull chain, you can more effectively troubleshoot and apply the appropriate fixes. Next, let’s walk through the steps to fix a Hunter ceiling fan pull chain that isn’t working.

ceiling fan tools

Step-by-Step Guide to Fix a Hunter Ceiling Fan Pull Chain

Now that we’ve covered the potential causes, let’s get into the steps to fix your Hunter ceiling fan pull chain. Whether it’s a simple cleaning, a mechanical repair, or replacing a faulty part, these instructions will guide you through the process to get your pull chain working again.

pull chain not working

Step 1: Turn Off the Power

The most important step before beginning any ceiling fan repair is to turn off the power. This ensures your safety while you work on the fan.

  1. Switch Off the Power: Go to your electrical panel and turn off the circuit breaker that powers your ceiling fan.
  2. Test the Power: To be extra cautious, use a voltage tester to confirm that there is no electrical current running to the fan.

Step 2: Remove the Fan’s Light and Housing (If Applicable)

If your Hunter ceiling fan has a light fixture attached, it’s essential to remove it to access the pull chain mechanism.

  1. Unscrew the Light Fixture: Use a screwdriver to carefully remove the light bulbs and any covers or glass light shades. Set them aside for safe keeping.
  2. Remove the Housing: You may also need to remove the housing surrounding the fan’s pull chain switch. Typically, this involves loosening screws and gently lifting off the outer casing.

Step 3: Inspect the Pull Chain Mechanism

Once you’ve removed the necessary parts, inspect the pull chain and the switch to see what might be wrong.

  1. Check for Physical Damage: Examine the pull chain for any visible signs of damage. If the chain itself is broken or too short, this will need to be replaced.
  2. Look at the Switch: If the chain appears intact, the issue may be with the switch mechanism inside. Ensure that the internal switch isn’t worn out or jammed. If the switch is not functioning properly, it may need to be replaced.
  3. Clean the Pull Chain Area: If you see dust or debris buildup, clean around the switch using a soft cloth or compressed air. Sometimes, simply cleaning the area can restore the functionality of the pull chain.

Step 4: Replace the Pull Chain Switch (If Necessary)

If the pull chain switch is broken or faulty, you will need to replace it. Here’s how you can do that:

  1. Disconnect the Switch Wires: Before replacing the switch, carefully disconnect the wires that connect the pull chain switch to the fan’s motor. Take note of where each wire connects, as you will need to replicate this setup with the new switch.
  2. Remove the Old Switch: Unscrew or unclip the broken pull chain switch. Keep the screws for installation of the new switch.
  3. Install the New Switch: Install the new pull chain switch in the same location as the old one. Reconnect the wires to the new switch, ensuring that each wire is securely attached.
  4. Reassemble the Fan: Once the new switch is installed, reattach the light fixture, housing, and any other parts that were removed earlier.

Step 5: Test the Pull Chain

With everything back in place, it’s time to test the fan.

  1. Turn the Power Back On: Flip the circuit breaker back on and ensure that the fan receives power.
  2. Test the Pull Chain: Gently pull the chain to test whether the fan is responding as expected. Check if the fan speed settings and light (if applicable) are functioning correctly.

If the pull chain operates smoothly, congratulations—you’ve successfully fixed your Hunter ceiling fan pull chain! If the issue persists, it might be a more complex internal wiring issue, and you may need to consult a professional for further assistance.

Step 6: Final Check and Clean Up

After testing the fan, be sure to clean up any leftover tools, parts, and debris from the repair process. Tighten any screws that might have been loosened and ensure that everything is properly secured.

When to Seek Professional Help

While many ceiling fan repairs can be done at home, there are certain situations where it’s best to consult a professional. If you’ve followed the above steps and your Hunter ceiling fan pull chain is still malfunctioning, there may be an underlying electrical issue that requires expert attention. Here are some signs that it’s time to call in a professional:

1. Persistent Electrical Issues

If your ceiling fan is still not working properly after repairing or replacing the pull chain switch, it could be an electrical issue beyond just the switch. Problems like faulty wiring, an overheated motor, or damaged electrical components can affect the performance of your fan and potentially pose a safety risk.

2. Complicated Wiring Problems

If you are unfamiliar with electrical systems, it’s best not to risk attempting complex rewiring. An incorrect installation could cause the fan to malfunction, or worse, lead to a fire hazard. In such cases, a licensed electrician or ceiling fan specialist can help identify and fix the problem safely.

3. Warranty Concerns

If your fan is still under warranty and you’re experiencing issues with the pull chain mechanism, it might be worth having a professional repair service conduct the work. Attempting repairs yourself could void the warranty, so it’s better to contact Hunter or an authorized repair service to ensure that your warranty remains intact.

4. Out of Your Comfort Zone

If you’re uncomfortable working with electrical components or handling repairs, it’s always safest to call a professional. A skilled technician can diagnose the issue, perform the repair correctly, and ensure that your fan operates at its best.

Where to Find Professional Repair Services

If you need professional help, there are a few places you can turn to:

  • Hunter Fan Support: Hunter’s official website provides contact details for repair services and authorized service centers. You can also find troubleshooting guides and FAQs to help you resolve common issues.
  • Local Electricians: If you’re unable to find a nearby Hunter-authorized technician, many local electricians are trained to work with ceiling fans and can perform repairs or installations.
  • Retailers: Some major retailers like Home Depot, Lowe’s, and Amazon offer installation and repair services for ceiling fans. If you purchased your fan from one of these stores, it might be worth checking if they offer repair services as well.

Final Thoughts

Fixing a malfunctioning pull chain on your Hunter ceiling fan is a straightforward process for most homeowners, and it’s often something you can handle yourself with a bit of patience. By following the steps outlined in this guide, you can restore your ceiling fan to its original functionality, saving both time and money.

However, always keep safety in mind, and don’t hesitate to call in a professional if the issue is beyond your comfort level or requires more advanced knowledge. With the right care and attention, your Hunter ceiling fan will continue to provide optimal airflow and comfort for years to come.

If you ever encounter difficulties or feel unsure about handling the repair, remember that help is just a phone call or click away—ensuring that your home remains comfortable and your ceiling fan operates efficiently!

Filed Under: Hunter Ceiling Fan Troubleshooting

Hunter Ceiling Fan Making Noise – Causes, Fixes, and Solutions

April 3, 2025 by admin Leave a Comment

Introduction: Why Is Your Hunter Ceiling Fan Making Noise?

Hunter ceiling fans are known for their quiet and efficient performance, making them a popular choice for homes. However, even the best ceiling fans can occasionally experience noise issues that can be frustrating, especially when you’re trying to enjoy a peaceful and quiet space. If your Hunter ceiling fan is making a noise that wasn’t there before, don’t worry—you’re not alone, and there are simple solutions to fix it.

Whether it’s a clicking sound, humming, or a loud buzzing noise, a noisy Hunter ceiling fan can often be fixed with some basic troubleshooting and maintenance. But before diving into the fixes, it’s essential to understand why the noise is happening in the first place. There are several common reasons behind ceiling fan noise, ranging from loose parts to motor issues, but the good news is that most of them are easy to resolve.

In this guide, we’ll walk you through the possible causes of the noise, provide step-by-step solutions to resolve the issue, and offer tips on how to prevent it from happening in the future. By the end of this article, you’ll have all the knowledge you need to restore the quiet operation of your Hunter ceiling fan, making it as comfortable and efficient as it was when it was first installed.

Ready to fix your noisy fan? Let’s dive in and discover what could be causing the sound, how to resolve it, and how to maintain your fan for long-term, quiet operation.

Common Causes of Noise in Hunter Ceiling Fans

Before you can effectively fix the noise coming from your Hunter ceiling fan, it’s crucial to understand what might be causing it. There are several potential culprits, and identifying the source of the noise will make it easier to resolve the issue. Here are some of the most common reasons for noise in Hunter ceiling fans:

1. Loose or Worn-Out Parts

One of the most common causes of noise in ceiling fans is loose or worn-out parts. This includes the fan blades, screws, mounting hardware, and even the motor. When these parts become loose, they can vibrate or rub against other components, creating unwanted noise. Over time, parts can also wear out, leading to friction and noise.

How to fix it:

  • Inspect the fan blades and make sure they are securely attached to the motor. If any screws are loose, tighten them using the appropriate screwdriver.
  • Check the mounting hardware where the fan is attached to the ceiling. If anything is loose, tighten it to reduce vibration.
  • Look for any worn-out or damaged components, and replace them if necessary.

2. Unbalanced Fan Blades

Another common cause of noise is unbalanced fan blades. If the fan blades are not balanced correctly, the fan will wobble as it spins, creating a buzzing or humming noise. This is particularly common in older fans or if the blades have been bumped or bent out of shape.

How to fix it:

  • Use a blade balancing kit, which is typically included with many ceiling fans. These kits help adjust the fan blades to ensure they are evenly spaced and balanced.
  • If the blades are damaged or warped, they may need to be replaced. You can find replacement blades through the manufacturer or an authorized dealer.

3. Motor Issues

The motor of your Hunter ceiling fan is the heart of the fan’s operation. If the motor is malfunctioning or if the bearings are worn out, it can lead to humming, grinding, or buzzing noises. Motor issues are less common but can occur over time, especially if the fan has been in use for many years.

How to fix it:

  • Ensure that the fan is turned off and unplugged before inspecting the motor.
  • Check if the motor is properly lubricated. If not, you can apply a light lubricant to the motor bearings, following the manufacturer’s instructions.
  • If the motor is making a persistent noise despite lubrication, it may need to be replaced. In this case, it’s best to consult a professional or contact Hunter’s customer service for guidance.

4. Incorrect Fan Speed Settings

Sometimes, a fan may make more noise if it’s set to a higher speed than necessary. This is particularly true if the fan is set to a high-speed setting, and the blades are moving too fast, causing them to vibrate or create a humming noise.

How to fix it:

  • Lower the fan speed and see if the noise decreases. Many Hunter ceiling fans have multi-speed settings, so adjusting the speed may help reduce noise.
  • If the noise persists even at lower speeds, it’s possible that the fan blades are still unbalanced or that there’s an issue with the motor.

5. Electrical Interference

In some cases, a ceiling fan may produce a humming or buzzing sound due to electrical interference. This can occur when the fan’s motor is receiving inconsistent voltage or when there are issues with the wiring. Electrical problems can also cause the fan to malfunction or make erratic noises.

How to fix it:

  • If you suspect electrical interference, it’s important to consult a professional electrician. They can inspect the wiring and make sure everything is properly connected and functioning.
  • You can also check if the fan is connected to a dimmer switch. Dimmer switches can cause interference with ceiling fan motors, resulting in noise. If this is the case, replacing the dimmer switch with a standard on/off switch can help eliminate the noise.

6. Dirty or Clogged Motor Components

A buildup of dust and debris in the motor or fan blades can also cause noise. Over time, dust can accumulate on the motor bearings or on the fan blades, leading to friction and unwanted sounds. This is a common issue in households with poor air circulation or in areas where dust accumulation is high.

How to fix it:

  • Turn off the fan and clean the fan blades with a soft cloth or microfiber towel. You can also use a gentle cleaning brush to remove dust from the motor and other components.
  • Periodically clean the fan to prevent dust buildup, which will not only help reduce noise but also improve the fan’s performance and efficiency.

Next Steps

Now that we’ve identified some common causes of noise in your Hunter ceiling fan, let’s move on to the solutions. In the next section, we’ll provide actionable steps to help you resolve the issue and restore the quiet operation of your fan.

How to Fix a Noisy Hunter Ceiling Fan

Now that we’ve explored some of the most common causes of noise in your Hunter ceiling fan, it’s time to look at the practical steps you can take to fix the issue. Whether the source of the noise is loose parts, an unbalanced fan, motor issues, or dust buildup, there are effective ways to eliminate the sound and restore your fan’s smooth operation.

1. Tighten Loose Parts and Hardware

As mentioned earlier, loose parts and hardware are one of the most common culprits for fan noise. A simple solution to this problem is tightening all screws and bolts to ensure everything is securely in place. Follow these steps:

  • Turn off the fan and allow it to cool down completely.
  • Inspect the fan blades to ensure they are securely attached to the motor. If any screws are loose, tighten them with the appropriate screwdriver.
  • Check the mounting bracket that attaches the fan to the ceiling. If the bracket is loose, it can cause vibrations that lead to noise. Tighten the mounting screws to eliminate this issue.
  • Ensure that the downrod (the rod connecting the motor to the ceiling) is tightly secured. Loose downrods can cause the fan to wobble and produce noise.
how to install a hunter ceiling fan light kit

2. Balance the Fan Blades

If your Hunter ceiling fan is wobbling or making a clicking or buzzing noise, the blades might be unbalanced. An unbalanced fan can cause uneven airflow and vibrations that result in noise. To fix this:

  • Use a blade balancing kit: Many Hunter ceiling fans come with a blade balancing kit, which includes small weights that can be attached to the fan blades to ensure they are evenly balanced.
  • Check for blade damage: If any blades are cracked, bent, or damaged, replace them with new, compatible blades. Damaged blades can cause the fan to wobble and create noise.
  • Adjust the blade pitch: Fan blades should be angled correctly for optimal airflow. If the blades are misaligned, they may cause noise. You can adjust the blade pitch carefully to ensure they are all positioned properly.

3. Lubricate the Motor

If the noise persists despite tightening loose parts and balancing the blades, the fan motor could be the problem. Over time, motor bearings can wear out or become dry, leading to grinding or humming noises. Here’s how you can address motor noise:

  • Lubricate the motor bearings: First, ensure the fan is turned off and has cooled down. Remove the motor cover and apply a few drops of light motor oil or a lubricant designed for ceiling fan motors to the bearings. Be careful not to over-lubricate, as excess oil can attract dust.
  • Check for signs of motor wear: If lubrication doesn’t solve the problem and the motor continues to make noise, it may be worn out and need replacement. If this is the case, it’s best to consult a professional or contact Hunter’s customer service for guidance.

4. Replace the Capacitor

In some cases, a faulty capacitor can cause your fan to make humming or buzzing noises. The capacitor helps regulate the fan’s motor speed and can become damaged over time. If you suspect the capacitor is the source of the noise:

  • Turn off the power: Always disconnect the fan from the power source before working with electrical components.
  • Replace the capacitor: Capacitors are relatively inexpensive and can be replaced by purchasing a new one from a local hardware store or directly from Hunter. Follow the manufacturer’s instructions to ensure proper installation.
ceiling fan capacitor wiring diagram

5. Eliminate Electrical Interference

Sometimes, ceiling fan noise can be caused by electrical interference. If your fan is connected to a dimmer switch, this could be causing the motor to hum or buzz. Dimmer switches aren’t ideal for ceiling fans, as they disrupt the motor’s power supply. To fix this:

  • Replace the dimmer switch: Install a standard on/off switch in place of the dimmer. This will eliminate the electrical interference and restore smooth operation.
  • Check the wiring: If electrical issues persist, it’s important to have a professional electrician inspect the wiring to ensure there are no faults or loose connections that might be causing the noise.

6. Clean the Fan

dirty ceiling fan

A buildup of dust and debris can also cause your Hunter ceiling fan to make noise. Dust on the fan blades can create friction, leading to unwanted sounds. Here’s how to clean your fan:

  • Turn off the fan and allow it to cool completely.
  • Use a soft cloth or microfiber towel to gently wipe down the blades, motor housing, and any other accessible components. Make sure to clean any dust or dirt buildup from the motor and blade edges.
  • If the motor housing is particularly dirty, consider using a vacuum cleaner with a soft brush attachment to carefully remove dust from hard-to-reach areas.

7. Check for Electrical Grounding Issues

If your ceiling fan is still making noise after all of these steps, there could be an issue with the electrical grounding of the fan. Improper grounding can cause a hum or buzz. To fix this, it’s best to consult a licensed electrician who can inspect the wiring and ensure the fan is properly grounded.

By following these steps, you should be able to identify and fix the most common causes of noise in your Hunter ceiling fan. If the noise persists despite your efforts, it’s best to consult a professional or contact Hunter customer support for further assistance.

In the next section, we’ll discuss when it’s time to seek professional help, and how to avoid future issues with your fan. Stay tuned!

When to Seek Professional Help for Your Hunter Ceiling Fan

While most ceiling fan issues can be solved with some basic troubleshooting, there are times when it’s best to consult a professional. If you’ve followed all the steps mentioned above and your Hunter ceiling fan is still making noise, it could be a sign of a more complex problem that requires expert attention. Here’s when you should consider getting help from a licensed electrician or a ceiling fan specialist:

1. Persistent Motor Noise Despite Lubrication

If you’ve lubricated the motor bearings and the noise persists, it could be a sign that the motor is damaged beyond repair. In such cases, replacing the motor or the entire fan might be necessary. A professional can assess the condition of the motor and determine if a replacement is the most cost-effective solution.

2. Electrical Issues or Shocking Noises

If your fan makes electrical buzzing, humming, or shocking noises, this could indicate an electrical problem, such as poor wiring, grounding issues, or a faulty capacitor. Since electrical issues can be dangerous, it’s crucial to have a licensed electrician inspect the fan. Handling electrical problems without proper training can lead to serious hazards, so it’s always safer to call a professional when you encounter these types of noises.

3. Inability to Balance the Fan Blades

If your fan continues to wobble or make clicking sounds despite using a balancing kit, the problem might lie with the blades or the motor housing. Sometimes, the fan housing may be misaligned, or the blades may be warped or damaged, which requires professional adjustments or part replacements.

4. Frequent Electrical Interference or Flickering Lights

If the fan’s lights are flickering, buzzing, or experiencing electrical interference, especially when connected to dimmer switches or other electrical devices, it may be time to call in an expert. A licensed electrician can help determine if the wiring or switches are causing the issue, and they can recommend the proper solution.

5. Overheating or Burning Smells

If you notice that your fan is overheating or emitting a burning smell, turn it off immediately and disconnect the power supply. This is a serious issue that could indicate a wiring fault, motor failure, or other electrical hazards. A professional should inspect the fan to identify the cause and ensure it’s safe to continue using.

6. Complex Fan Installations or Repairs

If your ceiling fan is installed in a location that’s difficult to access (e.g., high ceilings or awkward spaces), or if you need to replace major components like the motor or the entire fan, it may be worth hiring a professional for the job. Ceiling fan installations and repairs can be tricky and, in some cases, dangerous if not done correctly. Hiring a professional ensures that the fan will be properly installed or repaired, reducing the risk of further damage or safety issues.

How to Choose the Right Professional for Ceiling Fan Repairs

If you decide to hire a professional, it’s important to choose someone who is experienced with ceiling fan repairs and installations. Here are some tips on finding the right expert:

  • Look for licensed electricians: Always choose a licensed electrician who has experience working with ceiling fans. They’ll have the necessary skills to identify and repair electrical issues safely.
  • Check for certifications: A qualified ceiling fan technician will have certifications or training specific to fan installations and repairs. Make sure they have the proper credentials before hiring.
  • Ask for referrals or reviews: It’s always helpful to read reviews or ask friends and family for referrals. A good technician should have positive feedback from previous customers.
  • Get multiple estimates: If the repair involves replacing parts or replacing the fan, it’s a good idea to get multiple estimates to ensure you’re getting a fair price.

Conclusion: Keep Your Hunter Ceiling Fan Running Smoothly

A noisy Hunter ceiling fan can be a nuisance, but with the right troubleshooting and maintenance, you can usually resolve the issue without the need for professional help. By checking for loose parts, cleaning the fan, lubricating the motor, and balancing the blades, most common fan noises can be eliminated. However, if the issue persists, don’t hesitate to consult a professional to ensure the safety and functionality of your fan.

Regular maintenance and prompt attention to any unusual noises will help extend the life of your Hunter ceiling fan, keeping it running smoothly for years to come.

Filed Under: Hunter Ceiling Fan Troubleshooting

Hunter Ceiling Fan Speed Problems – Causes and Solutions

April 2, 2025 by admin Leave a Comment

Introduction: Understanding Hunter Ceiling Fan Speed Problems

If you own a Hunter ceiling fan, you’re already familiar with the brand’s reputation for reliable performance, quiet operation, and energy efficiency. However, like any home appliance, your ceiling fan may encounter some speed-related issues that can disrupt your comfort. A ceiling fan that’s not operating at the right speed—whether it’s too slow, too fast, or not responding at all—can make your room feel uncomfortable, especially on hot days when you depend on it for cooling or warmth circulation during colder months.

In this guide, we’ll dive into the common speed problems Hunter ceiling fans face and provide you with easy-to-follow solutions to get your fan back to optimal performance. Whether you’re dealing with a fan that seems to be stuck on one speed, a motor that sounds too loud, or any other speed-related issue, we’ll walk you through the steps to troubleshoot and resolve it. Additionally, we’ll provide tips for maintaining your fan to prevent future problems and ensure it continues running efficiently for years to come.

Understanding the issue and knowing how to solve it is essential for not only comfort but also for maximizing the longevity and performance of your Hunter fan. Let’s explore the most common reasons your Hunter ceiling fan might be experiencing speed problems and how to fix them in no time.

Common Causes of Hunter Ceiling Fan Speed Problems

Before jumping into solutions, it’s important to understand the various reasons your Hunter ceiling fan may be experiencing speed-related issues. Identifying the root cause will make troubleshooting faster and more efficient. Below are some of the most common causes:

1. Faulty Pull Chain or Wall Control Switch

Hunter ceiling fans typically come with a pull chain or wall control to adjust fan speed. If this component becomes faulty, it could cause issues with speed control. Sometimes, the switch may become worn out or loose over time, leading to the fan either running at one speed or not responding at all to adjustments.

2. Issues with the Capacitor

The capacitor in your Hunter ceiling fan controls the speed at which the motor runs. If the capacitor is damaged or malfunctioning, the fan may not operate at the intended speeds, or it might only work at a single, low setting. A faulty capacitor is a common culprit when dealing with speed problems in ceiling fans.

3. Motor Malfunction

A malfunctioning motor can significantly affect the performance of your ceiling fan, including its speed. If the motor is starting to wear out or has suffered damage, it may cause the fan to run erratically, either at high speeds or at inconsistent speeds. This issue can often result in noise as well, adding to the discomfort of an already frustrating situation.

4. Improper Wiring

Incorrect or loose wiring could be another reason why your fan is experiencing speed issues. If wires aren’t properly connected or have come loose, the electrical current might not be properly transmitted to the motor, causing the fan to fail to operate at the correct speeds.

5. Overloaded Circuit

If you have multiple devices connected to the same circuit as your ceiling fan, it could cause the fan to underperform. An overloaded circuit can lead to insufficient power being delivered to the fan, which may cause it to operate at a slower speed than intended. In this case, reducing the number of appliances on the same circuit might help restore the fan’s performance.

6. Debris or Dirt Buildup

Dust, dirt, and other debris can accumulate on the fan blades or in the motor housing, hindering the fan’s efficiency. When this happens, the fan might struggle to reach the desired speed or might run slower than usual. Regular cleaning can often prevent this issue and keep the fan functioning properly.

dirty ceiling fan

7. Remote Control Problems

For models that come with a remote control, speed issues may arise if the remote control malfunctions. A malfunctioning remote control may fail to send the proper signal to adjust the fan’s speed settings, leaving you unable to change the speed or turn it off.

Now that we’ve identified some of the most common causes, let’s move on to the solutions that will help restore your Hunter ceiling fan’s performance.

How to Fix Hunter Ceiling Fan Speed Problems

Now that we’ve covered the common causes of ceiling fan speed issues, let’s dive into practical solutions to fix them. Many of these fixes are simple and can be performed without professional assistance, but some may require replacing parts or seeking help from a technician. Here’s a step-by-step guide to help you troubleshoot and resolve Hunter ceiling fan speed problems:

1. Inspect the Pull Chain or Wall Control

If your fan speed is stuck at one setting or not responding properly, the first thing to check is the pull chain or wall control. These components are responsible for controlling the fan’s speed, and if they’re malfunctioning, they may be the root cause of the problem.

pull chain not working

How to fix it:

  • Pull Chain: Ensure that the pull chain is not broken or worn out. If it feels loose or doesn’t move smoothly, you may need to replace the pull chain or the switch mechanism. This can be done by removing the fan’s canopy, disconnecting the old pull chain, and installing a new one.
  • Wall Control: For wall-mounted controls, check for loose connections or damaged parts. If the control switch seems faulty or has become unresponsive, consider replacing it. Some newer models also come with a remote control, so if your wall control is malfunctioning, a remote might be a suitable alternative.

2. Check the Capacitor

The capacitor plays a crucial role in controlling your fan’s speed by regulating the motor’s power. If your ceiling fan is only running at one speed, or not running at all, the capacitor may be faulty.

How to fix it:

  • Turn off the power to the ceiling fan by switching off the circuit breaker.
  • Remove the fan’s canopy and locate the capacitor. The capacitor will typically be near the motor.
  • Check for any visible signs of damage, such as burns, cracks, or leaks.
  • If the capacitor looks damaged, you’ll need to replace it. Make sure to purchase a replacement capacitor that matches the specifications for your fan model. If you’re unsure, check the user manual or consult with a technician.

3. Check the Motor for Malfunctions

A malfunctioning motor can cause speed problems and other performance issues. If your motor is noisy, not operating at all, or only running at one speed, it might be time to address the motor issue.

How to fix it:

  • Inspect the motor for visible signs of wear, such as burnt areas, loose parts, or overheating. Make sure the fan blades spin freely and aren’t obstructed.
  • If you suspect the motor is malfunctioning, it’s best to consult a professional for repairs or replacement. Motor replacement can be tricky and requires specialized knowledge.

4. Tighten the Wiring Connections

Loose or improper wiring can cause the fan to perform inconsistently, including problems with speed. It’s essential to check the wiring to ensure all connections are secure and correct.

How to fix it:

  • Turn off the power to the fan by switching off the circuit breaker.
  • Carefully remove the canopy and access the wiring connections.
  • Inspect all wire connections for any loose, frayed, or disconnected wires. Tighten any loose connections and replace any damaged wires.
  • Once you’ve checked the wiring, reassemble the fan and test it to see if the speed issue is resolved.

5. Clean the Fan and Motor

Dirt and dust accumulation can slow down your ceiling fan’s performance, making it appear as if there’s an issue with the speed. Cleaning the blades, motor, and other fan components can help restore its efficiency.

How to fix it:

  • Turn off the fan and disconnect the power.
  • Use a soft cloth or microfiber towel to clean the blades, removing dust and debris. For a deeper clean, use a gentle cleaner that won’t damage the fan’s finish.
  • Inspect the motor housing and clean any visible dust buildup. A can of compressed air can help clear away dust from hard-to-reach areas.
  • Regularly cleaning your ceiling fan will help maintain its efficiency and prevent dust buildup from affecting the motor’s performance.

6. Reset or Replace the Remote Control

For Hunter ceiling fans with remote controls, the issue might be as simple as the remote not communicating with the fan properly. A malfunctioning remote control can cause the fan to get stuck on a particular speed or fail to adjust speeds as needed.

How to fix it:

  • Reset the Remote: If your fan uses a remote, check if it needs to be reset. Some fans have a reset button or procedure for syncing the remote with the fan. Refer to your fan’s manual for instructions on how to reset the remote.
  • Replace the Remote: If the remote continues to malfunction, you may need to replace it. Ensure you purchase a compatible remote control for your Hunter ceiling fan model.

7. Check for an Overloaded Circuit

If there are multiple electrical appliances drawing power from the same circuit, your ceiling fan might not be getting the necessary power to run efficiently.

How to fix it:

  • Unplug or turn off other appliances connected to the same circuit as your ceiling fan. This will allow the fan to receive sufficient power.
  • If the fan still doesn’t work properly, consider consulting an electrician to inspect the circuit and make any necessary upgrades or adjustments.

8. Consult with a Professional

If you’ve gone through the troubleshooting steps above and your fan is still experiencing speed problems, it may be time to consult a professional. An experienced technician can diagnose and resolve more complex issues, such as motor failures or wiring problems.

How to fix it:

  • Find a qualified technician who specializes in ceiling fan repairs.
  • Have them inspect the fan, motor, and wiring to identify any underlying issues that require professional attention.

Preventing Future Hunter Ceiling Fan Speed Problems

After troubleshooting and fixing your Hunter ceiling fan speed issues, it’s important to take proactive steps to prevent future problems. Regular maintenance and proper care can extend the lifespan of your fan and ensure that it continues to operate efficiently. Here are some tips to keep your ceiling fan running at its best:

1. Perform Regular Cleaning

Dust and debris can accumulate on the fan blades and motor, which can interfere with the fan’s operation and cause speed-related problems. Regularly cleaning your ceiling fan can help keep it functioning smoothly and reduce strain on the motor.

How to maintain cleanliness:

  • Turn off the fan and ensure that the power is disconnected.
  • Use a microfiber cloth or duster to clean the fan blades, ensuring that you remove dust and debris that can affect the fan’s performance.
  • For hard-to-reach areas, use a can of compressed air to blow away dust from the motor and fan housing.
  • Clean the light kit (if equipped) to ensure it provides optimal lighting without obstruction.

2. Lubricate the Motor

The motor in your ceiling fan requires occasional lubrication to keep it running smoothly and prevent wear and tear. This can help avoid performance issues, including speed problems.

how to oil a hunter ceiling fan

How to lubricate the motor:

  • Consult your fan’s user manual to see if it requires lubrication and the type of oil recommended.
  • Turn off the power to the fan and remove the fan’s canopy to access the motor.
  • Apply the recommended oil to the motor bearings, ensuring that it’s distributed evenly.
  • Allow the oil to settle before reassembling the fan and testing it.

3. Avoid Overloading the Fan’s Circuit

If your ceiling fan is connected to a circuit that is shared with multiple high-power appliances, it may not be getting enough power to operate efficiently. Overloading the circuit can cause the fan to work improperly, including causing issues with fan speed.

How to prevent overload:

  • Ensure that your ceiling fan is connected to a dedicated circuit, or avoid plugging in high-power appliances that could interfere with the fan’s operation.
  • If you notice that the fan’s performance improves when other appliances are turned off, consider rearranging your electrical setup to ensure the fan has a reliable power source.

4. Check the Fan’s Wiring Periodically

Loose or worn-out wiring can affect the fan’s speed and overall performance. Periodically inspecting the wiring can help prevent speed-related issues.

How to check wiring:

  • Turn off the power to the fan and inspect the wiring connections to ensure they are secure.
  • If you notice any frayed or damaged wires, replace them immediately to prevent electrical issues.
  • If you’re uncomfortable checking the wiring yourself, consult a licensed electrician to ensure everything is in proper working order.

5. Test and Reset the Remote Control

If your Hunter ceiling fan uses a remote control, it’s important to regularly check and reset the remote to ensure proper communication between the fan and remote. A malfunctioning remote can cause speed issues or prevent the fan from responding to adjustments.

How to test and reset the remote:

  • Make sure the remote has fresh batteries.
  • Follow the reset instructions in the fan’s user manual to re-sync the remote with the fan.
  • Test the remote’s functionality by adjusting the fan speed and light settings.

6. Schedule Professional Maintenance

For those who are less familiar with ceiling fan repairs or troubleshooting, scheduling regular professional maintenance can help catch any issues before they become more significant problems. A professional technician can inspect the fan’s motor, wiring, and other components to ensure optimal performance.

How to schedule professional maintenance:

  • Search for local ceiling fan repair services or electricians who specialize in Hunter ceiling fans.
  • Ask about regular maintenance packages that include checking motor performance, lubrication, wiring, and more.

When to Call a Professional for Hunter Ceiling Fan Speed Problems

While many Hunter ceiling fan speed issues can be resolved with a bit of troubleshooting and basic maintenance, there are situations where it’s best to call a professional. If you’ve gone through all the steps, and your fan is still experiencing speed problems, it could indicate a deeper issue that requires expert attention.

1. Persistent Speed Problems After Troubleshooting

If you’ve tried the common fixes — like checking the remote, resetting the speed settings, and inspecting the wiring — and the problem persists, it might be time to call in a professional. Speed issues can sometimes be a sign of motor failure, faulty wiring, or problems with the fan’s circuit board, all of which require specialized knowledge and tools to fix safely.

2. Fan Motor is Overheating

An overheating motor can be a major indicator of a mechanical issue. If your fan feels unusually warm, makes strange noises, or operates intermittently, it could be an issue with the motor’s components. A professional can check the motor’s bearings, lubrication, and electrical connections to diagnose the root cause of the overheating and recommend necessary repairs or a motor replacement.

3. Complex Wiring or Electrical Issues

If the wiring inside the fan or between the fan and its power source seems to be faulty, this can lead to erratic fan speed behavior, or the fan might not work at all. Improper wiring can also create safety hazards, such as short circuits or power surges. A licensed electrician or ceiling fan technician will have the tools and expertise to inspect and repair any electrical issues.

4. Difficulty with Fan Control System

If you’re still experiencing issues with fan speed despite replacing the pull chain, resetting the remote, or adjusting the wall controls, it may point to a malfunction in the fan’s control system. This includes problems with the fan’s capacitor, remote control receiver, or wall control unit. These components are integral to the proper operation of your fan’s speed settings, and a professional will be able to pinpoint and resolve any issues.

5. Warranty Coverage

If your Hunter ceiling fan is still under warranty, it’s a good idea to take advantage of the warranty services provided by Hunter Fan Company. They may offer free repairs or replacements if the issue falls under the warranty terms. Always check your fan’s warranty before attempting to fix major issues on your own. If needed, contact Hunter’s customer service for guidance on warranty claims.

6. Safety Concerns

If you’re uncertain about how to proceed with repairs, especially when dealing with electrical components, safety should always be your top priority. A professional technician has the training and experience to address the issue without compromising your safety or the functionality of the fan.

Conclusion

Dealing with Hunter ceiling fan speed problems can be frustrating, but many of these issues can be resolved with basic troubleshooting and regular maintenance. By performing simple steps like cleaning, checking wiring, and adjusting settings, you can restore your fan’s performance. However, for more complex issues, it’s important to know when to call a professional to avoid further damage and ensure safe and effective repairs.

By staying proactive with your fan’s maintenance and calling in a professional when needed, you can enjoy smooth, efficient operation and long-term performance from your Hunter ceiling fan. Feel free to explore our other helpful guides and troubleshooting tips to keep your Hunter ceiling fan in top shape for years to come!

Filed Under: Hunter Ceiling Fan Troubleshooting

Hunter Ceiling Fans Repair – Complete Guide to Fixing Common Issues

March 20, 2025 by admin Leave a Comment

Introduction: Why Proper Repair is Essential for Your Hunter Ceiling Fan

Hunter Ceiling Fans are renowned for their reliability, style, and quiet operation. However, like any appliance, regular use can sometimes lead to issues that require attention. Whether it’s a small repair or a more complex problem, knowing how to troubleshoot and repair your Hunter ceiling fan can extend its life, improve its performance, and keep it running efficiently for years.

In this article, we’ll guide you through the most common Hunter ceiling fan repairs, from simple fixes you can perform yourself to when it’s time to call a professional. By understanding basic repair techniques, you’ll save time and money while keeping your fan in top condition.

1. Common Hunter Ceiling Fan Problems and How to Fix Them

1.1. Hunter Ceiling Fan Not Turning On

hunter ceiling fan not working

If your Hunter ceiling fan isn’t turning on, it could be due to a number of factors. Here’s how to troubleshoot:

  • Check the Power Supply: Make sure the circuit breaker is on and the fan is connected to a working power source. If the fan isn’t receiving power, it won’t turn on.
  • Inspect the Wall Switch: The wall switch may be faulty. Check to see if it is functional by testing it with another appliance or trying a different switch.
  • Remote Control Issues: If your fan uses a remote, make sure the batteries are working. Sometimes, a dead battery is the culprit.

If these steps don’t resolve the issue, it may be a problem with the fan motor or wiring, which could require professional repair.

1.2. Hunter Ceiling Fan Speed Problems

If your Hunter ceiling fan is only running at a low speed or not changing speeds, follow these troubleshooting steps:

  • Check the Speed Control Switch: If your fan has a pull chain or wall-mounted speed control, it may be malfunctioning. Try adjusting the setting to see if that resolves the issue.
  • Inspect the Capacitor: The capacitor controls the fan’s speed. If it’s faulty, the fan may not work properly. If you’re familiar with electrical components, you can test the capacitor or replace it.
  • Remote Control Settings: For fans with remote control, check the speed settings to ensure they’re working as intended.

If the fan speed issue persists, the capacitor may need to be replaced, and professional repair might be required.

1.3. Hunter Ceiling Fan Making Noise

A noisy Hunter ceiling fan can be annoying, but it’s often easy to fix. Here are common causes and solutions:

  • Dirty Fan Blades: Dust and debris can accumulate on the blades, causing imbalance and noise. Clean the blades with a soft cloth and mild detergent to remove any buildup.
  • Loose Parts: Over time, screws and bolts may loosen, causing parts to rattle. Tighten all screws on the motor, blades, and light kit.
  • Motor Issues: If the motor is the source of the noise, it may need lubrication. Check if the fan is running smoothly and, if not, consult a technician for possible repairs or lubrication.

If the noise continues despite these steps, you may need to check the motor or other internal components, and a professional may be needed for more in-depth repair.

2. DIY Repair Tips for Hunter Ceiling Fans

2.1. Essential Tools for Repairing Hunter Ceiling Fans

Before starting any repair, it’s important to have the right tools. Here’s a list of essentials:

  • Screwdriver Set: For tightening loose screws on the fan and light kit.
  • Ladder: To safely reach the fan when performing repairs.
  • Voltage Tester: To ensure there is no electrical current running while you work on the fan.
  • Wire Stripper: If you need to repair or replace any wiring.
  • Balancing Kit: For correcting wobbling fans.
  • Lubricant: To keep the fan motor running smoothly.

2.2. General Repair Steps for Troubleshooting Issues

  • Turn Off the Power: Always turn off the power at the circuit breaker before working on any electrical appliance. This is essential for your safety.
  • Inspect the Wiring: If your fan is not operating at all or experiencing issues with the lights, check the wiring connections to ensure they’re secure and not damaged.
  • Lubricate the Motor: If the fan is making noise, a few drops of oil in the motor may help eliminate squeaks. Make sure to follow the manufacturer’s instructions for the correct type of lubricant.

If the problem persists after these DIY fixes, check out our Hunter Ceiling Fan Troubleshooting page for more in-depth solutions.

3. When to Call a Professional for Hunter Ceiling Fan Repair

While DIY repairs can handle many issues, certain problems require the expertise of a professional:

3.1. Motor Malfunctions

If the motor of your Hunter ceiling fan isn’t functioning, it may be due to an internal issue such as a damaged coil or wiring. Since this involves electrical work, it’s best to call a professional to handle repairs safely.

3.2. Electrical Issues and Wiring Problems

If you suspect an issue with the electrical wiring or if you encounter persistent power issues, it’s time to call in a licensed electrician. Electrical repairs can be dangerous, and it’s crucial that they are handled by someone trained to work with high-voltage components.

3.3. High-Ceiling Installations

If your Hunter ceiling fan is installed on a high ceiling, it may require specialized equipment or help for repair. In these cases, hiring a professional with experience in ceiling fan repairs is recommended.

3.4. Complex Issues with Remote Controls or Light Kits

If your remote control or light kit is malfunctioning and troubleshooting doesn’t resolve the issue, you might need a replacement part. A professional technician can help ensure the correct replacement part is used.

4. Preventing Future Issues with Your Hunter Ceiling Fan

4.1. Regular Maintenance Tips

To keep your Hunter ceiling fan running smoothly, consider performing regular maintenance:

  • Clean the Blades Regularly: Dust and debris can cause the fan to wobble and make noise.
  • Tighten Screws and Bolts: Regularly check and tighten any loose parts to prevent rattling and improve performance.
  • Lubricate the Motor: Apply lubricant to the motor annually to prevent squeaking or grinding sounds.

4.2. Checking and Replacing Parts

  • Replace Worn or Broken Parts: Over time, fan blades, remote controls, and light kits may need replacement. Always use genuine Hunter replacement parts to ensure compatibility and longevity. For more information on replacement parts, visit our Hunter Ceiling Fan Parts page.

5. Hunter Ceiling Fans Repair vs. Replacement

5.1. When to Repair vs. When to Replace

At some point, repairing your Hunter ceiling fan might become more costly than purchasing a new one. Here’s how to decide:

  • Cost of Repair: If repairs are costly or if the fan is old, it may be better to invest in a new fan with updated features.
  • Efficiency Concerns: Newer models may be more energy-efficient, saving you money in the long run on energy bills.

5.2. Warranty Coverage

If your Hunter ceiling fan is still under warranty, many repairs or replacements may be covered. Be sure to check the warranty terms before proceeding with repairs. For more information on warranty coverage, visit our Hunter Ceiling Fans Warranty page.

6. Final Thoughts on Repairing Your Hunter Ceiling Fan

Repairing a Hunter ceiling fan is often straightforward, and with the right tools and knowledge, many common problems can be fixed yourself. However, if you encounter more complex issues, don’t hesitate to call in a professional. Regular maintenance is key to keeping your fan running smoothly and efficiently for years to come.

By following the repair tips provided and using genuine Hunter replacement parts, you can enjoy the comfort and functionality of your Hunter ceiling fan for a long time.

Need Help with Your Hunter Ceiling Fan Repair?

If you’re unsure about how to handle your Hunter ceiling fan repair, or if the problem persists, don’t hesitate to reach out to Hunter Fan Company or a certified technician. Visit the Hunter Ceiling Fan Website page for more assistance and troubleshooting guides.

Filed Under: Hunter Ceiling Fan Troubleshooting

  • « Previous Page
  • 1
  • …
  • 3
  • 4
  • 5
  • 6
  • 7
  • 8
  • Next Page »


Best Hunter Ceiling Fans

Bestseller No. 1 Hunter 59244 Dempsey Ceiling Fan 44 inches Fresh White
Hunter 59244 Dempsey Ceiling Fan 44 inches Fresh White
Check Price
Bestseller No. 2 Hunter 53090 Builder Deluxe Ceiling Fan 52 inches Brushed Nickel
Hunter 53090 Builder Deluxe Ceiling Fan 52 inches Brushed Nickel
Check Price
Bestseller No. 3 Hunter Fan Company Fan Builder Elite Indoor Ceiling Fan with Pull Chain Control, Metal, New...
Hunter Fan Company Fan Builder Elite Indoor Ceiling Fan with Pull Chain Control, Metal, New...
Check Price

Recent Posts

  • Hunter Ceiling Fan Remote Control Manual
  • Hunter Ceiling Fan Flickering Lights: Causes and Fixes
  • Hunter vs Kichler Ceiling Fans — The Ultimate Battle for Your Ceiling
  • Hunter Fan Company Phone Number & Contact Information (Official Guide)
  • Hunter HVLS Fans: The Definitive Guide to High-Volume, Low-Speed Airflow
  • Hunter 99373 vs 99375: What’s the Difference Between These Remotes?
  • Hunter Fan Remote Battery Replacement
  • Hunter 99123 Fan Remote Troubleshooting & Manual
  • How to Unpair Your Hunter Fan Remote
  • How to Install Hunter Low Profile Ceiling Fan

Legal Information

This site is owned and operated by HunterCeilingfans. Hunter ceiling fans is a participant in the Google Adsense Program, an advertising program designed to provide a means for sites to earn advertising fees by displaying related advertisements.

Hunter ceiling fans also is a participant in Amazon Associates Program. “As an Amazon Associate, I earn from qualifying purchases.”

Hunter ceiling fan is compensated for referring traffic to these companies. Hunter ceiling fans is an independent site with no connections to Hunter and is operated entirely by independent volunteers and writers to provide information.

We are not the manufacturer of Hunter Ceiling Fans, nor are we associated with Hunter in any way. We are a third-party resource website that tries to help site visitors to find valuable information.

Categories

  • Discontinued Hunter Ceiling Fans
  • Hunter Ceiling Fan Parts
  • Hunter Ceiling Fan Reviews
  • Hunter Ceiling Fan Support
  • Hunter Ceiling Fan Troubleshooting
  • Hunter Ceiling Fans
  • Hunter Fan Manuals

Partners

Harbor Breeze