Hunter Ceiling Fans

  • Home
  • Hunter Manuals
  • Hunter Fan Parts
    • Hunter Ceiling Fan Remotes
    • Hunter Ceiling Fan Light Kits
    • Hunter Ceiling Fan Blade Arms
    • Hunter Ceiling Fan Blades
    • Hunter Ceiling Fan Downrods
    • Hunter Ceiling Fan Pull Chains
    • Hunter Ceiling Fan Wall Controls
    • Hunter Ceiling Fans Replacement Globes
  • Hunter Support
  • Hunter Commercial Ceiling Fans

How to Connect Hunter Fan to Alexa

May 5, 2025 by admin Leave a Comment

In today’s fast-paced, tech-savvy world, smart home integration is becoming an essential feature for many households. If you own a Hunter ceiling fan, connecting it to Alexa allows you to control the fan using just your voice. This not only adds convenience to your daily life but also contributes to a modern, tech-friendly home environment. In this guide, we’ll show you how to connect your Hunter fan to Alexa for seamless control and greater convenience.

Whether you’re adjusting the fan speed, turning on the light, or simply powering the fan on/off, you can do it all using Alexa. Let’s get started!

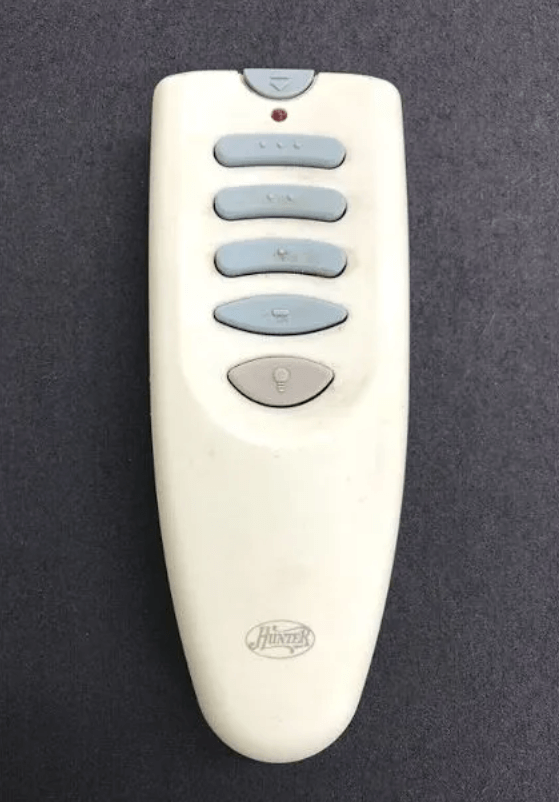
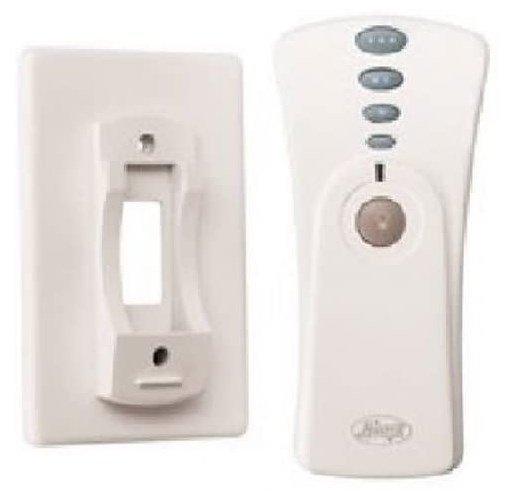
how to connect hunter fan to Alexa

What You’ll Need

Before you begin, make sure you have the following:

  1. Hunter Smart Ceiling Fan – Ensure your Hunter fan supports Alexa integration. Most Hunter fans with Hunter Simpleconnect feature are compatible.
  2. Alexa-enabled Device – This can be an Amazon Echo, Echo Dot, or any other Alexa-enabled device.
  3. The Alexa App – Available for download on iOS and Android devices.
  4. Stable Wi-Fi Connection – Both your Alexa device and Hunter fan need to be on the same Wi-Fi network.
  5. Hunter Remote App – Alternatively, you can also control your Hunter fan with the Hunter Ceiling Fan Remote App, which is compatible with most Smart models.

Step-by-Step Guide to Connect Your Hunter Fan to Alexa

Step 1: Set up Your Hunter Fan with the Hunter Simpleconnect App

Before linking your fan with Alexa, you first need to connect your Hunter fan to the Hunter Simpleconnect app.

  • Download the Simpleconnect app from your device’s app store (Google Play for Android or the App Store for iOS).
  • Open the app and follow the on-screen instructions to connect your Hunter fan to your Wi-Fi network.
  • Once the fan is connected to the app, make sure it is functioning properly in the app before moving on to the Alexa integration.
Step 2: Download and Set Up the Alexa App

Now that your Hunter fan is set up with the Simpleconnect app, the next step is to ensure the Alexa app is properly set up.

  • Download the Alexa app if you haven’t already.
  • Open the Alexa app and log in with your Amazon account.
  • Make sure your Alexa-enabled device (e.g., Echo, Echo Dot) is set up and connected to your home Wi-Fi network.
Step 3: Link Your Hunter Fan to Alexa

Once both the Hunter fan and Alexa app are ready, follow these steps:

  1. Open the Alexa app.
  2. Tap on the “More” option at the bottom right corner.
  3. Select “Skills & Games” from the menu.
  4. In the search bar, type “Hunter Simpleconnect” and hit Search.
  5. Choose the Hunter Simpleconnect skill and tap Enable.
  6. Log in using your Simpleconnect account credentials.
  7. Once logged in, Alexa will automatically link with your Hunter fan. You may need to tap “Discover Devices” if the fan doesn’t show up immediately. For additional control options, you can also use the Hunter Ceiling Fan Remote App, which provides another easy way to manage your fan settings.
Step 4: Voice Commands to Control Your Hunter Fan via Alexa

Once linked, you can use voice commands to control your Hunter fan through Alexa. Here are some common voice commands you can use:

  • “Alexa, turn on the Hunter fan.”
  • “Alexa, set the Hunter fan to high speed.”
  • “Alexa, turn off the Hunter fan light.”
  • “Alexa, set the Hunter fan to low speed.”

With these simple commands, you can easily adjust the fan’s settings without ever needing to touch the remote.

Troubleshooting Tips

If you encounter issues with Alexa not recognizing your Hunter fan or any other problems, here are some troubleshooting tips:

  1. Hunter fan not showing up in Alexa:
    • Make sure your Hunter fan is connected to the Simpleconnect app and is properly synced with Alexa.
    • Verify that both devices are connected to the same Wi-Fi network.
  2. Alexa not responding to voice commands:
    • Ensure the Hunter fan is properly named in the Simpleconnect app. You can rename the fan for better recognition.
    • Confirm that the Alexa microphone is turned on and that your voice commands are clear.
  3. Alexa not controlling the fan’s light:
    • Make sure the light feature is enabled for your Hunter fan in the Simpleconnect app.

For more detailed troubleshooting, check out our Hunter Ceiling Fan Remote Not Working article.

Conclusion

Connecting your Hunter fan to Alexa enhances your home automation experience, giving you easy control over your fan and light through simple voice commands. Whether it’s adjusting the fan speed or turning the light on/off, Alexa offers a hands-free and seamless way to manage your environment. Enjoy the convenience of controlling your Hunter fan with just your voice!

If you’re interested in more smart home features, explore our guide on Hunter Simpleconnect Smart Ceiling Fans to get the most out of your ceiling fan.

Want to get your hands on a Hunter fan remote replacement or other accessories? Check them out on Amazon for a wide range of options and enjoy hassle-free shopping.
Filed Under: Hunter Ceiling Fan Support

Hunter 85095 Remote Control Manual

May 1, 2025 by admin Leave a Comment

If you’re looking for the Hunter 85095 remote control manual, you’ve come to the right place. Whether you’re setting up a new Hunter ceiling fan remote, replacing an old remote, or troubleshooting issues, the manual provides all the information you need. In this guide, we’ll show you how to access the manual and explain how to install the Hunter 85095 remote control properly, along with troubleshooting tips and useful resources.

Hunter 85095 Ceiling Fan Remote Control

1. How to Find the Hunter 85095 Remote Control Manual

The Hunter 85095 remote control manual provides detailed instructions on installation, pairing, and troubleshooting. Here are the easiest ways to access the manual:

Option 1: Direct PDF Download

  • The manual is available for direct download, you can access the PDF from the official sources where it’s hosted. Make sure to download it for easy access while setting up your Hunter 85095 remote.

Here is the PDF link

Option 2: Online Search

  • A simple Google search for “Hunter 85095 remote control manual” can lead you to a trusted source hosting the manual in PDF format. Many fan-related websites and product retailers provide downloadable copies of user manuals.

Option 3:

  • For a comprehensive manual and additional installation instructions, you can refer to our Hunter Ceiling Fan Manuals page for more helpful documentation.

2. Understanding the Hunter 85095 Remote Control

Before diving into installation or pairing, it’s important to familiarize yourself with the Hunter 85095 remote control. This remote provides multiple functions, including:

  • Multi-speed control (low, medium, high).
  • Light control with dimming capability.
  • Fan direction control (reverse for winter or cooling mode for summer).
  • Compatible with most Hunter ceiling fan models and designed to be easy to install.

Battery Information:

The Hunter 85095 remote operates with a 12V 23A battery, ensuring reliable operation when installed correctly.

3. How to Install Hunter 85095 Remote Control

For detailed installation instructions on how to set up your Hunter ceiling fan remote, please refer to our How to Install a Hunter Ceiling Fan Remote guide.

This step-by-step guide will help you understand the entire process, from removing the fan canopy to pairing the receiver with the remote.

4. How to Pair the Hunter 85095 Remote Control

Pairing the Hunter 85095 remote control with your ceiling fan is crucial for optimal fan operation. It enables you to control the fan’s speed, light, and direction using the remote.

You can follow the pairing instructions we’ve provided earlier in our Hunter Fan Remote 85095 Pairing Guide. This will provide you with a detailed, step-by-step guide to successfully pair the remote with the fan.

5. Troubleshooting Common Issues

If the Hunter 85095 remote control is not working as expected, here are a few common problems and solutions:

Remote Not Pairing

  • Issue: The remote is not pairing with the receiver.
  • Solution:
    • Ensure the battery is fresh and installed correctly.
    • Reset the remote by turning off the fan power, waiting for 10 seconds, and then restoring power.
    • Check the dip switch settings to make sure they match between the receiver and the remote.

No Response from the Fan

  • Issue: The fan doesn’t respond to the remote’s commands.
  • Solution:
    • Ensure the receiver is properly installed and connected to the fan motor.
    • Confirm that the remote’s battery is working.

Fan Light Not Responding

  • Issue: The light does not turn on or respond to dimming commands.
  • Solution:
    • Ensure the light bulb is installed correctly and is dimmable.
    • Check the wiring to ensure that the receiver is properly controlling the light kit.

6. Additional Resources for Hunter Ceiling Fan Users

For more comprehensive troubleshooting and setup guides, you can explore these related articles:

  • Hunter Ceiling Fan Manuals: For more manuals and guides.
  • Hunter Ceiling Fan Remote Not Working: A detailed troubleshooting guide to help if your Hunter fan remote isn’t working as expected.

7. Conclusion

Installing and pairing the Hunter 85095 remote control is a straightforward process that enhances the functionality of your Hunter ceiling fan. By following the provided instructions, you can enjoy full control over your fan’s speed, light, and direction. If you encounter any issues, refer to the troubleshooting tips or check out the additional resources linked in this article.

For further help, feel free to go through the Hunter ceiling fans website article or check out other helpful articles on our website.

Filed Under: Hunter Fan Manuals

Hunter Fan Remote 85095 Pairing

April 30, 2025 by admin Leave a Comment

If you’re experiencing issues with your Hunter ceiling fan remote 85095, or need to install it for the first time, this guide provides a detailed, step-by-step approach to pairing the remote with your Hunter ceiling fan. In addition, we’ll cover how to configure the jumpers on both the remote and the receiver, troubleshooting tips for common issues, and how to set up the remote holder for convenience.

1. Introduction to Hunter Fan Remote 85095

Hunter 85095 Ceiling Fan Remote Control

The Hunter 85095 remote control is designed to work with a variety of Hunter ceiling fans, providing speed control, light dimming, and fan direction options. When setting up the Hunter 85095 remote, you’ll need to pair it with the fan receiver and ensure the settings are correctly configured. If multiple fans are installed nearby, proper configuration of the code settings is essential to avoid interference.

In this guide, we’ll explain how to pair the Hunter 85095 remote, configure the code settings using jumpers, and troubleshoot common issues.

2. Preparing for Installation

Before starting, it’s essential to prepare both the remote and the fan for pairing. Here’s a list of what you’ll need:

Tools Required:

  • Step Ladder: To safely reach the ceiling fan.
  • Small Pliers or Tweezers: For adjusting jumpers on the transmitter and receiver.
  • Phillips-head Screwdriver: For removing and securing fan components, like the canopy or mounting bracket.

Safety Precautions:

  • Turn off power at the circuit breaker to avoid electrical hazards.
  • Wear gloves and safety glasses when handling electrical components.
  • Ensure you are working in a dry environment and the area around the fan is clear of any obstructions.

3. Understanding the Hunter 85095 Remote and Its Components

The Hunter 85095 remote includes the following key features:

  • Multi-speed control: Adjust the fan speed (low, medium, high).
  • Light control: Dim or brighten the fan light.
  • Reverse control: Change the fan direction for summer or winter operation.

Additionally, the remote uses jumpers to assign unique codes between the transmitter and receiver, ensuring there is no interference from other nearby fans.

Components:

  • Transmitter (Remote): Operates at 350 MHz.
  • Receiver: Installed within the fan canopy.
  • Battery: Requires a 12V, Type 23A battery.

4. Configuring the Code Settings for the Hunter 85095 Remote

One of the key steps when installing or replacing the Hunter 85095 remote is configuring the code settings to avoid interference between multiple fans. The jumpers in the transmitter and receiver need to be set to the same configuration.

Step 1: Accessing the Jumpers

  • Transmitter (Remote): Open the battery compartment to access the three jumper switches inside.
  • Receiver: The receiver is located in the fan’s switch housing. You may need to remove the receiver from the housing to access the jumper switches.

Step 2: Adjusting the Jumpers

  • Using Small Pliers or Tweezers: Gently move the jumpers in both the transmitter and receiver to set the same code.
    • Example Configuration: Both the transmitter and receiver should have their jumpers aligned (e.g., in the same “ON” or “OFF” position for each switch).
  • Visual Guides: Refer to Figures 1 and 2 (included in the remote’s manual) to get a clear understanding of jumper positions.

Step 3: Reassembling the Receiver

  • Receiver Placement: Once the jumpers are set, carefully replace the receiver inside the switch housing. Ensure that the mounting holes align with the receiver slots to prevent any misalignment.
  • Secure with Screws: Tighten the screws to secure the receiver in place, ensuring the fan is correctly connected.

5. Pairing the Remote with the Receiver

Now that the jumpers are set, you can begin the pairing process.

Step 1: Turn the Power On

  • Restore the power to your fan by turning on the circuit breaker.

Step 2: Activate Pairing Mode

  • Press and hold the pairing button on the remote for about 3-5 seconds until you hear a beep or the fan light blinks to indicate successful pairing.

Step 3: Test the Remote

  • Test the remote by adjusting the fan speed, light brightness, and fan direction. If the fan responds correctly, the pairing was successful.

6. Troubleshooting Common Pairing Issues

If the Hunter 85095 remote isn’t working properly, try these troubleshooting tips:

1. No Response from the Fan

  • Check the battery: Replace the 12V 23A battery with a fresh one if it’s weak.
  • Verify the Jumper Switch Settings: Ensure the transmitter and receiver have matching jumper switch settings.

2. Intermittent Operation

  • RF Interference: Other electronic devices may interfere with the signal. Try moving the fan away from other electronics or turning off any devices that may cause interference.

3. Fan Light Not Working

  • Ensure that the light bulb is properly installed and functional.
  • Check the wiring to ensure the receiver is correctly connected to the light kit.

7. Installing the Hunter 85095 Remote Holder

The Hunter 85095 remote comes with a remote holder that allows you to attach it to an existing toggle switch wall plate or mount it on a wall. This ensures the remote is always accessible and prevents misplacement.

  • Step 1: Attach the remote holder to the wall plate or mount on the wall.
  • Step 2: Place the remote into the holder for easy access.

8. Conclusion

The Hunter 85095 remote is a powerful tool for controlling your Hunter ceiling fan and light. By following the pairing instructions, configuring the jumper settings correctly, and troubleshooting any issues, you can ensure smooth operation and optimal performance of your fan. For easy access, consider using the remote holder to keep your remote in a convenient location.

If you encounter any issues that cannot be resolved through these steps, consider reaching out to Hunter ceiling fans customer service for further assistance.

Filed Under: Hunter Ceiling Fan Support

Hunter Remote 85095 Replacement

April 29, 2025 by admin Leave a Comment

If you’re in need of a Hunter Remote 85095 replacement, you’ve come to the right place. Whether your current remote has stopped working, you need a spare, or you’re upgrading your system, this guide will walk you through everything you need to know about finding, purchasing, and replacing the Hunter 85095 remote control.

Hunter 85095 Ceiling Fan Remote Control

1. Where to Find the Hunter Remote 85095 Replacement

Finding the right replacement remote for your Hunter ceiling fan is easy and convenient. Here are the best places to purchase the Hunter Remote 85095:

Option 1: Purchase from Amazon

To purchase the Hunter Remote 85095 replacement with the ease of free returns and fast shipping, check out Amazon: Buy Hunter Remote 85095 on Amazon (affiliate link)

This is a great option for getting your remote delivered quickly, with the assurance of customer reviews and product compatibility.

Option 2: Hunter Fan Official Website

For direct purchases, you can go through the Hunter ceiling fans website. While the product availability may vary, this is the official source for Hunter ceiling fan parts and remotes.

Option 3: Other Retailers

Retailers like Home Depot, Lowe’s, or trusted third-party websites may also carry the Hunter Remote 85095. Always ensure compatibility before purchasing to avoid returns.

2. How to Install the Hunter Remote 85095 Replacement

Installing your Hunter Remote 85095 replacement is a straightforward process. However, to ensure proper functionality, follow these key steps:

  1. Turn Off Power to the Fan:
    Before starting any installation, make sure to turn off the power at the circuit breaker to avoid electrical hazards.
  2. Remove the Old Remote and Install the New Receiver:
    If you are replacing an old remote, remove the old receiver and install the new Hunter 85095 remote receiver inside the fan canopy.
  3. Insert the Battery:
    Open the battery compartment of the remote and insert the 12V 23A battery correctly.
  4. Pair the Remote:
    Pair the Hunter 85095 remote with your fan using the pairing instructions provided in the manual.

For detailed steps on installing a Hunter fan remote, you can refer to our guide on How to Install a Hunter Ceiling Fan Remote.

3. Troubleshooting Common Issues with Hunter Remote 85095

After installing the Hunter 85095 remote, you may encounter some issues. Here are some common problems and how to resolve them:

1. Remote Not Pairing

  • Solution: Ensure the battery is properly inserted and fresh. Re-pair the remote by following the pairing process.
  • For detailed troubleshooting, check out our Hunter Ceiling Fan Remote Not Working guide for a deeper dive into fixing pairing issues.

2. Remote Not Controlling the Fan

  • Solution: Make sure the receiver is installed properly and the wiring is intact. Reset the fan and remote pairing if necessary.

3. Fan Light Not Responding

  • Solution: Check the light bulb connections and test the dimming feature on the remote to see if it’s responding.
  • Further troubleshooting: If the light is still not responding, refer to our Hunter Ceiling Fan Remote Troubleshooting guide.

4. Additional Resources

If you’re still facing issues, here are some additional resources that might help:

  • Hunter Ceiling Fan Manuals: Access manuals for all Hunter ceiling fan models.
  • Hunter Fan Remote 85095 Pairing Guide: A complete guide to pairing the Hunter 85095 remote with your fan.
  • Hunter Ceiling Fan Replacement Parts: Find all the replacement parts you need for your Hunter ceiling fan.

5. Conclusion

Replacing the Hunter Remote 85095 is a simple process that enhances the functionality of your Hunter ceiling fan. By following the installation and troubleshooting steps in this guide, you’ll quickly restore full control over your fan’s speed, light, and direction. For quick purchasing, don’t forget to use our affiliate link on Amazon to get your replacement remote. If you have any other questions, don’t hesitate to check out our Hunter Ceiling Fan Troubleshooting and installation guides for further assistance.

Filed Under: Hunter Ceiling Fan Parts, Hunter Ceiling Fan Troubleshooting

Hunter 99119 Ceiling Fan and Light Universal Remote Control

April 27, 2025 by admin Leave a Comment

Ceiling fans have evolved over the years, and with the advent of smart home technology, controlling your fan with ease has become more important than ever. One such advancement is the Hunter 99119 Ceiling Fan and Light Universal Remote Control. If you own a Hunter ceiling fan, the 99119 remote offers a convenient, efficient, and stylish way to control the fan speed, lighting, and fan direction. This remote is designed to seamlessly integrate with Hunter ceiling fans and many other brands, providing full-range control for your fan’s settings.

In this comprehensive guide, we’ll walk you through the key features of the Hunter 99119 universal remote, how it works, and how to troubleshoot any issues you might encounter. Whether you’re looking for a replacement or just upgrading your fan controls, the Hunter 99119 remote offers the ultimate convenience at your fingertips.

Hunter Fan Company Hunter 99119 Traditional Control

2. Key Features of the Hunter 99119 Ceiling Fan and Light Universal Remote Control

The Hunter 99119 universal remote brings a wealth of features designed to enhance the user experience and improve overall fan and light control. Below are some of the top features that make this remote a must-have for your Hunter ceiling fan.

Contemporary Design

One of the standout features of the Hunter 99119 remote is its sleek and modern design. With a white and satin nickel finish, it complements a wide range of home interiors, whether you’re styling your living room, bedroom, or office space. The compact size (4 x 2.5 x 1 inches) ensures it’s comfortable to hold, and it’s small enough to fit into any remote holder or drawer.

Multi-Speed Control

The Hunter 99119 remote allows you to adjust the fan speed with three separate buttons. Whether you need a gentle breeze or full air circulation, the multi-speed functionality ensures that you can customize the airflow to your ideal comfort level. The speed control is quick and simple, making it easy to find the right setting with a press of a button.

Full-Range Light Operation

In addition to controlling the fan, the Hunter 99119 remote also controls the light. The full-range light dimming feature allows you to adjust the brightness of your ceiling fan light kit for different moods and settings. This makes it perfect for reading, entertaining, or creating a relaxed ambiance in any room. Whether you want to brighten up your living space or lower the lights for a cozy atmosphere, the Hunter 99119 remote provides full control over the lighting.

Instant On/Off Button

The instant on/off button is an incredibly convenient feature, allowing you to quickly turn the fan or light on or off without needing to adjust the speed or light settings. It’s perfect for times when you need to adjust your room temperature or lighting instantly, like when entering or leaving the room.

Compatibility with All Ceiling Fans

The Hunter 99119 remote is universal, which means it works with all ceiling fan brands, as long as the receiver fits in the fan’s canopy. This broad compatibility allows you to easily replace or upgrade your existing remote without worrying about brand limitations.

Frequency Range

The Hunter 99119 remote is designed to work with ceiling fans installed at ceiling heights of 9 feet or greater. This makes it suitable for most standard and large rooms in your home. Whether you have a high ceiling in your living room or a standard height in your bedroom, this remote will provide efficient control over your fan.

3. Why Choose the Hunter 99119 Universal Remote Control?

Ease of Use

The Hunter 99119 remote is designed with user-friendliness in mind. Unlike complicated controls or systems, this remote control offers a simple, intuitive interface. With just a few buttons to control the fan speed, lighting, and fan direction, you won’t have to fumble with confusing settings.

Enhanced Comfort and Convenience

By switching to a Hunter 99119 remote, you can control the fan and light settings without ever leaving your seat. This convenience allows you to adjust the temperature and lighting levels at a moment’s notice, giving you more control over your home environment. Whether you’re in bed, on the couch, or at your desk, the Hunter 99119 remote provides instant access to fan and light control.

Perfect for Modern Homes

The modern design of the Hunter 99119 remote makes it a perfect addition to any contemporary or modern home. Its simple design, combined with the functional features, makes it an essential gadget for smart homes. Its ability to adjust the fan speed and light dimming with ease makes it the ideal companion for Hunter ceiling fans in living rooms, bedrooms, and even larger rooms with high ceilings.

4. Installation of the Hunter 99119 Universal Remote Control

Installing the Hunter 99119 remote is a quick and easy process, even for beginners. Here’s how you can set it up:

Step 1: Turn Off the Power

Before beginning the installation, turn off the power to your ceiling fan by flipping the switch on the wall or turning off the circuit breaker.

Step 2: Install the Receiver

  • Open the ceiling fan canopy and attach the receiver that comes with the Hunter 99119 remote to the fan’s wiring. The receiver should fit snugly inside the canopy of your fan.
  • Ensure the wires are connected correctly. If you’re not sure, consult the manual that comes with the remote or seek assistance from a professional electrician.

Step 3: Install the Remote Control Wall Plate

The Hunter 99119 remote also comes with a wall switch access plate. This can be installed next to your light switch for easy access.

Step 4: Pair the Remote and Receiver

Once the receiver is installed and wired, follow the instructions provided in the manual to sync the remote to the fan. This usually involves pressing and holding a button on the remote to pair it with the fan’s receiver.

Once paired, you can begin using the Hunter 99119 remote to control your fan and lighting.

Buy Hunter 99119 Ceiling Fan Remote Control on Amazon – Affiliate Link

5. Troubleshooting Common Issues with the Hunter 99119 Ceiling Fan Remote Control

Like any technology, you might occasionally encounter problems with your Hunter 99119 remote control. Fortunately, most issues can be resolved easily without needing professional help. Below are some common issues with the Hunter 99119 ceiling fan remote control and how to fix them.

1. Remote Not Pairing with the Fan

If your Hunter 99119 remote is not pairing with your ceiling fan, it can be due to several reasons. Here’s how to troubleshoot:

  • Ensure Power is On: Make sure the power to the ceiling fan is on. Check the wall switch or circuit breaker to ensure the fan is powered.
  • Check Battery: Replace the batteries in your remote. Weak batteries are often the culprit when the remote fails to sync.
  • Reset the Pairing Process:
    • Turn off the power to the fan for about 10 seconds to reset it.
    • After turning the power back on, follow the pairing instructions provided in the manual to re-sync the remote with the fan.

If this doesn’t resolve the issue, contact Hunter customer support for further assistance.

2. Fan Speed or Light Controls Not Responding

If your Hunter fan speed or light control is not responding, the issue could be related to syncing or wiring.

  • Check Remote and Receiver Sync: If the fan speed or light control is not responding, ensure that the remote and receiver are properly synced. Reset the pairing process and test again.
  • Wiring Issues: Check the wiring inside the fan to ensure that all connections are secure. If you notice any loose wires, it’s best to call a professional to inspect and correct the wiring.
  • Test the Fan Without Remote: Try adjusting the fan speed and light settings manually to confirm that the fan is working correctly. If it does work manually, the problem may lie with the remote.

3. Light Not Turning On or Dimming

Sometimes, the light dimming function may not work or the light kit won’t turn on at all. Here’s how to address the issue:

  • Check Bulb Compatibility: Ensure that the light bulbs you’re using are compatible with the Hunter 99119 remote. If the bulbs are too powerful or incompatible, they may not function properly.
  • Reset the Light Settings: If the light is not dimming correctly, try resetting the remote settings by following the pairing process again. This might reset the light dimming function.
  • Examine the Light Fixture: Inspect the light fixture for any visible damage or loose connections. If the fixture is damaged, replacing it may be necessary.

4. Remote Control Not Responding to Fan Commands

If the Hunter 99119 remote is not responding to the fan commands (speed adjustment, light control), try these steps:

  • Reset the Remote: Turn off the power to the fan for 30 seconds, and then turn it back on. After restoring power, try reprogramming the remote with the receiver.
  • Battery Check: Make sure the remote’s batteries are working. Replace the batteries with new ones if needed.
  • Check for Interference: Ensure that there is no interference between the remote and the fan receiver. Move any obstacles that may block the signal between the remote and receiver.

5. Fan or Light Won’t Turn Off

If your Hunter 99119 remote is not turning the fan or light off, the problem may stem from the settings or the remote itself.

  • Check for Stuck Buttons: Sometimes, stuck buttons on the remote can cause the fan to remain on. Press each button individually to see if it resolves the issue.
  • Power Cycle: Turn the power off at the wall switch for 10 seconds and turn it back on to reset the fan and remote.
  • Factory Reset: If the issue persists, you may need to perform a factory reset on the remote and receiver. Refer to the manual for specific reset instructions.

If none of the above solutions work, it may be time to replace the remote or the receiver. You can also reach out to Hunter’s customer support for assistance.

6. Cost of the Hunter 99119 Ceiling Fan and Light Universal Remote Control

Understanding the cost of the Hunter 99119 remote control is important for making an informed purchasing decision. Here’s an overview of the average price range and other factors that affect the cost of the Hunter 99119 remote:

  • Average Price Range: The Hunter 99119 ceiling fan remote control typically costs over $60, depending on where you purchase it and whether you buy from authorized retailers like Amazon or Hunter’s official website.
  • Where to Buy: You can purchase the Hunter 99119 remote from various trusted retailers, including:
    • Amazon: Often has competitive prices and quick shipping.
    • Home Depot: Offers in-store and online purchasing with easy returns.
    • Lowe’s: Another reliable option for Hunter parts and accessories.
  • Affordability vs. Value: Considering the convenience and enhanced functionality that the Hunter 99119 remote provides, it’s a small price to pay for improved comfort and control over your ceiling fan and light settings.

Buy Hunter 99119 Ceiling Fan Remote on Amazon – Affiliate Link

7. Conclusion

The Hunter 99119 Ceiling Fan and Light Universal Remote Control is an essential accessory for Hunter ceiling fans and offers enhanced convenience, energy efficiency, and full control of your fan and light settings. With features like multi-speed control, light dimming, and compatibility with a wide range of fans, this remote ensures that you can create the perfect home environment with ease.

Whether you’re replacing an old remote or upgrading your fan control system, the Hunter 99119 remote is an excellent choice for modern homes seeking smarter, more convenient solutions.

If you’ve encountered issues with your Hunter 99119 remote, follow the troubleshooting steps above or consider contacting Hunter customer support for further help.

For those ready to enhance their ceiling fan experience, purchase the Hunter 99119 remote and enjoy unparalleled comfort and control at the push of a button.

Buy the Hunter 99119 Universal Remote Here – Affiliate Link

Filed Under: Hunter Ceiling Fan Parts

  • « Previous Page
  • 1
  • …
  • 4
  • 5
  • 6
  • 7
  • 8
  • …
  • 27
  • Next Page »


Best Hunter Ceiling Fans

Bestseller No. 1 Hunter 59244 Dempsey Ceiling Fan 44 inches Fresh White
Hunter 59244 Dempsey Ceiling Fan 44 inches Fresh White
Check Price
Bestseller No. 2 Hunter 53090 Builder Deluxe Ceiling Fan 52 inches Brushed Nickel
Hunter 53090 Builder Deluxe Ceiling Fan 52 inches Brushed Nickel
Check Price
Bestseller No. 3 Hunter Fan Company Fan Builder Elite Indoor Ceiling Fan with Pull Chain Control, Metal, New...
Hunter Fan Company Fan Builder Elite Indoor Ceiling Fan with Pull Chain Control, Metal, New...
Check Price

Recent Posts

  • Hunter Ceiling Fan Remote Control Manual
  • Hunter Ceiling Fan Flickering Lights: Causes and Fixes
  • Hunter vs Kichler Ceiling Fans — The Ultimate Battle for Your Ceiling
  • Hunter Fan Company Phone Number & Contact Information (Official Guide)
  • Hunter HVLS Fans: The Definitive Guide to High-Volume, Low-Speed Airflow
  • Hunter 99373 vs 99375: What’s the Difference Between These Remotes?
  • Hunter Fan Remote Battery Replacement
  • Hunter 99123 Fan Remote Troubleshooting & Manual
  • How to Unpair Your Hunter Fan Remote
  • How to Install Hunter Low Profile Ceiling Fan

Legal Information

This site is owned and operated by HunterCeilingfans. Hunter ceiling fans is a participant in the Google Adsense Program, an advertising program designed to provide a means for sites to earn advertising fees by displaying related advertisements.

Hunter ceiling fans also is a participant in Amazon Associates Program. “As an Amazon Associate, I earn from qualifying purchases.”

Hunter ceiling fan is compensated for referring traffic to these companies. Hunter ceiling fans is an independent site with no connections to Hunter and is operated entirely by independent volunteers and writers to provide information.

We are not the manufacturer of Hunter Ceiling Fans, nor are we associated with Hunter in any way. We are a third-party resource website that tries to help site visitors to find valuable information.

Categories

  • Discontinued Hunter Ceiling Fans
  • Hunter Ceiling Fan Parts
  • Hunter Ceiling Fan Reviews
  • Hunter Ceiling Fan Support
  • Hunter Ceiling Fan Troubleshooting
  • Hunter Ceiling Fans
  • Hunter Fan Manuals

Partners

Harbor Breeze