Hunter Ceiling Fans

  • Home
  • Hunter Manuals
  • Hunter Fan Parts
    • Hunter Ceiling Fan Remotes
    • Hunter Ceiling Fan Light Kits
    • Hunter Ceiling Fan Blade Arms
    • Hunter Ceiling Fan Blades
    • Hunter Ceiling Fan Downrods
    • Hunter Ceiling Fan Pull Chains
    • Hunter Ceiling Fan Wall Controls
    • Hunter Ceiling Fans Replacement Globes
  • Hunter Support
  • Hunter Commercial Ceiling Fans

How to Install a Hunter Ceiling Fan Remote Control: A Step-by-Step Guide

April 25, 2025 by admin 2 Comments

If you’ve recently purchased a Hunter ceiling fan and want to enjoy the convenience of remote control operation, this guide is for you! Installing a Hunter ceiling fan remote control allows you to easily adjust the fan’s speed, direction, and lighting from the comfort of your seat. Whether you’re upgrading from a manual pull-chain fan or need to replace a malfunctioning remote, this guide will take you through the installation process step-by-step.

This article covers how to install the Hunter ceiling fan remote, including pairing it with the fan’s receiver, troubleshooting common issues, and tips for making sure everything works perfectly.

1. Tools and Safety Precautions

Before you begin the installation, it’s important to gather the necessary tools and follow safety guidelines to ensure a smooth installation process.

Essential Tools:

  • Step Ladder: If your Hunter ceiling fan is installed at a high ceiling, a ladder will be necessary for easy access.
  • Screwdrivers (Phillips and flathead): You will need these to remove the fan’s canopy and mounting bracket.
  • Plastic Pry Tool: If the fan has any clips securing the trim ring or other parts, this tool helps remove them without causing damage.
  • Voltage Tester (optional): This is to ensure the fan is completely powered off before starting the installation.
  • Pliers (optional): To help with wiring connections.

Safety Precautions:

  • Turn off the power at the wall switch or circuit breaker to avoid electrical hazards during installation.
  • Wear gloves to protect your hands from sharp edges when working with wires or fan components.
  • Wear safety glasses to prevent debris from getting into your eyes when working with the fan motor or other parts.

2. Preparing for Installation

Before you start, ensure you have the necessary equipment and you’ve followed all safety precautions.

Turn Off the Power

Ensure that the power is turned off at the wall switch or circuit breaker to avoid electric shocks or injury while installing the remote control.

Remove Fan Blades and Light Kit (if applicable)

  • If your Hunter ceiling fan has fan blades or a light kit, you may need to remove them temporarily to give you better access to the fan motor and mounting bracket. This step helps reduce the fan’s weight, making it easier to handle and install the remote control.

Locate the Receiver

The Hunter ceiling fan remote control works by connecting a receiver to the fan motor. This receiver is typically located inside the canopy of the fan. If your fan is already installed, remove the canopy to expose the receiver and wiring.

3. Step-by-Step Guide: How to Install the Hunter Ceiling Fan Remote Control

Now that you’re prepared, follow these steps to install the Hunter ceiling fan remote control.

Step 1: Remove the Fan Canopy

  • Using a screwdriver, unscrew the fan canopy from the ceiling. This will give you access to the fan’s wiring and motor.
  • Carefully set the canopy aside, ensuring you don’t damage any wiring or components.

Step 2: Install the New Receiver

  • Take the new receiver that came with the Hunter ceiling fan remote and connect it to the wiring of the fan motor.
  • The receiver should have three wires: one for live (hot), one for neutral, and one for ground. Refer to the remote control’s manual for color-coded wiring instructions.
  • Make sure the connections are secure by tightening the wire nuts. If your fan uses Dip switches for setting the frequency, make sure they match the settings provided with the remote.

Step 3: Secure the Receiver

  • Place the receiver inside the fan canopy. Ensure the receiver is tucked neatly and securely so that it doesn’t interfere with any fan components.
  • After that, reassemble the canopy and screw it back in place.

Step 4: Insert the Battery into the Remote Control

  • The Hunter ceiling fan remote requires a 12V 23A battery for power. Insert the battery into the remote control.
  • Make sure the battery is installed correctly (with the positive side facing up or as indicated).

Step 5: Pair the Remote with the Receiver

  • To pair the remote with the fan receiver, you typically need to press and hold the pairing button on the remote for a few seconds.
  • You will usually hear a beep or see the light blink to confirm the remote has successfully paired with the receiver.
  • If the pairing doesn’t work, check the wiring and try again. Ensure that the Dip switches on the receiver and remote are correctly aligned.

4. Troubleshooting Common Installation Issues

If your Hunter ceiling fan remote control isn’t working as expected, here are some troubleshooting steps:

1. Remote Not Pairing with the Receiver

  • Double-check the Dip switch settings on both the remote and receiver to make sure they match.
  • Ensure that power is restored to the fan, and the battery in the remote is new and properly installed.

2. Fan Not Responding to Remote Commands

  • Verify that the receiver is properly wired and securely connected to the fan motor.
  • Check if the battery in the remote is working and is properly installed.

3. Fan Light Not Responding

  • Make sure the light bulb is properly installed and functional. If using a dimming feature, ensure the light bulb is dimmable.
  • Check the light connections and ensure the receiver is properly controlling the light.

If the troubleshooting steps don’t resolve the issue, consult the Hunter Fan Manual for further help or consider contacting customer service.

5. Conclusion

Installing your Hunter ceiling fan remote control allows you to enjoy enhanced convenience, control, and comfort right from your smartphone or remote. The installation process is straightforward, involving only a few steps to ensure your fan is properly connected and ready for use. Remember to follow the steps carefully, test your remote after installation, and troubleshoot any issues using the tips provided above.

For more information on replacement parts or other Hunter fan models, feel free to explore our Hunter Ceiling Fan Replacement Parts guide.

Filed Under: Hunter Ceiling Fan Support

How to Turn On Hunter Fan Without Remote: A Complete Guide

April 22, 2025 by admin Leave a Comment

If you’ve found yourself in a situation where your Hunter ceiling fan remote isn’t working, or you simply lost your remote, don’t worry. There are still several ways to control your Hunter ceiling fan and keep enjoying a comfortable atmosphere in your home. Whether you need to manually operate your fan or simply adjust the settings, we’ve got you covered.

In this guide, we’ll walk you through the step-by-step process of turning on your Hunter fan without using the remote control. You’ll learn how to operate the fan using manual methods, including the pull chain, wall switch, and ceiling-mounted control, ensuring you stay in control no matter what!

1. Tools and Safety Precautions

Before you begin, make sure you have the necessary tools and safety precautions to operate your Hunter ceiling fan:

Essential Tools:

  • Step Ladder: To safely reach your fan if it’s mounted high.
  • Screwdriver (optional): In case you need to adjust or remove any components.

Safety Precautions:

  • Turn off the power at the wall switch or circuit breaker to avoid any electrical accidents.
  • Wear safety glasses to protect your eyes from any falling debris when working with the fan.
  • Use gloves to protect your hands from sharp edges.

2. How to Turn On a Hunter Ceiling Fan Without Remote

If your Hunter ceiling fan is equipped with a pull chain, wall switch, or ceiling-mounted controls, you can still enjoy its cooling effects without a remote control. Here’s how to turn on your Hunter fan manually.

pull chain not working

Step 1: Locate the Pull Chain

  • Most Hunter ceiling fans are equipped with a pull chain located on the motor housing or downrod. This is the most common manual control for turning the fan on or off and adjusting its speed.

Step 2: Turn on the Fan with the Pull Chain

  • Simply pull the chain once to turn the fan on. Each pull typically toggles through the fan speed settings (low, medium, high). Keep pulling until the fan is set to your desired speed.

Step 3: Adjust Fan Speed Using the Pull Chain

  • If you want to adjust the speed, continue pulling the chain. Each pull will cycle the fan through its speed settings. Some Hunter fans may have separate chains for controlling the fan and the light, so ensure you’re adjusting the right function.

Step 4: Turn the Fan Off Using the Pull Chain

  • To turn off the fan, continue pulling the chain until the fan shuts off. Most fans will toggle off after going through all available speed settings.

3. Using the Wall Switch to Operate the Hunter Fan

In addition to the pull chain, some Hunter fans can be controlled using the wall switch, especially if the fan is wired directly to your home’s electrical system.

Step 1: Locate the Wall Switch

  • Look for the wall switch connected to the Hunter fan. Depending on the fan, this switch may control the fan speed, lighting, or both.

Step 2: Flip the Wall Switch to Turn the Fan On

  • Simply flip the wall switch to the on position to activate the fan. This will turn the fan on at its default speed (typically low or medium). If the fan is connected to a multi-speed wall switch, you can adjust the fan speed.

Step 3: Adjust Fan Speed Using the Wall Switch

  • If the wall switch is multi-speed, use it to increase or decrease the fan speed to your liking.

4. Turning On the Fan Using the Ceiling Mount Switch

Some Hunter fans are designed with a ceiling-mounted switch or fan speed control for easier access and control.

Step 1: Find the Ceiling-Mounted Switch

  • Some ceiling fans come with a mounted switch near the canopy. This is a manual speed control used for operating the fan.

Step 2: Adjust the Fan Speed Using the Ceiling-Mounted Switch

  • Use the ceiling-mounted switch to select the fan speed (low, medium, or high). This switch may also allow you to control the light settings, depending on your model.

5. Troubleshooting Common Issues When Turning on the Hunter Fan Without Remote

If your Hunter ceiling fan isn’t turning on manually, there may be a few issues you need to address. Here are some common problems and how to fix them:

1. Pull Chain Not Working

  • If the pull chain doesn’t work, ensure that the chain is intact and that it’s properly connected to the motor. If the chain is broken, you may need to replace it.

2. Wall Switch Not Turning On the Fan

  • If the wall switch isn’t turning on the fan, check if the switch is functional or if there’s an issue with the wiring. If needed, consult an electrician for wiring issues.

3. Fan Not Turning On

  • If the fan doesn’t respond at all, ensure that power is reaching the fan. Check the breaker box for any tripped breakers. If the power supply is fine, there may be an issue with the fan motor or wiring.

6. Alternative Methods for Turning on the Hunter Ceiling Fan

If you are still having trouble operating your Hunter ceiling fan without the remote, consider using an alternative method:

Use a Universal Fan Remote

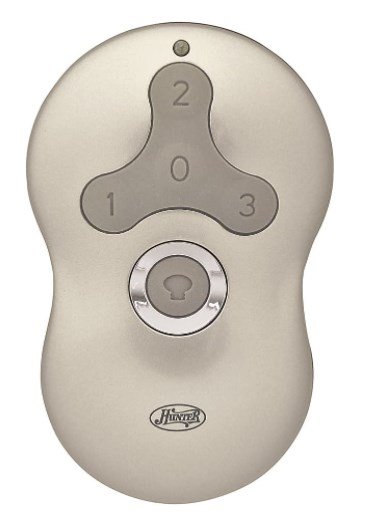
  • A universal fan remote is a great option if you’ve lost or damaged the original remote control. Make sure the remote is compatible with your Hunter ceiling fan and follow the pairing instructions.
Hunter 99123 Indoor Ceiling Fan Universal Remote Control

Install a New Remote Control

  • If the Hunter fan remote is no longer working, you can purchase a replacement remote. Be sure to get the right model for your specific fan. Some models even offer smart fan remote control options, allowing you to control your fan via Wi-Fi or smartphones.

7. Conclusion

You don’t always need the Hunter ceiling fan remote to enjoy your ceiling fan. By using the pull chain, wall switch, or ceiling-mounted switch, you can still control your Hunter fan with ease. These manual methods ensure that your Hunter fan operates smoothly even if the remote is missing or not working.

If you’re looking for more control options or need a replacement remote, Hunter offers a variety of accessories to enhance your fan experience. For replacement parts or any other fan-related needs, don’t hesitate to check out our Hunter Ceiling Fan Replacement Parts Guide.

Filed Under: Hunter Ceiling Fan Troubleshooting

Hunter Ceiling Fan Remote App – A Guide for Hunter Fan Remote App Users

April 21, 2025 by admin Leave a Comment

In today’s fast-paced, tech-driven world, even ceiling fans are becoming smarter! The Hunter Ceiling Fan Remote App is a modern solution for controlling your Hunter ceiling fan with just a tap on your smartphone or tablet. Whether you’re looking to adjust the fan speed, change the lighting, or set up a timer, this smart app provides convenience, efficiency, and comfort at your fingertips.

In this comprehensive guide, we’ll dive deep into the features, installation process, benefits, and troubleshooting tips for the Hunter Fan Remote App. Whether you’re new to smart home technology or just looking to get the most out of your Hunter ceiling fan, this article will provide all the information you need.

smart bond

1. Features of the Hunter Ceiling Fan Remote App

The Hunter Fan Remote App is packed with features designed to improve your overall fan control experience. Below are some of the standout features that make it a valuable addition to your home.

Contemporary Design and Compatibility

  • The Hunter Ceiling Fan Remote App works seamlessly with most Hunter ceiling fans, especially the smart-enabled models that are compatible with Wi-Fi connectivity. This allows you to control your fan from your smartphone, whether you’re in the room or anywhere else in your home.

Fan Speed Control

  • The app allows you to adjust the fan speed with ease. Whether you need a gentle breeze for a cozy evening or maximum airflow during the summer, the three-speed control provides optimal comfort at the touch of a button.

Light Control

  • Adjust the light brightness with the app, whether you want a dim ambiance for a movie night or bright lighting for reading or cleaning. The dimmable feature gives you full control over the light intensity to suit your mood and needs.

Fan Direction Control

  • The Hunter Fan Remote App lets you reverse the fan direction with a simple tap, allowing you to enjoy cooling breezes in summer (downdraft) or warm air circulation in winter (updraft). This feature is perfect for improving year-round comfort and energy efficiency.

Voice Control Integration

  • Alexa and Google Assistant integration allow you to control the Hunter fan and lights using just your voice. This hands-free feature makes it easy to change settings without having to touch your phone or the fan itself.

Scheduling and Timer Functionality

  • Set timers or schedule your Hunter ceiling fan to automatically turn on or off at specific times, creating a customized home environment without any manual effort.

2. How to Install and Set Up the Hunter Ceiling Fan Remote App

Installing and setting up the Hunter Fan Remote App is simple and straightforward. Here’s a step-by-step guide to help you get started.

Step 1: Download the App

  • Go to the App Store (for iPhone) or Google Play (for Android devices).
  • Search for Hunter Fan Remote and download the app to your smartphone or tablet.

Step 2: Create an Account

  • Open the app and create an account to begin syncing with your Hunter ceiling fan.
  • You’ll need to enter a few basic details, such as your name and email address, to complete the setup.

Step 3: Connect Your Fan

  • Ensure your Hunter ceiling fan is powered on and within range of your Wi-Fi network.
  • Follow the on-screen instructions in the app to pair your fan with the app. This typically involves connecting the fan to your Wi-Fi network.

Step 4: Customize Your Settings

  • Once connected, you can name your fan, assign it a room (e.g., living room, bedroom), and customize your fan speed and light settings.

Step 5: Enjoy Remote Control

  • You can now use the Hunter Fan Remote App to control the fan speed, light dimming, and fan direction from anywhere in your home.

If you encounter any issues while setting up, make sure your Wi-Fi connection is stable and that the fan is properly connected to the network.

3. How to Use the Hunter Fan Remote App

Once the app is installed and your fan is connected, you can start using it for everyday control of your ceiling fan. Here’s how you can maximize the app’s functionality:

Fan Speed Control

  • Open the Hunter Fan Remote App and select your ceiling fan. From here, you can adjust the fan speed to low, medium, or high, depending on your comfort level.

Light Adjustment

  • Tap the light icon to adjust the brightness of your fan light. You can dim the light or turn it off completely.

Reversing the Fan Direction

  • To change the fan direction, go to the settings tab in the app and select the reverse fan option. This helps to optimize air circulation in both summer and winter.

Scheduling

  • Schedule your Hunter fan to turn on or off at a specific time. Set a timer to ensure the fan shuts off automatically after a certain number of hours.

Voice Control Integration

  • To control the fan with your voice, link the app to your Alexa or Google Assistant. Once linked, simply say commands like:
    • “Alexa, turn on the fan”
    • “Google, dim the fan light”

If you’re interested in even more advanced smart fan features, the Hunter SimpleConnect Smart Ceiling Fans also offer integration with the Hunter Fan Remote App, allowing you to connect your ceiling fan directly to Wi-Fi for ultimate control. You can read more about Hunter SimpleConnect in our Hunter SimpleConnect Smart Ceiling Fans for detailed instructions on how to use all the smart features with your fan.

4. Troubleshooting Common Issues with the Hunter Fan Remote App

While the Hunter Fan Remote App is generally reliable, you may encounter some issues. Here’s how to troubleshoot common problems:

1. App Not Connecting to the Fan

  • Ensure your fan is powered on and within range of your Wi-Fi network.
  • Check that your Wi-Fi signal is strong and that your phone is connected to the same network.
  • If necessary, reset the app connection or follow the pairing process again.

2. Fan Not Responding to Commands

  • If the fan isn’t responding to the app, check the battery in the remote or make sure the fan is properly paired with the app.
  • Ensure that the fan’s receiver is functioning and that it is receiving commands from the app.

3. Light Control Not Working

  • Verify that the light bulbs are properly installed and compatible with the fan.
  • Check the dimming feature to make sure it’s not stuck at a specific brightness setting.

5. Conclusion

The Hunter Ceiling Fan Remote App provides an easy and convenient way to control your Hunter ceiling fan from anywhere in your home. With fan speed control, light dimming, scheduling, and voice command integration, the app enhances your home’s comfort and convenience. Whether you’re upgrading to a smart fan or looking for an easier way to manage your existing ceiling fan, the Hunter Fan Remote App offers all the features you need. For more information on Hunter ceiling fan parts or to purchase your Hunter fan, check out the Hunter Fan Remote App-Compatible Fans on Amazon.

Filed Under: Hunter Ceiling Fan Support

How to Remove a Hunter Ceiling Fan Canopy

April 21, 2025 by admin Leave a Comment

Removing a Hunter ceiling fan canopy is a necessary step for various maintenance tasks, including fan repairs, light kit installations, or upgrading internal components. The canopy is the covering that houses the motor and electrical components of the fan. Whether you need to replace a part, inspect wiring, or simply clean the fan, learning how to safely and effectively remove the Hunter ceiling fan canopy is essential.

In this guide, we’ll walk you through the step-by-step process for removing your Hunter ceiling fan canopy—with and without screws. This will help you tackle common fan repairs and ensure your fan is always in optimal condition.

tighten the fan blades

Tools and Safety Gear You’ll Need

Before starting any work on your Hunter ceiling fan, make sure you have the following tools and safety gear:

Essential Tools:

  • Screwdrivers (Phillips and flathead): To remove the screws from the fan canopy and motor housing.
  • Pliers: For adjusting or holding wires, if necessary.
  • Ladder: To safely access the ceiling fan.
  • Plastic Pry Tool: For gently prying the canopy off the mounting bracket (especially useful when there are no screws).

Safety Gear:

  • Safety Glasses: To protect your eyes from debris.
  • Gloves: To protect your hands from sharp edges and improve grip.

Before you start working, turn off the power at the wall switch or circuit breaker to ensure safety while handling the fan.

How to Remove a Hunter Ceiling Fan Canopy with Screws

The Hunter ceiling fan canopy is usually secured with screws around the edge, making the removal process straightforward. Here’s how to do it step by step:

Step 1: Turn Off the Power

  • The first and most important step is to turn off the power to your Hunter ceiling fan. Go to your wall switch or circuit breaker and cut the power to avoid electrical hazards.

Step 2: Remove Fan Blades and Light Kit (If Applicable)

  • To make the process easier, remove the fan blades and light kit if your fan has one. This will reduce the fan’s weight and give you better access to the canopy.
  • Simply unscrew the fan blades from the motor housing and disconnect the light kit by unscrewing the screws holding it in place.

Step 3: Unscrew the Canopy from the Ceiling

  • Locate the screws securing the canopy to the ceiling mount. Typically, these screws are around the perimeter of the canopy.
  • Using a Phillips screwdriver, carefully unscrew the fasteners. Once all screws are removed, gently pull the canopy away from the mounting bracket.

Step 4: Disconnect Wiring (If Necessary)

  • If you need to access the fan’s wiring (for repairs or upgrades), disconnect the wiring by carefully loosening the wire nuts. Keep a note of where each wire goes so you can reconnect it later.
  • It’s a good idea to take a picture of the wiring connections for reference.

Step 5: Remove the Canopy

  • Once the screws are removed and the wiring is disconnected, gently lower the canopy. Be careful not to damage any wires or the fan motor.

How to Remove a Hunter Ceiling Fan Canopy Without Screws

In some cases, you might encounter a Hunter ceiling fan canopy that’s not secured with screws. This can happen with some models that use a clip-based design or locking mechanism. Here’s how you can remove the canopy without screws:

Step 1: Turn Off the Power

  • Ensure that the power is completely turned off before you begin any work. Switch off the wall switch or circuit breaker.

Step 2: Inspect for Alternative Mounting Mechanisms

  • Check to see if the canopy is held in place by a locking mechanism or clips. These clips can be found along the edges of the canopy, keeping it securely attached to the ceiling bracket.

Step 3: Use a Plastic Pry Tool

  • Take a plastic pry tool (or a small flathead screwdriver) and gently slide it between the canopy and the mounting bracket. Pry carefully around the perimeter of the canopy, working to loosen the clips or locking mechanism.
  • Be gentle to avoid damaging the canopy or mounting hardware.

Step 4: Slide the Canopy Off

  • Once the canopy is loosened, carefully slide it off the mounting bracket. You might need to wiggle it slightly to ensure it detaches without force.

Step 5: Inspect the Wiring

  • If you plan on replacing components or inspecting wiring, make sure the wires are safely disconnected before proceeding. Keep track of the wiring connections so they can be reconnected properly.

4. Troubleshooting Common Issues When Removing the Canopy

While removing the Hunter ceiling fan canopy, you may encounter a few issues. Here are some common problems and how to fix them:

1. Stuck or Jammed Canopy

  • Solution: If the canopy is stuck, check for any hidden screws or clips that may be holding it in place. Use a plastic pry tool gently to loosen the canopy from the ceiling bracket.

2. Broken or Stripped Screws

  • Solution: If the screws securing the canopy are broken or stripped, use a screw extractor tool to remove them, or try using pliers to unscrew the remaining part of the screw.

3. Canopy Not Coming Off After Removing Screws

  • Solution: If the canopy is still stuck after unscrewing, check for hidden locking mechanisms or clips that could be preventing the canopy from detaching. Apply gentle pressure using a pry tool.

Conclusion

Removing your Hunter ceiling fan canopy is a straightforward process that allows you to perform maintenance, repair, or replacement tasks. Whether you need to remove it with screws or without, the process can be easily accomplished with the right tools and safety precautions.

By following this step-by-step guide, you’ll ensure that your Hunter ceiling fan continues to run smoothly and efficiently. If you encounter any problems or need replacement parts, be sure to visit our Hunter Ceiling Fan Replacement Parts Guide for more information.

Filed Under: Hunter Ceiling Fan Troubleshooting

Hunter Fan Canopy Trim Ring Removal: Step-by-Step Guide

April 21, 2025 by admin Leave a Comment

If you’re looking to replace, clean, or simply upgrade the trim ring on your Hunter ceiling fan, this guide will help you do so quickly and effectively. The trim ring is a decorative component that surrounds the canopy of your fan. It adds a polished look to the fan while covering the mounting hardware. Over time, trim rings can become dirty, damaged, or outdated, necessitating a replacement or removal.

In this article, we’ll guide you through Hunter fan canopy trim ring removal. Whether you’re upgrading the look of your fan or accessing internal parts for maintenance, the steps are easy to follow.

How to Remove a Canopy Trim Ring on a Hunter Ceiling Fan

1. Tools and Safety Gear

Before diving into the trim ring removal process, make sure you have the necessary tools and safety precautions.

Essential Tools:

  • Flathead screwdriver or plastic pry tool: These tools are essential for gently prying off the trim ring without damaging the fan or the surrounding components.
  • Phillips screwdriver: If the trim ring is secured with screws, you’ll need this tool to unscrew the fasteners.
  • Ladder: To safely access the fan and reach the ceiling.
  • Pliers (optional): If you need to manipulate or handle wires.

Safety Precautions:

  • Turn off the power to the ceiling fan at the wall switch or circuit breaker before beginning any work.
  • Wear safety glasses to protect your eyes from any falling debris or particles.
  • Use gloves to protect your hands from sharp edges, especially when handling the trim ring or fan components.

2. Why You Might Need to Remove the Canopy Trim Ring

There are several reasons why you may need to remove the trim ring from your Hunter fan:

  • Cleaning: Dust, dirt, and debris tend to accumulate on the fan blades and trim ring, which can affect your fan’s performance and aesthetic. Regular cleaning can help improve airflow and the overall look of the fan.
  • Upgrading or Replacing the Trim Ring: If your trim ring is damaged, outdated, or you simply want a new finish, removing it will allow you to install a new one.
  • Accessing Internal Parts: If you need to perform maintenance on the fan motor, light kit, or other internal components, removing the trim ring will give you better access to these parts.

3. Step-by-Step Guide: How to Remove a Hunter Fan Canopy Trim Ring

Removing the Hunter fan canopy trim ring is typically a straightforward task, whether it’s secured with screws or just clips. Here’s a step-by-step guide to help you with the process.

Step 1: Turn Off the Power

Safety is paramount. Ensure the power to your Hunter ceiling fan is off by switching off the wall switch or circuit breaker before starting any work.

Step 2: Remove Fan Blades and Light Kit (if applicable)

If your fan has blades or a light kit, it’s best to remove them before tackling the trim ring. This will make the fan lighter and give you better access to the canopy. To remove the blades:

  • Unscrew the fan blades from the motor housing.
  • If necessary, unscrew the light kit and disconnect any wiring.

Step 3: Inspect the Trim Ring for Securing Mechanisms

Before removing the trim ring, carefully inspect it to determine how it is secured. There are typically two common ways trim rings are attached to the canopy:

  1. Clips: Some trim rings are held in place by clips that snap into the fan’s motor housing.
  2. Screws: Other models might secure the trim ring with small screws around the edge.

If the trim ring uses clips, you can proceed to the next step. If it uses screws, you’ll need to unscrew them first.

Step 4: Removing the Trim Ring

  • If the Trim Ring is Secured with Clips:
    • Use a plastic pry tool (or a small flathead screwdriver) to gently pry around the edge of the trim ring. Work your way around the ring slowly to avoid damaging the fan or trim. Apply gentle pressure to loosen the clips, and once loose, pull the trim ring off.
  • If the Trim Ring is Secured with Screws:
    • Use a Phillips screwdriver to remove the screws securing the trim ring. Unscrew each screw and keep them aside in a safe place. After all screws are removed, gently pull the trim ring off the canopy.

Step 5: Inspect the Trim Ring for Damage or Dirt

Once the trim ring is removed, check for any damage such as cracks or dirt buildup. If it’s in good condition and you’re planning to reinstall it, clean the trim ring and surrounding fan components.

Step 6: Reinstall or Replace the Trim Ring

If you’re planning to replace the trim ring or upgrade to a new one, simply align the new ring with the canopy and secure it either by snapping the clips back into place or tightening the screws (depending on your model).

4. Troubleshooting Common Issues with Canopy Trim Ring Removal

If you run into any issues during the removal of the Hunter fan canopy trim ring, here are some common problems and their solutions:

  • Stuck Trim Ring: If the trim ring is stuck and won’t come off, check for any hidden clips or screws that you may have missed. Use a plastic pry tool to gently work around the ring, making sure not to damage the finish.
  • Damaged Trim Ring: If the trim ring is cracked or broken during removal, you can purchase a replacement trim ring from the Hunter Fan website or authorized retailers.
  • Fan Wobbling After Reinstallation: If the fan starts wobbling after you reinstall the trim ring, make sure that the fan blades are securely attached and that all screws are tightened correctly.

5. Where to Buy Replacement Hunter Fan Canopy Trim Rings

If you need to replace your Hunter fan canopy trim ring, you can purchase a genuine replacement from the following places:

  • Official Hunter Fan Website: For genuine Hunter parts, visit the official Hunter ceiling fans website to find the right trim ring for your fan model.
  • Amazon: Amazon often has competitive pricing for Hunter ceiling fan parts, including trim rings.
  • Home Depot or Lowe’s: These retailers also stock Hunter replacement parts for ceiling fans, including trim rings.

Shop Hunter Trim Ring on Amazon – Affiliate Link

6. Conclusion

Removing your Hunter fan canopy trim ring is an important task that helps maintain your fan’s appearance and functionality. Whether you need to clean the trim ring, replace it, or upgrade it, following the steps outlined in this guide will ensure a smooth and safe removal process. Remember to use the right tools, follow the safety instructions, and check for any issues during reinstallation. If you encounter any problems or need replacement parts, visit trusted retailers or the official Hunter Fan website. For more tips on fan maintenance and replacement parts, be sure to visit our Hunter ceiling Fan Replacement Parts Guide for further assistance.

Filed Under: Hunter Ceiling Fan Troubleshooting

  • « Previous Page
  • 1
  • …
  • 5
  • 6
  • 7
  • 8
  • 9
  • …
  • 27
  • Next Page »


Best Hunter Ceiling Fans

Bestseller No. 1 Hunter 59244 Dempsey Ceiling Fan 44 inches Fresh White
Hunter 59244 Dempsey Ceiling Fan 44 inches Fresh White
Check Price
Bestseller No. 2 Hunter 53090 Builder Deluxe Ceiling Fan 52 inches Brushed Nickel
Hunter 53090 Builder Deluxe Ceiling Fan 52 inches Brushed Nickel
Check Price
Bestseller No. 3 Hunter Fan Company Fan Builder Elite Indoor Ceiling Fan with Pull Chain Control, Metal, New...
Hunter Fan Company Fan Builder Elite Indoor Ceiling Fan with Pull Chain Control, Metal, New...
Check Price

Recent Posts

  • Hunter Ceiling Fan Remote Control Manual
  • Hunter Ceiling Fan Flickering Lights: Causes and Fixes
  • Hunter vs Kichler Ceiling Fans — The Ultimate Battle for Your Ceiling
  • Hunter Fan Company Phone Number & Contact Information (Official Guide)
  • Hunter HVLS Fans: The Definitive Guide to High-Volume, Low-Speed Airflow
  • Hunter 99373 vs 99375: What’s the Difference Between These Remotes?
  • Hunter Fan Remote Battery Replacement
  • Hunter 99123 Fan Remote Troubleshooting & Manual
  • How to Unpair Your Hunter Fan Remote
  • How to Install Hunter Low Profile Ceiling Fan

Legal Information

This site is owned and operated by HunterCeilingfans. Hunter ceiling fans is a participant in the Google Adsense Program, an advertising program designed to provide a means for sites to earn advertising fees by displaying related advertisements.

Hunter ceiling fans also is a participant in Amazon Associates Program. “As an Amazon Associate, I earn from qualifying purchases.”

Hunter ceiling fan is compensated for referring traffic to these companies. Hunter ceiling fans is an independent site with no connections to Hunter and is operated entirely by independent volunteers and writers to provide information.

We are not the manufacturer of Hunter Ceiling Fans, nor are we associated with Hunter in any way. We are a third-party resource website that tries to help site visitors to find valuable information.

Categories

  • Discontinued Hunter Ceiling Fans
  • Hunter Ceiling Fan Parts
  • Hunter Ceiling Fan Reviews
  • Hunter Ceiling Fan Support
  • Hunter Ceiling Fan Troubleshooting
  • Hunter Ceiling Fans
  • Hunter Fan Manuals

Partners

Harbor Breeze