Hunter Ceiling Fans

  • Home
  • Hunter Manuals
  • Hunter Fan Parts
    • Hunter Ceiling Fan Remotes
    • Hunter Ceiling Fan Light Kits
    • Hunter Ceiling Fan Blade Arms
    • Hunter Ceiling Fan Blades
    • Hunter Ceiling Fan Downrods
    • Hunter Ceiling Fan Pull Chains
    • Hunter Ceiling Fan Wall Controls
    • Hunter Ceiling Fans Replacement Globes
  • Hunter Support
  • Hunter Commercial Ceiling Fans

How to Reprogram Your Hunter Fan Remote

July 15, 2025 by admin Leave a Comment

Reprogramming your Hunter fan remote is the essential step to re-establish communication when your fan and remote aren’t responding to each other, especially after a battery change, power outage, or a remote reset. This process, often involving a sequence of power cycles or pressing specific ‘learn’ buttons, creates a fresh connection, ensuring your remote can reliably control your ceiling fan’s functions like speed, light, and direction. Understanding the correct method for your specific Hunter remote and fan model is key to restoring seamless comfort control.

When You Need to Reprogram Your Hunter Fan Remote

While a simple Hunter Fan Remote Reset can resolve minor glitches, reprogramming is a more comprehensive step often required to re-establish a stable connection. You’ll typically need to reprogram your Hunter fan remote in these situations:

  • After Replacing Remote Batteries: Even with new batteries, the remote might lose its paired signal, requiring a fresh connection.
  • Following a Power Outage: Power surges or prolonged outages can sometimes disrupt the fan’s receiver memory.
  • After a Remote Reset: A reset often clears the remote’s memory, necessitating reprogramming to pair it anew with the fan.
  • Installing a New Remote Control: Any new remote, even a replacement for an existing one, needs to be programmed to your fan’s receiver.
  • Installing a New Hunter Ceiling Fan: The remote included with a new fan needs to be paired for the first time.
  • Erratic Fan Behavior: If your fan is turning on/off randomly, changing speeds without command, or the light is flickering, reprogramming can often resolve these communication issues.
  • Interference Issues: In rare cases, strong interference from other devices might necessitate reprogramming to find a clearer signal channel.

Preparation is Key: Before You Begin Reprogramming

Before you dive into the reprogramming steps, a little preparation can save you time and frustration. Taking these preliminary actions will ensure you have everything ready for a smooth process:

  1. Safety First: Turn Off Power: Always begin by turning off the power to your ceiling fan at the circuit breaker. This is crucial for your safety, especially if you need to access the fan’s canopy for dip switches or a ‘learn’ button.
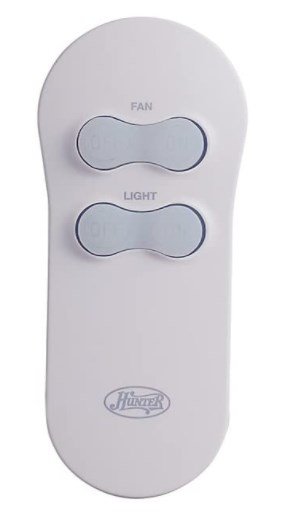
  2. Check Your Remote Type: Hunter fans use different types of remotes and receivers. Older models often use physical “dip switches” inside the remote and the fan’s receiver. Newer models usually rely on a ‘learn’ button synchronization. Knowing your model type helps determine the correct method.
  3. Locate Your Fan’s Receiver: The receiver is the small electronic box installed inside the fan’s canopy (the cover against the ceiling). You might need a ladder and a screwdriver to access it, as it contains the dip switches or ‘learn’ button.
  4. Fresh Batteries: Ensure your remote has fresh batteries. A low battery can cause programming failures.

Expert Insight: Many issues that appear to be programming failures are actually due to old batteries or power not being completely cut at the breaker. Always double-check these simple steps first!

Step-by-Step Reprogramming Guide (Common Methods)

Hunter fans utilize a few primary methods for remote reprogramming. Identify which method applies to your fan/remote combination and follow the steps carefully.

Method 1: Dip Switch Reprogramming (Older Models)

This method involves setting matching codes on both the remote and the fan’s receiver unit.

  1. Cut Power to Fan: Turn off the circuit breaker for your fan.
  2. Access Remote Dip Switches: Open the battery compartment on your remote. You’ll see a series of small switches (usually 4 to 8).
  3. Access Receiver Dip Switches: Carefully lower the fan canopy. Locate the receiver box inside. It will also have a set of dip switches.
  4. Match Codes: Using a small pen or screwdriver, ensure the dip switches on both the remote and the receiver are set to the exact same pattern (e.g., if remote is 1-on, 2-off, 3-on, receiver must be the same). You can change the pattern if you suspect interference from a neighbor’s fan.
  5. Restore Power: Secure the receiver back in the canopy and turn the circuit breaker back on.
  6. Test: Your fan remote should now be reprogrammed. Test all functions.

Method 2: ‘Learn’ Button Reprogramming (Newer Models)

Newer Hunter remotes often use a ‘learn’ button for synchronization, making the process simpler as there are no physical switches to match.

  1. Cut Power to Fan: Turn off the circuit breaker for your fan for at least 30 seconds to a minute.
  2. Restore Power: Turn the circuit breaker back on.
  3. Press ‘Learn’ Button on Remote: Within 60 seconds of restoring power to the fan, press and hold the ‘Learn’ button on your remote control for approximately 3-5 seconds. This button is often located in the battery compartment or on the side of the remote. You might hear a beep from the fan or see its light flash, indicating successful pairing.
  4. Test: Immediately test your fan’s functions with the remote.

Method 3: Power Cycle Reprogramming (Select Models/Universal Remotes)

Some remotes, particularly universal ones or specific Hunter models, can be reprogrammed solely through a power cycling sequence without needing to access the receiver.

  1. Cut Power to Fan: Turn off the circuit breaker for your fan for a full minute.
  2. Restore Power: Turn the circuit breaker back on.
  3. Quick Power Cycle (Optional): For some models, you may need to quickly turn the fan’s wall switch (if applicable) OFF and ON twice within 5 seconds.
  4. Press Fan Speed Button: Within a short window (typically 30-60 seconds) of the final power restoration, press and hold the “Fan Speed” button (or the “Light” button on some models) on your remote for 5-10 seconds. The fan or light may blink or cycle through speeds to confirm.
  5. Test: Test all remote functions.

Troubleshooting Reprogramming Issues

If your Hunter fan remote still isn’t working after attempting to reprogram it, don’t despair. Here are some common troubleshooting steps:

  • Double-Check Batteries: Always, always ensure the remote has fresh, correctly inserted batteries. This is the most common oversight.
  • Verify Power Cycle Timing: The 30-60 second window for pressing the ‘learn’ button or initiating the power cycle sequence is critical. Be precise.
  • Confirm Dip Switch Match (if applicable): Re-verify that the dip switches on both the remote and the receiver are identical. Even one switch out of place will prevent pairing.
  • Remote Range & Obstructions: Ensure you are within a reasonable range of the fan (usually within 20-30 feet) and that there are no major obstructions blocking the signal.
  • Interference: Temporarily turn off other wireless devices in the room (e.g., Wi-Fi routers, other smart home devices) to rule out signal interference.
  • Receiver Malfunction: In rare cases, the fan’s receiver unit itself might be faulty and unable to accept new programming.
  • Consult Your Fan Manual: Your specific Hunter fan model’s user manual will always contain the most accurate and detailed reprogramming instructions. If you’ve lost it, you can usually find it on the official Hunter Fan website by searching your model number.
  • When All Else Fails: If you’ve exhausted all troubleshooting steps and your remote still won’t reprogram, it might indicate a more serious issue with the remote itself or the fan’s receiver unit. For persistent issues, our Hunter Ceiling Fan Remote Not Working guide provides further troubleshooting.

Maintaining Your Remote’s Connection

To minimize the need for frequent reprogramming, consider these tips:

  • Use Quality Batteries: Invest in good quality alkaline batteries and replace them annually, even if the remote seems to be working.
  • Avoid Power Fluctuations: If your area experiences frequent power surges or outages, consider installing a whole-house surge protector to protect your fan’s electronics.
  • Keep Remote Dry: Protect your remote from moisture, as water damage is a common cause of malfunction.

Conclusion: Regain Seamless Fan Control

Reprogramming your Hunter fan remote is a vital skill for maintaining the comfort and convenience of your home. Whether you’re dealing with a new installation, a battery change, or erratic behavior, these step-by-step guides empower you to re-establish a reliable connection. By understanding the different programming methods and troubleshooting common issues, you can ensure your Hunter ceiling fan always responds to your command, keeping your space perfectly comfortable. If you encounter persistent problems, don’t hesitate to reach out to Hunter Ceiling Fans Customer Service for expert assistance.

Filed Under: Hunter Ceiling Fan Troubleshooting

Hunter Fan Remote Reset Guide

July 10, 2025 by admin Leave a Comment

Experiencing issues with your Hunter ceiling fan remote can quickly disrupt your home comfort, leaving you unable to adjust fan speeds or lighting. This guide will walk you through the essential Hunter fan remote reset process, a common and often simple troubleshooting step that can restore seamless control, clearing glitches and re-establishing communication between your remote and fan. Understanding when and how to perform this reset can save you time and frustration, getting your smart fan back to perfect operation.

When to Reset Your Hunter Fan Remote

A remote control reset is your first line of defense against many common fan control issues. You should consider resetting your Hunter fan remote whenever you experience unexplained unresponsiveness, erratic behavior, or a complete loss of function. This simple procedure clears temporary glitches in the remote’s internal memory and attempts to re-establish a fresh communication link with your ceiling fan’s receiver, much like restarting a computer resolves minor software issues.

Here are the key scenarios that indicate it’s time for a remote reset:

  • Unresponsive Buttons: You press buttons, but nothing happens on the fan or light.
  • Erratic Fan Behavior: The fan turns on or off unexpectedly, changes speed without command, or the light flickers.
  • After Battery Replacement: Even with new batteries, sometimes a remote needs a reset to properly connect.
  • Interference Issues: Other devices in your home might be causing signal interference. A reset can sometimes help the remote find a clearer signal path.
  • After a Power Outage: Power fluctuations can sometimes desynchronize the remote from the fan’s receiver.
  • Initial Setup Problems: If your remote isn’t pairing correctly during the initial fan installation, a reset is a good preliminary step before full reprogramming.

Expert Tip: Before attempting a full reset, ensure the simplest solution isn’t overlooked: check and replace the remote’s batteries. Weak batteries are a leading cause of unresponsive remotes and can mimic more complex issues.

Step-by-Step Guide: How to Perform a Hunter Fan Remote Reset

Performing a basic reset on your Hunter fan remote is typically a straightforward process that involves cycling the power to the fan itself. This often clears any temporary communication errors and prepares the remote for a fresh connection. Always ensure safety first by turning off power at the breaker before manipulating any electrical components.

Follow these steps carefully:

  1. Turn Off Power at the Circuit Breaker: Go to your home’s electrical panel and locate the circuit breaker that controls the power to your ceiling fan. Flip the breaker to the “OFF” position. This is crucial for safety and to properly cut power to the fan’s receiver unit.
  2. Wait for [Time]: Allow the power to remain off for at least 30 seconds to a full minute. This ensures that the fan’s internal receiver completely loses power and any residual charge is dissipated, effectively “resetting” its state.
  3. Turn Power Back On: Return to your circuit breaker and flip the breaker back to the “ON” position.
  4. Perform Remote Reset (If Applicable): Some Hunter remotes have a small “reset” button, often recessed to prevent accidental presses. If your remote has one (check your remote’s manual), press and hold it with a paperclip or pen tip for 5-10 seconds immediately after restoring power to the fan.
  5. Test the Remote: Within 60 seconds of restoring power (or performing the remote’s specific reset), try operating the fan. Press the fan “ON” button or try adjusting the speed. The fan or light should respond.

Important Note: This basic power-cycling method is often sufficient for a simple reset. However, a reset alone may not be enough if the remote has completely lost its pairing with the fan’s receiver. In such cases, the next crucial step is reprogramming.

After the Reset: What’s Next?

If your Hunter fan remote responds correctly after the reset, congratulations – you’ve resolved the issue! However, in many instances, especially after a complete loss of function or during initial setup, a simple reset acts as a precursor to a more comprehensive reprogramming process. Think of the reset as clearing the slate, and reprogramming as writing new instructions.

If your remote still isn’t working or responding consistently after the reset, it likely needs to be reprogrammed to the fan’s receiver. This involves specific steps to establish a new, stable communication link. Our article provides a detailed guide on how to reprogram hunter fan remote (this link will guide you through the full pairing process).

Troubleshooting Common Reset Issues

Sometimes, a straightforward reset might not yield the desired results. If your Hunter fan remote remains unresponsive or problematic after following the reset steps, consider these common troubleshooting tips:

  • Check Batteries Again: Even if you just replaced them, ensure they are inserted with correct polarity and are fresh. Try a different set of new batteries to rule out a faulty pack.
  • Verify Power to the Fan: Ensure the fan itself is receiving power. If the fan isn’t turning on via the pull chain (if it has one) or wall switch, the issue might be with the fan’s power supply, not just the remote.
  • Remote Dip Switches: Older Hunter fan remotes and receivers use “dip switches” (small physical switches inside the remote battery compartment and the fan’s receiver unit) to set a unique code. If these switches are not set identically on both the remote and the receiver, the remote will not work. You may need to access the fan’s canopy to check the receiver’s dip switches.
  • Clear Obstructions: Ensure there are no physical obstructions between the remote and the fan’s receiver. Large furniture or walls can sometimes block the signal.
  • Interference from Other Devices: Other remote-controlled devices, smart home hubs, or even neighbor’s fans operating on similar frequencies can cause interference. Try temporarily powering off other nearby wireless devices to see if the issue resolves.
  • Consult Your Manual: Every Hunter fan model can have slightly different remote reset and programming procedures. Always refer to your specific fan model’s user manual for precise instructions. You can usually find these on the official Hunter Fan website by searching for your model number.

For broader troubleshooting steps covering various remote issues, including physical damage or receiver problems, you can also consult our detailed guide: Hunter Ceiling Fan Remote Not Working.

When to Call a Professional

While many remote issues can be resolved with a simple reset or reprogramming, there are times when it’s best to call a qualified electrician or a Hunter authorized service technician. Prioritize your safety and avoid attempting complex electrical repairs yourself.

You should consider professional help if:

  • No Power to the Fan: The fan has no power, even after checking the circuit breaker and wall switch. This could indicate faulty wiring or a problem with the fan’s internal components.
  • Persistent Unresponsiveness: You’ve tried all reset and reprogramming steps, including checking batteries and dip switches, but the fan still doesn’t respond to the remote or wall controls.
  • Physical Damage: The remote or the fan’s receiver unit shows signs of physical damage (e.g., water damage, burnt smell).
  • Intermittent Power Issues: The fan works sometimes but frequently cuts out, suggesting a deeper electrical problem.
  • Safety Concerns: You are uncomfortable working with electrical wiring or troubleshooting electrical components.

For official support and further troubleshooting, you can always reach out to Hunter Ceiling Fans Customer Service.

Conclusion: Regain Control with a Simple Reset

A non-responsive Hunter fan remote can be a minor annoyance, but often, the solution is as straightforward as a simple reset. By understanding the common scenarios that call for a reset and following the step-by-step guide, you can frequently resolve minor communication glitches and restore full control over your ceiling fan’s comfort settings. While a reset often primes the system for optimal function, remember that reprogramming might be the next essential step to re-establish a solid connection. Empower yourself with these troubleshooting techniques to keep your Hunter fan running smoothly and enhance your home’s comfort year-round.

Filed Under: Hunter Ceiling Fan Troubleshooting

Hunter Symphony Smart Ceiling Fan

July 5, 2025 by admin Leave a Comment

Is the Hunter Symphony truly intelligent, or merely a fan with a remote? In the rapidly evolving landscape of smart home technology, the Hunter Symphony smart ceiling fan stands out as a genuine leader, seamlessly blending elegant design with advanced connectivity and intuitive control. This isn’t just a fan you can turn on with your phone; it’s a sophisticated environmental control device that integrates deeply into your digital ecosystem, offering unparalleled convenience, energy efficiency, and personalized comfort.

The Hunter Symphony – A Pinnacle of Smart Fan Technology

The Hunter Symphony is a premium smart ceiling fan, defined by its seamless SIMPLEconnect Wi-Fi technology for app and voice control (Alexa, Google Assistant, Apple HomeKit), and its integrated WhisperWind® DC motor for quiet, efficient operation. Beyond basic remote functions, it offers advanced intelligent scheduling, energy monitoring, remote access, and future-proof firmware updates. Its sophisticated design, combined with robust smart features, makes it a top-tier choice for enhancing modern living spaces, providing precise climate and lighting control that adapts to your lifestyle.

Redefining Comfort: What Makes the Hunter Symphony a True Smart Ceiling Fan?

The journey from a basic ceiling fan to a “smart” one involves more than just adding a remote control. A truly smart ceiling fan like the Hunter Symphony incorporates sophisticated technologies that allow it to interact with your home’s network, respond to voice commands, adapt to your routines, and offer capabilities far beyond traditional manual operation. The Symphony distinguishes itself by integrating these advanced features directly, eliminating the need for cumbersome external hubs or bridges, and providing a cohesive, user-friendly experience.

At its core, the Symphony’s intelligence stems from several key components working in harmony:

  1. Built-in Wi-Fi Technology: Unlike fans that rely on proprietary radio frequencies or Bluetooth, the Symphony features integrated 2.4GHz Wi-Fi. This direct connection to your home’s existing wireless network is fundamental, enabling stable, widespread control from anywhere with an internet connection, not just within remote range.
  2. The Hunter SIMPLEconnect App: This intuitive mobile application (available for iOS and Android) is the central command hub for your Symphony fan. It translates your finger taps into fan commands, provides visual feedback, and unlocks the fan’s deeper smart capabilities.
  3. Native Voice Assistant Integration: The Symphony boasts full, certified compatibility with the industry’s leading voice platforms: Amazon Alexa, Google Assistant, and Apple HomeKit (Siri). This allows for truly hands-free control and effortless integration into your existing smart home routines.
  4. Internet of Things (IoT) Connectivity: As an IoT device, the Symphony isn’t a standalone gadget. It’s designed to connect, communicate, and potentially interact with other smart devices in your home, participating in more complex automation scenarios. This connectivity also enables over-the-air (OTA) firmware updates, ensuring your fan stays current with new features and improvements.
  5. Advanced Microcontrollers and Sensors: Beyond simple on/off circuits, the Symphony’s internal processors manage complex algorithms for precise motor control, light dimming, scheduling, and potentially even environmental sensing (depending on specific model variations and future updates).

Together, these elements transform the Hunter Symphony from a mere appliance into an intelligent partner in climate control and ambiance management, seamlessly blending into your modern lifestyle.

Advanced Smart Features of the Hunter Symphony

While the foundational smart technologies are impressive, the true power of the Hunter Symphony lies in the advanced features they enable, designed to enhance convenience, comfort, and efficiency.

1. Intelligent Scheduling and Automation

The Symphony goes beyond simple timer functions. Through the SIMPLEconnect app, you can create intricate schedules and automation routines:

  • Time-Based Scheduling: Program the fan to turn on at a specific speed and light level before you wake up, gradually cool your home in the afternoon, or dim lights as bedtime approaches. This is ideal for managing comfort throughout your daily routine without manual intervention.
  • “Away Mode” / Occupancy Simulation: For enhanced home security, activate an “Away Mode” through the app. The Symphony can then randomly turn its light (and potentially the fan) on and off throughout the day or evening, creating the illusion that someone is home, deterring potential intruders.
  • Integration with Smart Home Routines: Via Alexa, Google Assistant, or HomeKit, the Symphony can be incorporated into broader smart home routines. For instance, a “Good Morning” routine could simultaneously turn on your fan, open your smart blinds, and start your coffee maker.

2. Energy Monitoring and Optimization

The Symphony’s integrated smart technology isn’t just about convenience; it’s also about efficiency.

  • Real-time Energy Tracking: The SIMPLEconnect app can often provide insights into your fan’s energy consumption. By tracking usage patterns, you can identify opportunities to optimize operation and reduce electricity costs.
  • ENERGY STAR Certification: Many Hunter Symphony models are ENERGY STAR certified, meaning they meet strict energy efficiency guidelines set by the EPA. This certification, combined with smart scheduling and control, can lead to significant reductions in your utility bills compared to traditional fans. The efficient DC motor (discussed below) plays a key role here.

3. Seamless Voice Control Experience

The native integration with Amazon Alexa, Google Assistant, and Apple HomeKit provides a truly hands-free way to manage your fan.

  • Amazon Alexa Integration:
    • “Alexa, turn on the living room fan.”
    • “Alexa, set the living room fan to medium.”
    • “Alexa, dim the living room light to 50 percent.”
    • “Alexa, turn off the fan light.”
    • You can also include the Symphony in Alexa Routines, such as “Alexa, goodnight,” to turn off the fan, dim lights, and lock doors.
  • Google Assistant Integration:
    • “Hey Google, turn on the fan in the bedroom.”
    • “Hey Google, set the fan speed to 3.”
    • “Hey Google, make the fan light brighter.”
    • “Hey Google, is the fan on?”
    • Integrate into Google Home Routines for synchronized actions with other devices.
  • Apple HomeKit (Siri) Integration:
    • “Hey Siri, turn on the fan.”
    • “Hey Siri, set the fan to high.”
    • “Hey Siri, dim the light in the living room.”
    • Control via the Apple Home app, allowing for automation based on location, time of day, or other HomeKit accessory states. Enjoy enhanced privacy and security with HomeKit.

4. Future-Proofing Through Firmware Updates

Unlike non-smart fans that remain static, the Hunter Symphony’s IoT connectivity allows for over-the-air (OTA) firmware updates. This means your fan can:

  • Receive bug fixes and performance enhancements.
  • Gain new features or expanded compatibility with evolving smart home platforms.
  • Stay secure against potential vulnerabilities. This “smarter over time” capability ensures your investment in a Symphony fan continues to provide value and cutting-edge functionality.

Design Meets Intelligence: The Hunter Symphony’s Aesthetic and Performance

Beyond its technological prowess, the Hunter Symphony is also a statement piece, blending modern aesthetics with Hunter’s century-plus legacy of performance engineering.

  • Elegant, Contemporary Design: The Symphony series is characterized by its sleek lines, often featuring gracefully curved blades and a minimalist motor housing. It’s designed to complement contemporary and modern interiors, becoming a subtle yet sophisticated focal point. It comes in various finishes (e.g., matte black, fresh white, brushed nickel) to match your decor.
  • Optimal Blade Span: Hunter Symphony fans typically feature blade spans (e.g., 54 inches) ideal for large living rooms, great rooms, master bedrooms, and open-concept areas, ensuring effective air circulation across expansive spaces.
  • WhisperWind® DC Motor Technology: This is a cornerstone of the Symphony’s premium performance. DC (Direct Current) motors are inherently more efficient and quieter than traditional AC motors.
    • Ultra-Quiet Operation: The WhisperWind® DC motor ensures powerful airflow with virtually imperceptible noise, making it perfect for bedrooms or areas where silence is golden.
    • Energy Efficiency: DC motors consume significantly less power, contributing to the Symphony’s ENERGY STAR certification and your energy savings.
    • Precise Speed Control: DC motors allow for a wider range of speed settings and more precise adjustments via the app, compared to the fixed speeds of many AC fans.
  • Integrated Dimmable LED Lighting: Most Symphony models feature an integrated LED light kit, providing efficient and customizable illumination.
    • Energy Savings: LEDs are highly energy-efficient and have a long lifespan, reducing replacement frequency and electricity consumption.
    • Full-Range Dimming: Control the light output from bright task lighting to a soft, ambient glow directly from the app, remote, or voice commands, creating the perfect atmosphere for any occasion.
    • Sleek Profile: Integrated light kits often contribute to the fan’s overall sleek and flush profile, avoiding bulky external light fixtures.

The Symphony’s combination of elegant design and superior performance ensures it doesn’t just add smart features; it enhances the living experience through both form and function.

From Box to Breeze: Installation and Smart Setup for Your Hunter Symphony

While the Hunter Symphony is a smart device, its physical installation adheres to standard ceiling fan procedures. Hunter designs its products with user-friendliness in mind, but for safety and optimal performance, professional installation by a qualified electrician is always recommended.

1. Physical Installation

For comprehensive, step-by-step guidance on the physical mounting and wiring of your Hunter ceiling fan, including essential safety precautions and best practices, please refer to our dedicated guide: Hunter Ceiling Fans Installation. This article covers everything you need to know about securely installing your fan before proceeding with its smart setup.

2. Connecting to the Hunter SIMPLEconnect App

Once the physical installation is complete and power is restored, the smart setup begins:

  1. Download the App: Install the Hunter SIMPLEconnect app on your iOS or Android smartphone or tablet. This essential application transforms your mobile device into a powerful command center for your smart fan. For a more detailed look at the app’s features and how it enhances your control experience, explore our article on the Hunter Ceiling Fan Remote App.
  2. Create Account & Log In: Follow the prompts to create a Hunter user account or log in if you already have one.
  3. Add Your Fan: The app will guide you through the process of adding your new Symphony fan. This usually involves:
    • Selecting “Add New Device.”
    • Power cycling the fan (turning the breaker OFF for 10-20 seconds, then ON again). This puts the fan’s receiver into a pairing mode.
    • Within a short time window (e.g., 60 seconds after power is restored), follow the app’s specific instructions. This might involve holding a “Learn” button on the physical remote (if provided with your Symphony) or tapping “Next” in the app when prompted to “discover” the fan.
    • The fan’s light may blink or the fan may briefly twitch to confirm successful pairing with the app.
  4. Connect to Wi-Fi: The app will then prompt you to connect your Symphony fan to your home’s 2.4GHz Wi-Fi network. Ensure your phone is also connected to the same Wi-Fi network during this process. Enter your Wi-Fi password when requested.
  5. Name Your Fan & Assign to Room: Give your fan a friendly name (e.g., “Living Room Fan,” “Master Bedroom Fan”) and assign it to a virtual “room” within the app. This is crucial for voice control.

3. Integrating with Voice Assistants (Alexa, Google, HomeKit)

After successfully setting up the Symphony in the Hunter SIMPLEconnect app, link it to your preferred voice assistant:

  • For Amazon Alexa: Open the Alexa app, go to “Skills & Games,” search for “Hunter SIMPLEconnect,” enable the skill, and link your Hunter account. Then, tell Alexa to “Discover Devices.”
  • For Google Assistant: Open the Google Home app, tap the “+” icon, select “Set up device,” then “Works with Google,” and search for “Hunter SIMPLEconnect.” Link your account.
  • For Apple HomeKit: If your Symphony model is HomeKit-certified, open the Apple Home app, tap the “+” icon, select “Add Accessory,” and scan the HomeKit code located on the fan or in its manual.

For more detailed programming and setup specific to Hunter fans and remotes, including troubleshooting pairing issues:

  • Consult our in-depth article on how to program a hunter ceiling fan remote.

Troubleshooting Your Hunter Symphony Smart Fan: Common Issues & Solutions

Even with advanced smart technology, occasional glitches can occur. If your Hunter Symphony isn’t responding as expected to app, voice, or remote commands, here are targeted troubleshooting steps:

  1. Wi-Fi Connectivity Check:
    • Is Your Wi-Fi On? Ensure your home Wi-Fi network (specifically the 2.4 GHz band) is active and functioning correctly.
    • Signal Strength: Is the fan located too far from your Wi-Fi router? Weak Wi-Fi signal can cause intermittent connectivity. Consider a Wi-Fi extender if necessary.
    • Router Restart: Try restarting your home Wi-Fi router and modem. Wait a few minutes for them to fully reboot, then check the fan connection.
    • Band Steering: If your router has “band steering” (combining 2.4GHz and 5GHz into one SSID), try temporarily disabling it to ensure the fan connects to the 2.4GHz band during setup.
  2. Power Cycle the Fan: This is often the quickest fix for minor smart glitches. Turn the power to your Symphony fan OFF at the circuit breaker for at least 30 seconds (some recommend 1 minute), then turn it back ON. Allow a moment for the fan to reconnect to Wi-Fi.
  3. Hunter SIMPLEconnect App Issues:
    • App Status: Check the app to see if the fan appears “Offline.”
    • Force Close & Reopen: Close the SIMPLEconnect app completely and reopen it.
    • App Updates: Ensure your Hunter SIMPLEconnect app is updated to the latest version from your app store.
    • Relink Account: If the app itself seems disconnected, try logging out of your Hunter account within the app and logging back in.
  4. Voice Assistant Connection:
    • Device Discovery: If you’ve recently renamed your fan, added a new smart speaker, or had a network outage, ask your voice assistant to “Discover Devices” again.
    • Skill/Action Linked: Ensure the “Hunter SIMPLEconnect” skill (Alexa) or “Works with Google” action (Google Home) is still enabled and linked to your Hunter account in the respective voice assistant app.
    • Voice Commands: Ensure you’re using the correct and exact voice commands.
  5. Firmware Updates: Occasionally, an issue might be resolved by a fan firmware update. Check the Hunter SIMPLEconnect app to see if there are any pending firmware updates for your Symphony fan and install them.
  6. Remote Control (Physical) Not Working: If the physical remote that came with your Symphony also isn’t working, this points to a different set of issues. For comprehensive troubleshooting related to the remote itself, including battery checks and re-pairing:
    • Please consult our dedicated guide on Hunter Ceiling Fan Remote Not Working.
  7. Factory Reset (Last Resort): As a last resort, if all else fails, a factory reset of the fan’s receiver might be necessary. This typically involves a very specific power cycle sequence. Consult your Symphony fan’s original manual or Hunter’s online support for precise factory reset instructions. Be aware that a factory reset will erase all smart settings and require you to re-pair and re-connect the fan to your Wi-Fi and smart home platforms from scratch.

Conclusion: The Hunter Symphony – A Smart Investment in Home Comfort

The Hunter Symphony smart ceiling fan is far more than just an air-moving appliance; it’s a sophisticated, connected device designed to elevate your home’s comfort, convenience, and energy efficiency. With its robust SIMPLEconnect Wi-Fi technology, seamless integration with major voice assistants, intuitive app control, and advanced features like intelligent scheduling and energy monitoring, the Symphony truly embodies what a “smart” ceiling fan should be.

Its elegant design, combined with Hunter’s legendary WhisperWind® DC motor for quiet and powerful performance, ensures that you’re not just getting smart features, but also a high-quality, durable fan. By understanding its capabilities and leveraging its advanced connectivity, the Hunter Symphony allows you to command your indoor climate and lighting with unprecedented ease, adapting to your lifestyle and making your home truly intelligent. Investing in a Hunter Symphony is investing in a future where comfort is effortlessly smart.

Find the Hunter Symphony Smart Fan on Amazon

Filed Under: Hunter Ceiling Fans

Hunter Smart Ceiling Fans – Revolutionizing Home Comfort

July 1, 2025 by admin Leave a Comment

Hunter smart ceiling fans offer unparalleled convenience, energy efficiency, and seamless integration into modern smart homes. Powered primarily by Hunter’s HunterSMART™ Wi-Fi technology, these fans can be controlled via smartphone apps, voice commands (through Amazon Alexa, Google Assistant, Apple HomeKit), and traditional remote controls. Key benefits include automated scheduling, energy savings, precise climate control, and enhanced home security. When choosing, consider size, location (indoor/outdoor), features like integrated LED lighting, and compatibility with your existing smart home ecosystem.

Elevate Your Space: Discover Hunter Smart Ceiling Fans

Beyond merely circulating air, today’s ceiling fans offer a sophisticated blend of comfort and cutting-edge technology. Hunter, a brand synonymous with quality and innovation in ceiling fans, has stepped into the smart home era with a range of intelligent models designed to revolutionize how you control your indoor climate and lighting. Hunter smart ceiling fans move beyond simple pull chains or basic remotes, integrating seamlessly with your digital life to offer unparalleled convenience, energy efficiency, and personalized comfort.

This comprehensive guide will explore what makes a Hunter fan “smart,” the myriad benefits they bring to your home, highlight popular models (while reserving deep dives for specific fans like the Symphony for future articles), and provide guidance on choosing and controlling the perfect smart fan for your space.

The Brains Behind the Breeze: What Makes a Hunter Fan “Smart”?

At the heart of Hunter’s smart ceiling fan ecosystem is their proprietary HunterSMART™ Wi-Fi technology. This built-in system allows the fan to connect directly to your home’s Wi-Fi network (typically 2.4 GHz), enabling a world of intelligent control.

Here’s what this smart integration brings to the table:

  • Smartphone App Control: The Hunter SIMPLEconnect app (available for iOS and Android) becomes your central command center. This essential application transforms your mobile device into a powerful command center for your smart fan, acting as the primary interface for the HunterSMART™ system. From anywhere in your home—or even remotely, if your Wi-Fi allows—you can:
    • Turn the fan on/off.
    • Adjust fan speeds (often with more granular control than traditional remotes).
    • Control the integrated LED light (on/off, dimming).
    • Change fan direction (summer downdraft/winter updraft).
    • Set schedules for fan and light operation.
    • Enable specialized modes like “Breeze” or “Away” mode.
    • For a more detailed look at the app’s features and how it enhances your control experience, explore our article on the Hunter ceiling fan remote app.
  • Voice Control Integration:HunterSMART™ fans are among the few Wi-Fi-enabled ceiling fans that boast broad compatibility with leading smart home voice assistants, including:
    • Amazon Alexa: “Alexa, turn on the living room fan.”
    • Google Assistant: “Hey Google, set the bedroom fan to medium.”
    • Apple HomeKit: “Hey Siri, dim the kitchen light.” This hands-free control offers ultimate convenience, especially when your hands are full or you’re relaxing.
  • Traditional Remote Included: Despite their advanced capabilities, most Hunter smart fans still come with a dedicated handheld remote control, offering a familiar, reliable backup for direct control without needing your phone or voice assistant.
  • Built-in Receiver: The smart technology components, including the Wi-Fi module and remote receiver, are typically pre-installed within the fan’s housing, streamlining the installation process compared to adding separate smart modules.

This multifaceted approach to control ensures you can manage your home’s comfort in the way that best suits your lifestyle.

Beyond the Spin: The Benefits of Owning a Hunter Smart Ceiling Fan

Investing in a Hunter smart ceiling fan offers a host of advantages that extend far beyond basic air circulation.

  • Ultimate Convenience & Control: Imagine adjusting your fan speed or turning off the light from your bed, the couch, or even while you’re away from home. No more fumbling for pull chains or hunting for a misplaced remote. The smartphone app provides a centralized, intuitive interface for all fan functions.
  • Energy Efficiency & Cost Savings:
    • Automated Scheduling: Program your fan to turn on only when needed (e.g., during peak heat hours, or when you typically arrive home) and turn off automatically when you leave or when temperatures drop.
    • Smart Thermostat Integration: While not direct, integrating your smart fan with routines from your smart thermostat can create a more efficient cooling strategy, allowing you to potentially raise your AC setpoint by a few degrees while maintaining comfort, thus reducing energy consumption. Many HunterSMART™ fans are also ENERGY STAR certified, indicating superior energy efficiency.
  • Enhanced Home Security: The “Away” mode feature in the Hunter SIMPLEconnect app can simulate occupancy by turning lights on and off at random intervals, adding an extra layer of security when you’re on vacation.
  • Personalized Comfort: Adjust fan speeds and light levels precisely to your preference, creating the perfect ambiance for any activity, from reading to entertaining. The multi-speed options and dimmable LEDs give you granular control.
  • Quiet Operation: Hunter is renowned for its WhisperWind® motor technology, ensuring powerful airflow with minimal noise. Many smart models also feature efficient DC motors, which are even quieter and more energy-efficient.
  • Modern Aesthetics: Hunter smart fans come in a wide array of styles, finishes, and sizes, seamlessly blending into any décor, from contemporary minimalist to classic farmhouse. The integrated light kits often provide sleek, flush designs.

Popular Hunter Smart Ceiling Fan Models

Hunter offers a diverse range of smart ceiling fans, each designed to meet different aesthetic preferences and room requirements. While the core smart technology (SIMPLEconnect Wi-Fi) remains consistent, models vary in size, design, features, and indoor/outdoor rating.

Here are some popular Hunter smart fan models frequently found on platforms like Amazon, showcasing the breadth of their smart offerings:

  • Hunter Aerodyne Smart Fan:
Hunter Aerodyne Ceiling Fan
  • Overview: A modern and sleek indoor smart fan, often available in 52-inch and 60-inch blade spans, making it suitable for large rooms. It features integrated LED lighting and a clean, contemporary design.
  • Key Features: ENERGY STAR certified, SureSpeed® Guarantee for powerful airflow, WhisperWind® motor for quiet operation, compatible with Alexa, Google Home, and Apple HomeKit.
  • Ideal For: Living rooms, great rooms, large bedrooms, modern spaces.
  • Check Hunter Aerodyne on Amazon
  • Hunter Gravity Smart Fan:
Hunter Gravity Ceiling Fan
  • Overview: Designed for very large spaces, the Gravity fan comes in substantial sizes like 60-inch and 72-inch. It typically features six blades and a powerful DC motor to move a significant amount of air.
  • Key Features: ENERGY STAR certified, SureSpeed® Guarantee, WhisperWind® DC Motor, integrated dimmable LED light, smart home compatibility.
  • Ideal For: Great rooms, open-concept living areas, master suites where maximum airflow is desired.
  • Check Hunter Gravity on Amazon
  • Hunter Aeronaut Outdoor Smart Fan:
Hunter Aeronaut Ceiling Fan
  • Overview: This fan extends smart home convenience to your covered outdoor spaces. With damp-rated components, it’s suitable for patios, porches, and sunrooms. It typically features a sleek, minimalist three-blade design.
  • Key Features: Damp-rated for outdoor use, ENERGY STAR certified, SureSpeed® Guarantee, reversible DC motor, integrated LED light, smart home compatibility.
  • Ideal For: Covered patios, screened porches, large bathrooms, outdoor kitchens.
  • Check Hunter Aeronaut on Amazon
  • Hunter Signal Smart Fan:
    • Overview: A refined and contemporary indoor fan that integrates seamlessly into smart home setups. It often features a four-blade design and an integrated LED light, combining style with smart functionality.
    • Key Features: WhisperWind® motor, integrated LED light, compatible with major smart home platforms including HomeKit.
    • Ideal For: Bedrooms, home offices, medium to large living spaces.
    • Check Hunter Signal on Amazon
  • Hunter Symphony Smart Fan:
Hunter Symphony Ceiling Fan
  • Overview: A modern smart fan known for its graceful, sweeping blades and elegant lines, offering a soft modern aesthetic. It’s part of the Hunter SIMPLEconnect Wi-Fi Collection and suitable for large indoor living spaces.
  • Key Features: WhisperWind® motor, integrated dimmable LED light, SIMPLEconnect Wi-Fi technology for smart home integration.
  • Note: While the Symphony is a popular smart fan model, its specific features and detailed setup will be covered extensively in a dedicated article, so we will not delve into further specifics here.
  • Check Hunter Symphony on Amazon

Choosing the Right Hunter Smart Fan for Your Home

Selecting the ideal Hunter smart ceiling fan involves considering several factors beyond just its “smart” capabilities:

  1. Room Size: Fan blade span is critical for effective air circulation.
    • Small rooms (up to 100 sq ft): 30-48 inches
    • Medium rooms (100-225 sq ft): 44-54 inches
    • Large rooms (225-400 sq ft): 52-60 inches
    • Great rooms (over 400 sq ft): 60-72+ inches (like the Gravity model)
  2. Location (Indoor/Outdoor): Ensure the fan’s rating matches its intended environment.
    • Dry-rated: For indoor use only (bedrooms, living rooms).
    • Damp-rated: For covered outdoor spaces exposed to humidity but not direct water (patios, sunrooms, large bathrooms). The Aeronaut is an example.
    • Wet-rated: For direct exposure to rain or water (pergolas, open porches). Hunter offers fewer wet-rated smart fans, so check carefully.
  3. Mounting Type: Hunter fans offer various mounting options:
    • Downrod: Standard for most ceilings (9 ft or higher).
    • Flush Mount: For lower ceilings (8 ft or less).
    • Angled Mount: For vaulted or sloped ceilings.
  4. Light Kit & Design: Decide if you need an integrated LED light kit, and choose a design and finish that complements your room’s aesthetic. Hunter offers designs from modern to traditional.
  5. Smart Home Ecosystem: While Hunter’s SIMPLEconnect works with Alexa, Google Home, and HomeKit, consider which platform you primarily use to ensure seamless integration.

Installing and Setting Up Your Hunter Smart Ceiling Fan

While Hunter smart fans are designed for user-friendly installation with pre-paired components, a professional electrician is always recommended for ceiling fan installation to ensure safety and proper wiring. The smart functionality often relies on the correct physical setup.

For detailed instructions on the physical installation, including wiring the receiver:

  • Refer to our comprehensive guide on Hunter Ceiling Fans Installation.

Once the fan is physically installed, the next crucial step is connecting it to your home’s Wi-Fi and integrating it with your chosen smart home platform. This typically involves:

  1. Downloading the Hunter SIMPLEconnect App: This is the primary app for setup and control within the HunterSMART™ ecosystem.
  2. Creating an Account: If you don’t have one already.
  3. Adding Your Fan: The app will guide you through the process, often involving power cycling the fan and then pairing it via a “Learn” button or specific in-app prompts.
  4. Connecting to Wi-Fi: The app will help you connect your fan to your home’s 2.4 GHz Wi-Fi network.
  5. Linking to Voice Assistants: Once connected to the Hunter app, you can link your Hunter account to Amazon Alexa, Google Home, or Apple HomeKit through their respective apps or smart assistant setup routines.

For detailed instructions on programming your remote and connecting your smart fan to your app:

  • Consult our in-depth article on how to program a hunter ceiling fan remote.

Troubleshooting Your Hunter Smart Fan

Even smart devices can encounter occasional hiccups. If your Hunter smart ceiling fan isn’t responding as expected, consider these common troubleshooting steps related to smart functionality:

  • Check Wi-Fi Connectivity:
    • Ensure your home Wi-Fi (2.4 GHz band) is active and the signal is strong at the fan’s location.
    • Check if other devices on the same Wi-Fi network are working correctly.
    • Restart your Wi-Fi router.
  • Power Cycle the Fan: Turn the power to the fan OFF at the circuit breaker for 30 seconds to a minute, then turn it back ON. This can resolve temporary communication glitches.
  • Re-sync the App/Remote: If the fan responds to the physical remote but not the app or voice commands, try re-syncing the fan within the Hunter SIMPLEconnect app.
  • Voice Assistant Re-discovery: If you’ve renamed your fan or made significant changes, you might need to “discover devices” again within your Alexa, Google Home, or HomeKit app.
  • App Updates: Ensure your Hunter SIMPLEconnect app and your smart home assistant apps are updated to their latest versions.
  • Firmware Updates: Occasionally, Hunter may release firmware updates for your fan via the SIMPLEconnect app. Ensure your fan’s firmware is up to date.

For more general troubleshooting tips if your remote or fan isn’t working:

  • Read our guide on Hunter Ceiling Fan Remote Not Working and Hunter ceiling fan not working.

Conclusion: Embrace the Intelligence of Hunter Smart Fans

Hunter smart ceiling fans represent the pinnacle of modern home comfort, blending timeless design with cutting-edge technology. By offering intuitive control through apps, voice commands, and traditional remotes, coupled with features like energy efficiency and intelligent scheduling, these fans transform a simple appliance into a vital component of your connected home. Whether you’re upgrading an existing fan or planning a new installation, a Hunter smart ceiling fan provides not just a breeze, but an intelligent, effortless living experience.

Filed Under: Hunter Ceiling Fans

Instructions for Programming Hunter Fan Remote

June 20, 2025 by admin Leave a Comment

Programming your Hunter fan remote ensures seamless control over your comfort. The core process involves identifying your remote type (Learn Button or Dip Switch), preparing by checking batteries and cycling power, and then performing a specific button sequence or switch matching. Beyond basic pairing, many Hunter remotes offer advanced programming for features like light dimming, fan timers, and breeze modes. Always consult your specific fan and remote manual for precise instructions, as models vary. If you encounter issues, troubleshooting often involves repeating steps, checking power, and verifying settings.

A Hunter ceiling fan with a remote offers unmatched convenience, allowing you to fine-tune your environment with the press of a button. But before you can enjoy that perfect breeze or ideal lighting, your remote needs to speak the same language as your fan. This guide dives deep into the precise steps for programming your Hunter fan remote, ensuring you gain full control without the frustration. We’ll cover various remote types, essential pre-programming checks, and how to unlock advanced features beyond simple on/off.

Understanding Your Hunter Remote: The First Step to Programming

Before diving into button sequences or switch settings, it’s crucial to identify the “species” of Hunter remote you possess. Hunter has evolved its remote control technology over the years, leading to different programming methods.

  1. “Learn Button” Remotes (Modern & Universal Kits): These are commonly found in newer Hunter fans or universal remote kits. They feature a small, often recessed “Learn” or “Pair” button, usually located inside the battery compartment. This method relies on a timed signal transmission from the remote to the fan’s receiver. Examples include models like 99122, 27157, 99372.
  2. “Dip Switch” Remotes (Older Models & Universal Kits): Characterized by a row of tiny physical switches (typically 4 or 5) inside the battery compartment. These “dip switches” (Dual In-line Package switches) are used to set a unique frequency code that must match a corresponding set of dip switches on the fan’s receiver unit, located within the ceiling canopy. This method ensures your remote only controls your fan and not your neighbor’s!
  3. Pre-Paired Remotes: In rare instances, particularly if you bought a fan and remote as a matched set, they might come pre-programmed from the factory. While convenient, even these may require re-pairing if the remote is replaced or if power is extensively cycled.

Identifying your remote type is paramount, as the programming instructions differ significantly. If you’re unsure, check your fan or remote’s original manual, or look for visible switches or a button once you open the battery compartment.

Preparing for Programming: Essential Pre-Checks

Before you begin the programming ritual, a few critical preparatory steps can save you time and frustration. Skipping these often leads to failed programming attempts.

  1. Fresh Batteries are Non-Negotiable: This cannot be stressed enough. Even seemingly new batteries can be underpowered. Always install a brand new set of the correct type (e.g., AAA, 9V, A23) into your remote. Ensure they are inserted with the correct polarity (+/-). A weak battery is the single most common reason for failed programming.
  2. Power Cycle Your Fan (The System Reset): Most Hunter remote programming sequences require a complete power cycle of the fan. This resets the fan’s receiver, putting it into a “listening” or pairing mode for a short window.
    • Locate your fan’s circuit breaker: Go to your home’s main electrical panel and locate the breaker that controls the ceiling fan you intend to program.
    • Turn power OFF: Flip the breaker to the fully OFF position.
    • Wait: Allow at least 10-20 seconds (some recommend up to a minute) for any residual power to dissipate from the fan’s receiver. This “rest period” is crucial.
    • Turn power ON: Flip the breaker firmly back to the ON position.
    • Be Ready: The fan’s receiver will typically enter a pairing window for a limited time (often 60 seconds to 3 minutes) after power is restored. Have your remote ready to perform the programming sequence immediately.
    • Caution: Always confirm you are turning off the correct breaker. If unsure, consult a qualified electrician.
  3. Set Fan Pull Chains (If Applicable): If your Hunter fan has pull chains for speed and light, set them to their “on” positions before programming. Typically, the fan speed chain should be set to its highest setting, and the light chain (if present) should be turned ON. This ensures the remote can take full control. It’s often recommended to then shorten or remove these chains after successful programming to prevent accidental interference.

Programming by Remote Type: Step-by-Step Instructions

The exact programming method depends on your Hunter remote’s design. Follow the instructions for your specific type.

Method 1: Programming Hunter Remotes with a “Learn Button”

This is the most common method for modern Hunter remotes and many universal kits.

  1. Prepare the Fan: Complete the “Preparing for Programming” steps above: ensure fresh batteries in the remote and perform the power cycle by turning the fan’s circuit breaker OFF for 10-20 seconds, then back ON.
  2. Access the Learn Button: Immediately after restoring power to the fan, open your remote’s battery compartment. Locate the small “Learn” or “Pair” button.
  3. Press the Learn Button: Within the specified time window (usually 60 seconds to 3 minutes) after turning the power back on, press and immediately release the “Learn” or “Pair” button. Do not hold it down.
    • Note: Some Hunter remotes (e.g., specific 99xxx series or newer models) might require you to press and hold a combination of buttons (like “FAN OFF” and “HIGH,” or “FAN” and “LIGHT”) for 3-5 seconds instead of a dedicated “Learn” button. Always check your specific remote’s manual if a “Learn” button isn’t obvious or the quick press doesn’t work.
  4. Confirm Pairing: The fan’s light should blink once (or multiple times), or the fan might twitch/beep to indicate successful pairing. This is the fan acknowledging the remote’s signal.
  5. Test Functions: Immediately test all remote functions: turn the fan on/off, adjust speeds, turn the light on/off, and dim the light. If all functions work, your remote is successfully programmed.

Method 2: Programming Hunter Remotes with “Dip Switches”

This method is typical for older Hunter models or certain universal remote kits where a “Learn” button is absent. It involves physically matching frequency codes.

  1. Prepare the Fan: Perform the “Preparing for Programming” steps: ensure fresh batteries in the remote, and note that a power cycle is typically not part of the dip switch matching sequence itself, but good to do as a general system reset if you’re troubleshooting.
  2. Access Remote Dip Switches: Open the remote’s battery compartment. You will see a small row of tiny switches (usually 4 or 5) that can be set to either an “up” or “down” position. Note the current pattern.
  3. Access Receiver Dip Switches: This step requires accessing the fan’s receiver unit, which is located inside the ceiling canopy (the dome-shaped cover where the fan attaches to the ceiling).
    • Safety First: Turn the power OFF at the circuit breaker before attempting to access the receiver.
    • Remove Canopy: Carefully unscrew and lower the fan canopy to expose the wiring and the receiver unit.
    • Locate Receiver Dip Switches: Find the matching set of tiny switches on the receiver unit.
  4. Match the Patterns: The pattern of the dip switches on the remote must exactly match the pattern on the receiver. Use a small screwdriver, pen tip, or tweezers to carefully set the switches on both the remote and the receiver to an identical sequence (e.g., up-down-up-up).
    • Pro Tip for Multiple Fans: If you have more than one remote-controlled fan in your home, ensure each fan/remote pair has a unique dip switch pattern to prevent one remote from controlling multiple fans simultaneously. Avoid common patterns like all “up” or all “down.”
  5. Reassemble and Restore Power: Carefully tuck the receiver and wiring back into the canopy, re-secure the canopy, and then turn the power back ON at the circuit breaker.
  6. Test Functions: Test all functions of your remote. If the patterns match correctly, your remote should now control your Hunter fan.

Unlocking Advanced Features: Programming Beyond Basic Control

Many Hunter remotes offer more than just on/off and speed control. You can often program additional features to enhance your comfort and energy efficiency. The availability of these features depends on your specific Hunter fan and remote model. Always refer to your product’s manual for the precise instructions, as methods vary significantly.

  • Light Dimming Activation:
    • Some Hunter remotes require a specific sequence to enable the dimming feature, especially when switching between incandescent and LED bulbs, or if it was accidentally disabled.
    • Common methods involve:
      • Cycling the light on/off quickly.
      • Holding the light button while simultaneously pressing another button (e.g., “Fan Off” or “Learn”).
      • Pressing and holding both “Up” and “Down” light/fan arrows for several seconds.
    • Once enabled, dimming typically involves pressing and holding the light button (or dedicated dimming buttons) to cycle through brightness levels.
    • Expert Tip: Ensure you’re using dimmable LED bulbs if you intend to use the dimming function. Non-dimmable LEDs can flicker or be damaged if a dimming signal is sent.
  • Fan Timers: Some remotes allow you to set a timer for the fan to automatically turn off after a set duration (e.g., 1, 2, 4, 8 hours). This is great for saving energy or using the fan while falling asleep.
    • Programming usually involves pressing a dedicated “Timer” button repeatedly to cycle through the available time settings.
    • The fan might flash its light or beep to confirm the timer setting.
  • Breeze Mode/Natural Wind Simulation: Advanced Hunter remotes might include a “breeze” or “natural wind” mode that varies fan speed to mimic natural outdoor breezes.
    • This is often activated by a dedicated button press. Some models might allow programming the intensity or pattern of this mode via sequential presses or menu options.
  • Power-On Light (POL) Setting: This feature determines whether the fan’s light automatically turns on when power is restored (e.g., after a power outage or if controlled by a wall switch).
    • Programming POL usually involves a sequence of button presses while holding the “Learn” button or a combination of light/fan buttons. Check your manual for exact steps to toggle this feature on or off.

Troubleshooting Hunter Remote Programming Failures

Even with careful attention, programming can sometimes be tricky. If your Hunter remote isn’t responding after following the steps:

  • Repeat Precisely: The most common reason for failure is incorrect timing or button sequence. Go back through the steps for your specific remote type, paying meticulous attention to the “within X seconds” windows and whether to press and release or press and hold.
  • Re-Check Batteries: Seriously, try another new set of batteries. It’s a surprisingly frequent solution.
  • Power Cycle Again: A longer power cycle (e.g., 1 full minute off) can sometimes clear any lingering signals in the receiver.
  • Verify Dip Switches (if applicable): If your remote uses dip switches, double-check that the pattern on the remote exactly matches the pattern on the receiver in the fan’s canopy. A single switch out of place will prevent communication.
  • Is Your Remote “Learning”? For “Learn Button” remotes, ensure the fan is actually entering pairing mode (e.g., the light blinks) after the power cycle. If not, your power cycling might be too fast or too slow.
  • Fan Pull Chains: Confirm the fan’s pull chains are still set to high speed and the light is on, as they can override remote commands if not positioned correctly.
  • Receiver Issues: If multiple attempts fail, the issue might lie with the fan’s receiver unit or the remote itself. For broader troubleshooting beyond programming, refer to our comprehensive guide on Hunter Ceiling Fan Remote Not Working.

Next Steps: Installation and Further Details

This guide has focused on the crucial programming steps. If you are installing a new Hunter fan remote kit, or replacing a receiver, you will first need to handle the physical installation. For detailed instructions on this, please consult our guide on how to install a hunter ceiling fan remote. Once the physical installation is complete, return to this guide for the programming sequence.

For more in-depth knowledge on optimizing your fan’s functionality, our article how to program a hunter ceiling fan remote covers the steps of customizing your fan’s behavior, including advanced feature programming.

Conclusion: Mastering Your Hunter Fan Remote

Programming your Hunter fan remote is a gateway to effortless comfort and control in your home. By understanding the different remote types, diligently performing the pre-programming checks, and precisely following the pairing or dip switch matching instructions, you can quickly establish reliable communication between your remote and fan. Don’t shy away from exploring the advanced programming features that many Hunter remotes offer, as they provide an even greater level of personalization for your living space. With these instructions, you’re well-equipped to master your Hunter ceiling fan remote and enjoy the perfect breeze, every time.

Filed Under: Hunter Ceiling Fan Troubleshooting

  • « Previous Page
  • 1
  • 2
  • 3
  • 4
  • 5
  • …
  • 27
  • Next Page »


Best Hunter Ceiling Fans

Bestseller No. 1 Hunter 59244 Dempsey Ceiling Fan 44 inches Fresh White
Hunter 59244 Dempsey Ceiling Fan 44 inches Fresh White
Check Price
Bestseller No. 2 Hunter 53090 Builder Deluxe Ceiling Fan 52 inches Brushed Nickel
Hunter 53090 Builder Deluxe Ceiling Fan 52 inches Brushed Nickel
Check Price
Bestseller No. 3 Hunter Fan Company Fan Builder Elite Indoor Ceiling Fan with Pull Chain Control, Metal, New...
Hunter Fan Company Fan Builder Elite Indoor Ceiling Fan with Pull Chain Control, Metal, New...
Check Price

Recent Posts

  • Hunter Ceiling Fan Remote Control Manual
  • Hunter Ceiling Fan Flickering Lights: Causes and Fixes
  • Hunter vs Kichler Ceiling Fans — The Ultimate Battle for Your Ceiling
  • Hunter Fan Company Phone Number & Contact Information (Official Guide)
  • Hunter HVLS Fans: The Definitive Guide to High-Volume, Low-Speed Airflow
  • Hunter 99373 vs 99375: What’s the Difference Between These Remotes?
  • Hunter Fan Remote Battery Replacement
  • Hunter 99123 Fan Remote Troubleshooting & Manual
  • How to Unpair Your Hunter Fan Remote
  • How to Install Hunter Low Profile Ceiling Fan

Legal Information

This site is owned and operated by HunterCeilingfans. Hunter ceiling fans is a participant in the Google Adsense Program, an advertising program designed to provide a means for sites to earn advertising fees by displaying related advertisements.

Hunter ceiling fans also is a participant in Amazon Associates Program. “As an Amazon Associate, I earn from qualifying purchases.”

Hunter ceiling fan is compensated for referring traffic to these companies. Hunter ceiling fans is an independent site with no connections to Hunter and is operated entirely by independent volunteers and writers to provide information.

We are not the manufacturer of Hunter Ceiling Fans, nor are we associated with Hunter in any way. We are a third-party resource website that tries to help site visitors to find valuable information.

Categories

  • Discontinued Hunter Ceiling Fans
  • Hunter Ceiling Fan Parts
  • Hunter Ceiling Fan Reviews
  • Hunter Ceiling Fan Support
  • Hunter Ceiling Fan Troubleshooting
  • Hunter Ceiling Fans
  • Hunter Fan Manuals

Partners

Harbor Breeze