Hunter Ceiling Fans

  • Home
  • Hunter Manuals
  • Hunter Fan Parts
    • Hunter Ceiling Fan Remotes
    • Hunter Ceiling Fan Light Kits
    • Hunter Ceiling Fan Blade Arms
    • Hunter Ceiling Fan Blades
    • Hunter Ceiling Fan Downrods
    • Hunter Ceiling Fan Pull Chains
    • Hunter Ceiling Fan Wall Controls
    • Hunter Ceiling Fans Replacement Globes
  • Hunter Support
  • Hunter Commercial Ceiling Fans

Minka vs Hunter Ceiling Fans

March 29, 2025 by admin Leave a Comment

Minka vs Hunter Ceiling Fans: A Comprehensive Comparison

If you’re in the market for a new ceiling fan, you’ve likely considered some of the top names in the industry—Minka-Aire and Hunter. Both brands have earned their reputation for reliable performance, aesthetic designs, and energy-efficient technologies, but which one is better for your home?

In this ultimate guide, we’ll break down every critical factor in choosing between Minka-Aire and Hunter ceiling fans. We’ll compare them based on quality, performance, noise levels, energy efficiency, smart features, warranties, price, and aesthetics to help you make the best choice for your needs.

Quick Comparison Table: Minka-Aire vs Hunter Ceiling Fans

FeatureMinka-AireHunter
QualityPremium, high-end materialsExcellent quality with budget-friendly options
Noise LevelWhisper-quiet with DC motorsQuiet with WhisperWind® motor but may have slight noise in budget models
Airflow EfficiencyExcellent airflow with unique blade designsGood airflow, slightly less efficient than Minka-Aire
Smart FeaturesModels available with Wi-Fi, app control, and voice assistantsModels available with Wi-Fi, app control, and voice assistants
WarrantyLifetime on motors, lifetime or 2 years on other partsLifetime on motors, 1-2 years on other parts
Price Range$400 – $1000+Under $100 – $500
Design StylesModern, contemporary, luxury finishesClassic, modern, rustic, and farmhouse styles
Energy EfficiencyENERGY STAR rated, uses DC motorsENERGY STAR rated, uses efficient WhisperWind® motors
AvailabilityHigher-end, premium storesWidely available in big-box retailers and online
InstallationEasy DIY with modern mounting systemsSimple installation with adjustable downrods

1. Quality and Durability: Minka-Aire vs Hunter Ceiling Fans

Both Minka-Aire and Hunter manufacture ceiling fans with high-quality materials designed for long-term durability. However, the differences in their manufacturing processes may influence your choice.

Minka-Aire Quality and Durability

  • Premium Materials: Minka-Aire is synonymous with luxury design. They use materials like genuine wood, aircraft-grade metals, handcrafted glass, and high-end finishes to create stunning, durable fans that are built to last.
  • Long-lasting Design: Their fans are made to be durable and elegant, providing exceptional craftsmanship that can withstand years of use without losing their appeal.
  • Warranties: Minka-Aire offers a lifetime warranty on the motors and up to 2 years on other components for subsequent owners, showing their confidence in product longevity.

Hunter Quality and Durability

  • Affordable Quality: Hunter is known for offering premium quality fans at more budget-friendly prices. Their fans are made with ABS plastics, aluminum, wood composites, and steel, which makes them suitable for homeowners seeking both affordability and long-lasting durability.
  • WhisperWind® Motor: Hunter’s WhisperWind® motor offers reliable performance and quiet operation, even in more budget-conscious models.
  • Warranties: Hunter offers a lifetime limited warranty on motors and a 1 to 2-year warranty for other parts, making them a good investment for most homeowners.

Winner: Minka-Aire, due to the premium materials and exceptional attention to detail in their construction.

2. Noise Levels: Whisper-Quiet Performance

Both brands are known for their whisper-quiet operation, but which one is quieter?

Minka-Aire Noise Levels

  • Minka-Aire uses DC motors, which are typically quieter than traditional AC motors. The DC brushless motors are designed for ultra-quiet operation, and most Minka-Aire fans are nearly silent, even at high speeds.
  • Consistent Silence: User reviews consistently note the lack of noise, making them ideal for spaces like bedrooms or studios where silence is crucial.

Hunter Noise Levels

  • Hunter uses the WhisperWind® motor in most models, which is designed to operate quietly while providing high airflow. However, slight ticking sounds have been reported by users of budget models, although this is not common in higher-end Hunter fans.
  • Generally Quiet: While generally quiet, some budget-conscious models may produce minor noise during operation, especially at higher speeds.

Winner: Minka-Aire, for the exceptionally quiet DC motors that provide a more consistent and quieter performance across all models.

3. Airflow Efficiency: Maximizing Comfort

Both Minka-Aire and Hunter fans are engineered for optimal airflow, but the specifics can make a difference.

Minka-Aire Airflow Efficiency

  • Minka-Aire fans are designed with aerodynamically shaped blades and advanced motor technology to ensure maximum airflow. Their fans offer high-efficiency airflow, even in larger rooms.
  • Blade Designs: Minka-Aire fans typically use unique blade shapes and slopes that are specifically designed for smooth airflow and high efficiency.

Hunter Airflow Efficiency

  • Hunter fans use a PowerMax motor on select models and WhisperWind® motors to optimize airflow. The airflow is still strong but may not be as powerful as Minka-Aire’s high-end models.
  • Good Airflow: Hunter fans are effective in most room sizes, and their WhisperWind® motors help maintain smooth operation for medium to large rooms.

Winner: Minka-Aire, for superior airflow efficiency with better blade designs and motor technology for larger rooms.

4. Smart Features: Connectivity for the Modern Home

With the rise of smart home devices, many ceiling fans now come with Wi-Fi integration and compatibility with voice-controlled systems like Alexa and Google Assistant. Let’s compare the smart features available in both brands.

Minka-Aire Smart Features

  • Many Minka-Aire models are Wi-Fi-enabled and compatible with Apple HomeKit, SmartThings, and Bond Home.
  • Apple HomeKit: Some Minka-Aire fans allow you to control them using Siri voice commands, giving them a distinct edge in the smart home market.

Hunter Smart Features

  • Hunter fans are also Wi-Fi compatible and work with popular smart home systems like Alexa, Google Assistant, and Apple HomeKit.
  • Voice Control: Many Hunter fans offer voice-activated controls, making it easy to adjust settings without having to leave your seat.

Winner: Minka-Aire, for offering Apple HomeKit and advanced smart features that give their fans a more modern edge.

5. Price Range: Affordability vs. Premium Quality

One of the most significant differences between these two brands is their price range.

Minka-Aire Price Range

  • Minka-Aire fans are known for their premium quality and tend to be more expensive. Expect to pay anywhere between $400 to $1000+ for high-end models with smart features and luxury materials.
  • Minka-Aire is better suited for those who are willing to invest in premium ceiling fans.

Hunter Price Range

  • Hunter fans are generally more affordable, with prices ranging from under $100 to around $500 for higher-end models.
  • Hunter offers a range of budget-friendly fans while still delivering excellent performance and quality.

Winner: Hunter, for offering more budget-friendly options without sacrificing quality.

6. Warranties: Ensuring Long-Term Peace of Mind

A good warranty is essential when purchasing a ceiling fan, and both Minka-Aire and Hunter offer solid coverage.

Minka-Aire Warranty

  • Lifetime warranty on motors and a 2-year warranty on other parts for subsequent owners. This extensive coverage shows their confidence in the durability of their products.

Hunter Warranty

  • Lifetime warranty on motors for the original purchaser, with 1 to 2 years coverage for other components.

Winner: Minka-Aire, for offering a more comprehensive warranty on all components.

Conclusion: Which is Better—Minka-Aire or Hunter Ceiling Fans?

Choosing between Minka-Aire and Hunter ceiling fans ultimately depends on your specific needs:

  • If you want the best in luxury, quiet performance, and efficiency, Minka-Aire is the brand for you. Their premium design and advanced motor technology ensure you get the most modern fan on the market.
  • If you’re looking for budget-friendly options with reliable performance, Hunter offers great value. With a wide selection of designs and a whisper-quiet motor, Hunter fans are an excellent choice for most homes.

In the end, both brands are excellent choices, but your decision will depend on whether you prioritize luxury or affordability.
Filed Under: Hunter Ceiling Fans

Hunter Ceiling Fans Accessories

March 28, 2025 by admin Leave a Comment

When it comes to selecting the perfect ceiling fan for your home, it’s not just about picking the right fan. The accessories you choose can significantly enhance the performance, style, and functionality of your Hunter ceiling fan. From adjusting airflow and lighting to controlling your fan from the comfort of your couch, ceiling fan accessories offer a customizable experience that meets your unique needs.

Hunter ceiling fans are known for their durability, sleek designs, and advanced technology. However, it’s the right set of accessories that truly unlock their full potential. Whether you’re looking to boost your fan’s performance or simply make it more stylish, there are numerous options to choose from.

In this guide, we’ll explore the various Hunter ceiling fan accessories that can help you get the most out of your fan. We’ll dive into the essential parts and features like fan blades, remotes, wall controls, pull chains, and more, giving you all the information you need to make an informed decision.

Let’s get started by looking at the first essential accessory — ceiling fan blades.

1. Ceiling Fan Blades: The Heart of Your Fan’s Performance

When it comes to ceiling fans, blades are more than just a design element — they are key to the fan’s airflow efficiency and performance. The quality, size, and material of the blades directly affect how well your Hunter fan cools a room, how quietly it operates, and how much energy it consumes.

Hunter ceiling fan blades are crafted with precision to ensure maximum air circulation while keeping noise levels at a minimum. These blades are designed for different room sizes and aesthetic preferences, so you can select the best ones to suit your space.

Choosing the Right Ceiling Fan Blades

Hunter fans come with various blade options, each offering unique features:

  • Material: The blades can be made from wood, metal, or plastic, each providing different aesthetic and performance benefits. Wood blades offer a classic look, while metal blades are known for their durability and sleek finish. Plastic blades are lightweight and resistant to wear.
  • Size: Larger rooms require larger blade spans (e.g., 52 inches or more), while smaller rooms are better suited for fans with smaller blades (e.g., 42-44 inches).
  • Design & Finish: Whether you prefer a rich wood grain or a modern matte finish, Hunter provides a variety of designs to complement any room style.

For more information on selecting the perfect blades for your Hunter ceiling fan, be sure to explore our detailed Hunter Ceiling Fan Blades section.

2. Remotes for Hunter Ceiling Fans: Control at Your Fingertips

The Hunter ceiling fan remote is a game-changer when it comes to convenience and comfort. Whether you’re lounging on the couch or lying in bed, being able to adjust the fan speed, lighting, and motor direction from across the room offers unmatched ease.

Why Choose a Ceiling Fan Remote?

  • Convenience: Forget about getting up to adjust the fan settings manually. With a remote control, you can control your fan’s operation from anywhere in the room.
  • Multi-functionality: Many Hunter ceiling fan remotes offer more than just speed control. Depending on the model, you can adjust the light dimming levels, reverse the motor’s direction for winter use, or set timers for automatic shutdown.
  • Smart Integration: Some Hunter fans are compatible with smart remotes that integrate with voice assistants like Alexa, Google Assistant, or Apple HomeKit, giving you even more control over your fan.

If you’re interested in enhancing your fan’s functionality, check out the available options in our Hunter Ceiling Fan Remotes section.

3. Wall Controls for Hunter Ceiling Fans: A Seamless Integration

If you’re looking for a more permanent, stylish way to control your Hunter ceiling fan, wall controls are the perfect solution. Wall-mounted fan controls replace the traditional pull chains and give your room a clean, streamlined look. These controls are ideal for homes where the fan is regularly used and the convenience of a remote isn’t always necessary.

Benefits of Using Wall Controls:

  • Integrated Design: Wall controls eliminate the need for pull chains, which can sometimes be difficult to reach, especially in high-ceiling rooms. The controls blend seamlessly into your home’s decor, offering a sleek, modern appearance.
  • More Control Options: Many wall controls offer more settings than traditional pull chains. Depending on the model, they allow you to adjust speed, light dimming, and even fan direction.
  • Convenience and Ease of Use: Wall controls are designed for everyday use, offering quick access to adjust your fan settings without fumbling around for remotes or chains.

For more on the different wall control options and installation guides, visit our Hunter Ceiling Fan Wall Controls page.

4. Pull Chains for Hunter Ceiling Fans: A Traditional Solution

For those who appreciate simplicity and functionality, pull chains remain a classic, reliable way to control your Hunter ceiling fan. They are typically found on older fan models or for users who prefer a no-frills solution for adjusting fan speed and lighting.

Why Choose Pull Chains?

  • Simplicity: Pull chains are straightforward, easy to use, and offer a quick way to adjust your ceiling fan without needing a remote or wall switch.
  • Affordability: If you’re looking for a budget-friendly option or a replacement part, pull chains are typically an inexpensive choice that doesn’t compromise on functionality.
  • Durability: Hunter pull chains are designed to last, even with regular use. Whether you’re adjusting the fan speed or turning the light on and off, you can rely on their durability.

For more information on how to replace or upgrade your pull chain, visit our Hunter Ceiling Fan Pull Chains page.

5. Light Kits for Hunter Ceiling Fans: Illuminate Your Space

One of the most popular accessories for Hunter ceiling fans is the light kit. Many Hunter ceiling fans come with integrated light kits, providing both airflow and illumination in one unit. Whether you’re looking to add a little extra lighting to your living room, or you need more powerful lighting for your bedroom, a light kit is an excellent addition to your ceiling fan.

Benefits of Light Kits:

  • Integrated Illumination: Combining air circulation and lighting into one fixture is not only convenient but also space-saving. You get both without needing separate light fixtures.
  • Energy Efficiency: Many of Hunter’s light kits feature energy-efficient LED bulbs, which are not only brighter but also help reduce your home’s energy consumption.
  • Aesthetic Variety: From traditional chandelier-style kits to modern sleek designs, Hunter offers a variety of light kits that fit seamlessly with their fan models.

Explore the wide range of light kits that can be added to your Hunter ceiling fan for a perfect fit with your lighting needs.

Conclusion: Enhance Your Hunter Ceiling Fan with Quality Accessories

Choosing the right Hunter ceiling fan accessories can make all the difference in both performance and aesthetics. From the whisper-quiet operation of remotes to the sleek integration of wall controls, each accessory is designed to enhance your experience. Whether you need a simple pull chain for ease or a complete light kit for functionality, Hunter’s accessories provide the flexibility and reliability you need for your home.

Ready to upgrade your ceiling fan? Explore the full range of Hunter ceiling fan accessories today to enhance your fan’s performance and style.

If you’re looking for more details on installation, maintenance, or additional parts, don’t hesitate to check out our related pages or reach out for expert advice.

Filed Under: Hunter Ceiling Fan Parts

Hunter Ceiling Fan Blades

March 27, 2025 by admin Leave a Comment

When it comes to ceiling fans, the blades are much more than just a design feature. They are essential for delivering optimal airflow, cooling efficiency, and the overall performance of your Hunter ceiling fan. Whether you’re replacing old blades, upgrading your fan, or simply enhancing the aesthetic of your room, understanding the role of Hunter ceiling fan blades is key. In this guide, we’ll explore everything you need to know to select, install, and maintain the perfect Hunter ceiling fan blades for your home.

1. Why Are Ceiling Fan Blades Important?

Ceiling fan blades play a vital role in ensuring your fan performs at its best. Here’s how:

  • Performance and Airflow: The blades directly affect the amount of air circulated by the fan. Larger blades provide more air circulation, making them ideal for larger rooms, while smaller blades are suitable for compact spaces.
  • Noise and Vibration: High-quality fan blades help reduce noise and vibrations, ensuring a quieter and more stable operation. This is crucial, especially in bedrooms or areas where noise might be a concern.
  • Energy Efficiency: When fan blades are properly matched with the fan’s motor, they improve airflow efficiency, which can help lower your energy bills by maximizing the fan’s cooling performance.

2. Types of Hunter Ceiling Fan Blades

Hunter fans offer a variety of blade types, each offering unique advantages based on the material, style, and room size. Here’s a breakdown of the different blade types available:

Wood Blades

Wood blades provide a classic, elegant look. Ideal for traditional and rustic décor, wood blades also offer excellent durability and a natural aesthetic. They are perfect for spaces that require a warm, inviting atmosphere.

Metal Blades

Metal blades are sleek, modern, and highly durable. These blades are often favored for their contemporary design, and they provide a shiny finish that complements modern or industrial spaces. Metal blades are also more resistant to wear and tear than other materials.

Plastic Blades

Plastic blades are lightweight, durable, and resistant to moisture. These blades are ideal for humid areas like kitchens or bathrooms, where other materials might degrade over time. They are easy to maintain and offer great performance at a lower cost.

Reversible Blades

One of the standout features of many Hunter ceiling fans is the reversible blade design. Reversible blades offer two finishes—one on each side. This gives you the flexibility to change the fan’s appearance without replacing the entire set of blades, making them an excellent option for those who want to refresh their room’s look.

3. Choosing the Right Hunter Ceiling Fan Blades

Selecting the right Hunter ceiling fan blades requires considering a few key factors. Here’s what to keep in mind when making your decision:

Blade Size

Blade size is a crucial factor in fan performance. Here’s how to choose the right size for your room:

  • Small Rooms: For rooms up to 75 sq. ft. (like small bedrooms or bathrooms), a fan with 42-44 inch blades is ideal.
  • Medium Rooms: For rooms ranging from 75 to 144 sq. ft. (such as living rooms or kitchens), a 52-inch blade span works well.
  • Large Rooms: For larger spaces over 144 sq. ft. (like great rooms or large open areas), choose a fan with a 56-inch or larger blade span for maximum airflow.

Blade Pitch

The blade pitch (angle) determines how much air the fan can move. A steeper blade pitch (12-15 degrees) will move more air, making it suitable for larger rooms or areas where powerful airflow is needed. Most Hunter fans are designed to offer an optimal balance between pitch and airflow efficiency.

Material and Design

The material and design of the blades impact both the aesthetics and functionality of the fan:

  • Wood blades offer a warm, natural look.
  • Metal blades deliver a sleek, modern finish.
  • Plastic blades are lightweight and easy to maintain.

Hunter provides various designs, finishes, and textures for each material type, making it easy to find a match for your home decor.

Compatibility

Ensure the fan blades you choose are compatible with your specific Hunter fan model. Some models may have unique blade attachments or specific blade sizes. Always refer to your fan’s manual or the Hunter Fan website to check compatibility.

Here is the list of some retailers where you may be able to obtain Hunter ceiling fan blades, once you visit their site. If there are any additional outlets that serve the same purpose, feel free to tell us.

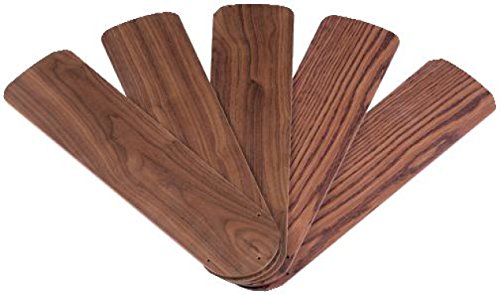
Westinghouse 7741000 42-Inch Oak/Walnut Replacement Fan Blades, Five-Pack
Westinghouse 7741000 42-Inch Oak/Walnut...
Check Price
Sale Westinghouse 7741100 42-Inch White/Bleached Oak Replacement Fan Blades, Five-Pack
Westinghouse 7741100 42-Inch White/Bleached Oak...
Check Price
Westinghouse 7741500 52-Inch Oak/Walnut Replacement Fan Blades, Five-Pack
Westinghouse 7741500 52-Inch Oak/Walnut...
Check Price
OHLECTRIC 5Pcs 16 ½' Ceiling Fan Blades - Fan Replacement Blades For 42' Ceiling Fan -...
OHLECTRIC 5Pcs 16 ½" Ceiling Fan Blades - Fan...
Check Price

4. Where to Buy Replacement Hunter Ceiling Fan Blades

Finding the right replacement blades for your Hunter fan is essential for maintaining optimal performance. Here are some reliable retailers where you can find replacement Hunter ceiling fan blades:

  • HomeDepot.com: Offers a wide selection of Hunter replacement parts, including fan blades.
  • Amazon: A convenient place to find Hunter fan blades with customer reviews and ratings.
  • Lowe’s.com: Another trusted retailer where you can find replacement blades for your Hunter fan.
  • Hunter Fan Manufacturer’s Website: The official website of Hunter Fan offers the best selection of compatible replacement blades.

It’s important to verify that the blades are from Hunter to avoid compatibility issues. Be cautious of retailers that may advertise compatible blades that are not officially from Hunter, as these might not fit correctly or could affect the performance of your fan.

5. How to Identify the Correct Part Number for Hunter Ceiling Fan Blades

If you’re struggling to find the right replacement blades, start by locating the part number. Here’s how:

Check the Fan Manual

The easiest way to find the correct part number is to refer to your fan’s manual, which will provide the exact blade part number. If you no longer have the manual, you can check Hunter’s manuals page for assistance.

Online Resources

If you can’t find the part number, you can always visit Hunter’s website or contact their customer service for help in identifying the exact blades needed for your fan model.

6. What to Do If You Can’t Find the Exact Replacement Blade

If you’re unable to find the specific part number or replacement blade, don’t worry. There are a few options:

  • Consider Compatibility: Select blades of the same size and material that match the fan’s design and airflow requirements.
  • Replace the Entire Blade Set: In some cases, it’s better to replace the entire blade set to maintain balance and ensure optimal airflow. Many Hunter ceiling fan blade sets come with five blades that are designed to work together for smooth, efficient operation.

Remember, replacing blades with mismatched sizes or materials can cause wobbling, poor performance, and potential damage to the fan motor.

7. Installing Hunter Ceiling Fan Blades

Once you’ve selected the right blades, the installation process is relatively simple. Here are the basic steps:

  1. Turn Off Power: Always turn off the power to your fan at the breaker before performing any maintenance.
  2. Remove the Old Blades: Use a screwdriver to remove the screws that secure the blades to the motor assembly.
  3. Install the New Blades: Align the new blades with the motor’s mounting brackets and secure them with the screws.
  4. Balance the Blades: Ensure the blades are balanced correctly to prevent wobbling and ensure smooth operation.

For detailed instructions, visit our Hunter Ceiling Fan Installation page for step-by-step guidance.

8. Maintaining and Cleaning Your Hunter Ceiling Fan Blades

Keeping your Hunter fan blades clean is important for optimal performance. Here are some tips:

  • Regular Dusting: Use a soft microfiber cloth to wipe down the blades regularly and prevent dust buildup.
  • Deep Cleaning: Occasionally, remove the blades and wash them with mild soap and water. Dry them thoroughly before reattaching them to the fan.

Proper maintenance will not only keep your fan looking great but also ensure that it operates efficiently for years.

9. Hunter Ceiling Fan Blade Troubleshooting

Here are some common issues with fan blades and how to fix them:

  • Wobbling: If your fan blades are wobbling, it could be due to uneven or loose blades. Tighten the screws and ensure all blades are equally spaced.
  • Airflow Problems: If your fan is not circulating air effectively, the blades may be dirty or misaligned. Clean and balance the blades to restore optimal performance.

For troubleshooting assistance, visit our Hunter Ceiling Fan Troubleshooting page.

Conclusion: Upgrade Your Hunter Ceiling Fan with the Right Blades

Choosing the right Hunter ceiling fan blades is essential for maximizing performance, comfort, and style in your home. Whether you’re replacing old blades or upgrading to a new style, Hunter offers a variety of options to meet your needs. Make sure to select the right material, size, and design to complement your room’s décor and enhance your fan’s functionality.

Filed Under: Hunter Ceiling Fan Parts

How to Remove Hunter Ceiling Fan Light Cover

March 25, 2025 by admin Leave a Comment

If you’ve ever needed to replace a light bulb or clean your Hunter ceiling fan, you know how important it is to remove the light cover properly. But what happens when the light cover is stubborn, or you’re unsure of how to safely remove it? Don’t worry – we’ve got you covered.

In this step-by-step guide, we’ll walk you through how to remove your Hunter ceiling fan light cover with ease. Whether you’re looking to replace the bulb, clean the cover, or simply perform routine maintenance, it’s important to do the job right. Our easy-to-follow instructions will help you avoid any frustration and ensure the process is quick and safe.

Before we get started, let’s talk about why it’s crucial to turn off the power before handling any electrical appliance like your ceiling fan. Not only does this keep you safe from potential electrical hazards, but it’s also an essential first step for any home maintenance task.

By the end of this guide, you’ll have all the knowledge you need to remove your Hunter ceiling fan light cover efficiently, all while maintaining your fan in top-notch condition. Whether you’re a seasoned DIY-er or a beginner, we’ve broken down the steps into easy-to-understand instructions.

Ready to get started? Let’s jump in!

Why You Might Need to Remove the Light Cover

There are a few good reasons why you might need to remove the light cover on your Hunter ceiling fan. Knowing how to properly remove the cover can make a variety of tasks much easier. Here are some common scenarios where this might be necessary:

1. Changing the Light Bulbs

Over time, your ceiling fan light bulbs will inevitably burn out. When that happens, you’ll need to remove the light cover to replace the bulbs. Many Hunter fans are designed with easy access to the bulbs, but the light cover must come off first. Whether you’re replacing incandescent, CFL, or LED bulbs, understanding how to safely remove the cover is key to making this task quick and painless.

2. Cleaning and Dusting

Fans and their light fixtures can collect dust and dirt over time, and this includes the light cover. If you’ve noticed that your light cover is starting to look a little dull or dirty, taking it off to give it a good cleaning is a smart idea. This helps not only with aesthetics but also ensures the fan operates efficiently. Regular cleaning can prevent dust buildup, which can affect both the performance and the appearance of your ceiling fan.

3. Upgrading or Replacing the Light Kit

If you want to change the look of your Hunter ceiling fan or upgrade the light kit for more energy-efficient lighting or a new style, removing the light cover is your first step. Whether you’re adding a dimmer switch or switching from traditional bulbs to LED lighting, removing the cover is essential for accessing and replacing the light kit.

4. Performing Maintenance or Repairs

Occasionally, your Hunter ceiling fan light kit or components may require maintenance or repair. If you’re troubleshooting electrical issues, replacing a broken light fixture, or checking for wiring problems, removing the light cover is often part of the process. In these cases, you may also need to check the connections and wiring to ensure everything is in working order.

Removing the light cover is a simple task that plays a critical role in maintaining your ceiling fan’s performance and appearance. Whether you’re doing it for regular maintenance or to make an upgrade, knowing how to do it correctly will save you time and effort.

In the next section, we’ll discuss exactly what tools and materials you’ll need to get started.

What You Will Need

Before diving into the process of removing the Hunter ceiling fan light cover, it’s important to gather the right tools and materials. Having everything on hand will ensure that the task goes smoothly and you don’t have to stop midway to search for missing items. Here’s a quick list of what you’ll need to get the job done efficiently and safely:

1. Screwdriver

Depending on the design of your Hunter ceiling fan, you will need a Phillips or flathead screwdriver to remove the screws that hold the light cover in place. Some fans use screws with small heads, so it’s important to use the right-sized screwdriver to avoid damaging the screws.

  • Tip: If you’re unsure, always try a Phillips screwdriver first, as it’s the most common choice for ceiling fan light covers.

2. Ladder or Step Stool

Since the Hunter ceiling fan light cover is usually installed several feet above the ground, a ladder or step stool will be necessary to reach it safely. Make sure the ladder is sturdy and positioned on a flat surface for added stability. If you’re working in a high-ceiling room, ensure the ladder is tall enough for easy access without straining.

  • Tip: Use a step stool if you only need a little extra height, or a ladder if you need more reach. Safety first!

3. Voltage Tester (Optional, but Recommended)

For added safety, use a voltage tester to ensure that the power to your fan is completely turned off. This is especially important if you’re performing any electrical work beyond just removing the light cover, such as replacing the light kit or fixing wiring issues.

  • Tip: Always double-check with a voltage tester before touching any electrical components, even if you’ve already turned off the circuit breaker.

4. Soft Cloth or Microfiber Towel

Having a soft cloth or microfiber towel handy is a great way to clean the light cover once it’s removed. These materials won’t scratch or damage the cover’s surface, making them perfect for wiping away dust and dirt without causing harm.

  • Tip: A microfiber towel is ideal for cleaning delicate surfaces, as it traps dust particles and prevents smudges.

5. Gloves (Optional)

While not strictly necessary, wearing gloves can help protect your hands during the process. This is especially useful if your Hunter ceiling fan has been in place for a long time and you need to deal with dust or sharp edges when removing the cover. Gloves can also keep your hands clean if you’re handling the light kit or fan parts.

  • Tip: Choose thin gloves that allow for flexibility, so you can still work efficiently with small screws and parts.

6. Replacement Bulbs (If Needed)

If you’re removing the light cover to replace a bulb, make sure you have the correct replacement bulbs on hand. Different Hunter fans use various bulb types, including incandescent, CFL, or LED bulbs. Check your fan’s specifications or look at the current bulbs to ensure you buy the right type.

  • Tip: If you’re upgrading to energy-efficient LED bulbs, ensure they’re compatible with your fan and light kit.

By preparing these tools and materials, you’re setting yourself up for success. Whether it’s for a simple bulb change, a full fan cleaning, or a light kit upgrade, gathering the right items first will make the process much smoother. Now that you have everything ready, let’s dive into the step-by-step instructions on how to safely remove your Hunter ceiling fan light cover.

Step-by-Step Instructions to Remove the Hunter Ceiling Fan Light Cover

Now that you have all your tools and materials ready, it’s time to remove the Hunter ceiling fan light cover. Follow these simple, clear steps to safely and efficiently remove the cover. Whether you’re replacing the bulb, cleaning the cover, or making repairs, this guide will walk you through the process in a hassle-free way.

1. Turn Off the Power

Safety is always the first priority. Before you do anything, make sure the power is turned off to the ceiling fan.

  • Turn off the circuit breaker that controls the fan and light, and verify that the power is completely off by using a voltage tester to check the wires. This step is crucial to avoid any electrical hazards.

Tip: If you’re unsure of which breaker controls your ceiling fan, you can turn off all breakers in the panel, especially if you plan on working with the wiring as well.

2. Remove the Light Bulbs (If Necessary)

If the light cover is in the way of your bulbs, you’ll need to remove them first.

  • Gently twist the light bulbs counterclockwise to unscrew them. Some Hunter ceiling fans may have twist-lock bulbs, so make sure to turn the bulb gently until it comes off.
  • Tip: If the bulb is stuck, try wiggling it slightly while twisting to avoid damaging the socket.

3. Locate and Remove the Screws

Next, you’ll need to remove any screws that are holding the light cover in place. Most Hunter fans will use screws to secure the cover, but some models might also have clips or a simple twist-lock mechanism.

  • Use your screwdriver to remove the screws around the light cover. Depending on your model, these screws might be visible on the side of the light cover or under the fan’s light fixture.
  • If the cover uses clips instead of screws, gently press or pull on the clips to release the cover.

Tip: Keep the screws in a safe place so you don’t lose them. You can place them in a small dish or container while you work.

4. Detach the Light Cover

Once the screws are removed, it’s time to take the light cover off.

  • Gently pull the cover away from the fan fixture. If the cover is a little stuck, give it a slight wiggle to loosen it, but do not force it. Forcibly pulling the cover could damage the fan or the cover itself.

Tip: If your fan has a glass cover, handle it with care to avoid breaking it. If the cover is dusty, it’s a great time to clean it while it’s off the fan.

5. Clean the Light Cover (Optional)

If your goal is to clean the light cover after removing it, now’s the perfect time.

  • Use a microfiber towel or soft cloth to wipe away any dust, dirt, or grime from the cover. If the cover has stubborn stains, you can lightly dampen the cloth with warm water or a mild cleaning solution.
  • For glass covers, use a glass cleaner for a streak-free shine.

Tip: Be gentle with your cleaning products. Harsh chemicals can cause damage to the cover’s finish or affect the materials.

6. Reattach the Light Cover

After you’ve completed your maintenance or cleaning, it’s time to reinstall the light cover.

  • Align the light cover with the fan fixture and make sure it fits securely in place.
  • Screw the cover back into position using the screws you removed earlier. Tighten the screws carefully, ensuring the cover is secure but not over-tightened, as this could crack the cover.

Tip: If you had removed any light bulbs, reinstall them before putting the light cover back on.

7. Test the Fan and Light

Once the cover is securely in place, it’s time to test your ceiling fan to make sure everything is working properly.

  • Turn the power back on at the circuit breaker and check that the fan operates correctly.
  • If you replaced the bulb, turn on the light and check that it functions as expected.

Conclusion

By following these simple, easy-to-understand steps, you’ve successfully removed the Hunter ceiling fan light cover. Whether you were cleaning, replacing bulbs, or upgrading your light kit, you’ve ensured that your fan and light are functioning properly for years to come.

Remember, safety is always the most important step when handling electrical appliances, so be sure to follow the instructions carefully. Regular maintenance like cleaning and checking the light fixture can help extend the life of your Hunter ceiling fan and keep it running smoothly.

If you have any doubts or feel uncomfortable with any part of the process, don’t hesitate to contact a professional for assistance. With these instructions, you can confidently tackle light cover removal and maintenance with ease.

Next Steps:

  • Explore more about Hunter Ceiling Fans: Check out our other helpful guides, including Hunter Ceiling Fan Troubleshooting, Hunter Ceiling Fan Parts, and Hunter Ceiling Fan Installation for more tips and maintenance advice.

Filed Under: Hunter Ceiling Fans

Hunter Sojourn Ceiling Fan

March 25, 2025 by admin Leave a Comment

Hunter Sojourn Ceiling Fan: The Ultimate Blend of Style, Performance, and Innovation

The Hunter Sojourn Ceiling Fan represents a perfect fusion of sophisticated design, energy efficiency, and exceptional performance, making it an ideal choice for homeowners seeking both style and functionality. Whether you’re outfitting a modern living room, a cozy bedroom, or a covered outdoor patio, the Sojourn ceiling fan is designed to provide reliable airflow, elegance, and comfort year-round.

In this guide, we will explore everything you need to know about the Hunter Sojourn Ceiling Fan, including its standout features, installation instructions, benefits, and more, to help you make an informed decision and enhance your home’s decor.

Hunter Sojourn Ceiling Fan

Key Features of the Hunter Sojourn Ceiling Fan

The Hunter Sojourn Ceiling Fan combines a sleek, contemporary design with advanced technology, providing a cooling solution that is both functional and visually appealing.

1. Elegant Design with Custom Finishes

The Hunter Sojourn Ceiling Fan is a statement piece in any room, featuring a modern aesthetic with a touch of classic style. The fan is available in several finishes, including brushed nickel, matte black, and weathered bronze, allowing you to select the perfect finish to complement your home’s decor.

  • Reversible Fan Blades: The fan blades are reversible, giving you the option to choose from different finishes such as a rich wood tone on one side or a modern solid color on the other.
  • Versatility: This makes the Hunter Sojourn a great fit for both traditional and contemporary spaces.

2. WhisperWind® Motor for Quiet, Powerful Performance

The Hunter Sojourn Ceiling Fan is powered by the advanced WhisperWind® motor technology, known for delivering ultra-quiet operation without compromising airflow. This ensures that you can enjoy a comfortable breeze without the annoying noise often associated with other ceiling fans.

  • High-Performance Airflow: The motor provides reliable airflow, ensuring your room stays cool during the summer and comfortable during the winter when the fan is in reverse mode.
  • Energy Efficiency: The motor is designed to operate with minimal energy consumption, making it an eco-friendly option that helps reduce your electricity bill.

3. LED Light Kit Compatibility for Added Illumination

The Hunter Sojourn Ceiling Fan is equipped with an integrated LED light kit option (sold separately), making it a dual-purpose fixture. The energy-efficient LED bulbs provide bright illumination while keeping energy costs low.

  • Dimmable LED Lighting: The light kit features dimmable LED lighting, allowing you to adjust the brightness to fit the ambiance of your space.
  • Warm, Even Lighting: The frosted glass shade diffuses light evenly, creating a soft, inviting glow perfect for living rooms, bedrooms, or dining areas.

4. Multiple Speed Settings for Custom Comfort

The Hunter Sojourn Ceiling Fan offers three speed settings, giving you full control over your environment. Whether you prefer a gentle breeze or a stronger gust, you can easily adjust the fan’s settings to suit your needs.

  • Seasonal Airflow: The fan’s reversible motor allows you to switch the direction of the blades to circulate cool air in the summer and warm air in the winter, providing year-round comfort.

5. Advanced Control Options for Added Convenience

For ultimate convenience, the Hunter Sojourn Ceiling Fan comes with several control options:

  • Handheld Remote Control: Many models come with a remote control, allowing you to adjust the fan speed, light intensity, and fan direction with ease from anywhere in the room.
  • Smart Home Compatibility: The Hunter Sojourn is compatible with smart home systems, allowing you to integrate it into your home automation setup and control it through Alexa, Google Home, or any other smart home platform.

Why Choose the Hunter Sojourn Ceiling Fan?

The Hunter Sojourn Ceiling Fan is an exceptional choice for homeowners looking to combine style, efficiency, and convenience. Let’s break down some of the key benefits:

1. Versatile for Indoor and Outdoor Use

The Hunter Sojourn Ceiling Fan is built to last, with a weather-resistant design that makes it suitable for both indoor and outdoor spaces. It can be installed in covered outdoor areas like patios, sunrooms, or porches as well as living rooms, bedrooms, and dining areas.

  • Durability: The fan is designed to withstand outdoor elements like humidity, ensuring it maintains its performance and appearance over time.

2. Energy Efficient and Cost-Effective

The Hunter Sojourn Ceiling Fan is designed with energy efficiency in mind. From the LED lighting to the WhisperWind® motor, this fan helps reduce energy consumption, making it an eco-friendly and cost-effective solution for cooling your home.

  • Sustainable Comfort: The ability to reverse airflow allows you to use the fan throughout the year, ensuring your home stays comfortable while using less energy.

3. Easy Installation for DIY Homeowners

The Hunter Sojourn Ceiling Fan comes with a user-friendly installation guide, making it accessible for DIY enthusiasts. If you have basic electrical knowledge and tools, you can complete the installation in no time.

  • Standard and Angled Ceiling Compatibility: The fan can be installed in both standard and angled ceilings, providing greater flexibility in terms of placement.

4. Low Maintenance and Long-Lasting Durability

Maintaining the Hunter Sojourn Ceiling Fan is easy. Regular cleaning of the blades and light fixtures helps maintain its performance and appearance. Plus, the motor is designed for minimal upkeep, ensuring a quiet, long-lasting fan.

Hunter Sojourn Ceiling Fan Installation: A Quick Guide

Installing the Hunter Sojourn Ceiling Fan is straightforward and can be done with basic tools. Here’s a quick overview of the installation process:

  1. Turn off the power at the circuit breaker before starting.
  2. Install the mounting bracket to the ceiling.
  3. Wire the fan motor to the ceiling’s electrical system.
  4. Secure the fan motor to the bracket.
  5. Attach the fan blades.
  6. Install the LED light kit (if applicable).
  7. Test the fan to ensure everything works as expected.

For more detailed instructions, visit our Hunter Ceiling Fan Installation page.

Conclusion: The Hunter Sojourn Ceiling Fan is the Perfect Addition to Your Home

The Hunter Sojourn Ceiling Fan is a perfect blend of style, energy efficiency, and high-performance functionality. Whether you’re upgrading your living room, adding comfort to your bedroom, or outfitting a covered outdoor patio, this fan has everything you need for a cooler, more comfortable home.

With its advanced motor technology, LED lighting, easy installation, and weather-resistant design, the Hunter Sojourn Ceiling Fan is an ideal investment for homeowners who want both elegance and practicality.

Explore more Hunter ceiling fan models and find the perfect fan for your home at the Hunter Ceiling Fans Category.

Filed Under: Hunter Ceiling Fan Reviews, Hunter Ceiling Fans

  • « Previous Page
  • 1
  • …
  • 14
  • 15
  • 16
  • 17
  • 18
  • …
  • 27
  • Next Page »


Best Hunter Ceiling Fans

Bestseller No. 1 Hunter 59244 Dempsey Ceiling Fan 44 inches Fresh White
Hunter 59244 Dempsey Ceiling Fan 44 inches Fresh White
Check Price
Bestseller No. 2 Hunter 53090 Builder Deluxe Ceiling Fan 52 inches Brushed Nickel
Hunter 53090 Builder Deluxe Ceiling Fan 52 inches Brushed Nickel
Check Price
Bestseller No. 3 Hunter Fan Company Fan Builder Elite Indoor Ceiling Fan with Pull Chain Control, Metal, New...
Hunter Fan Company Fan Builder Elite Indoor Ceiling Fan with Pull Chain Control, Metal, New...
Check Price

Recent Posts

  • Hunter Ceiling Fan Remote Control Manual
  • Hunter Ceiling Fan Flickering Lights: Causes and Fixes
  • Hunter vs Kichler Ceiling Fans — The Ultimate Battle for Your Ceiling
  • Hunter Fan Company Phone Number & Contact Information (Official Guide)
  • Hunter HVLS Fans: The Definitive Guide to High-Volume, Low-Speed Airflow
  • Hunter 99373 vs 99375: What’s the Difference Between These Remotes?
  • Hunter Fan Remote Battery Replacement
  • Hunter 99123 Fan Remote Troubleshooting & Manual
  • How to Unpair Your Hunter Fan Remote
  • How to Install Hunter Low Profile Ceiling Fan

Legal Information

This site is owned and operated by HunterCeilingfans. Hunter ceiling fans is a participant in the Google Adsense Program, an advertising program designed to provide a means for sites to earn advertising fees by displaying related advertisements.

Hunter ceiling fans also is a participant in Amazon Associates Program. “As an Amazon Associate, I earn from qualifying purchases.”

Hunter ceiling fan is compensated for referring traffic to these companies. Hunter ceiling fans is an independent site with no connections to Hunter and is operated entirely by independent volunteers and writers to provide information.

We are not the manufacturer of Hunter Ceiling Fans, nor are we associated with Hunter in any way. We are a third-party resource website that tries to help site visitors to find valuable information.

Categories

  • Discontinued Hunter Ceiling Fans
  • Hunter Ceiling Fan Parts
  • Hunter Ceiling Fan Reviews
  • Hunter Ceiling Fan Support
  • Hunter Ceiling Fan Troubleshooting
  • Hunter Ceiling Fans
  • Hunter Fan Manuals

Partners

Harbor Breeze