When your Hunter ceiling fan stops working as efficiently as it once did, or parts begin to wear out, you may be wondering where to find replacement parts. A ceiling fan is an essential fixture in many homes, providing cooling relief during the summer and circulating air during the winter, so keeping it in top condition is key to its continued performance. Whether it’s worn-out blades, a malfunctioning motor, or a faulty remote control, replacing parts is often the best way to get your Hunter fan running smoothly again.
Hunter Fans are known for their durability, innovative designs, and long-lasting performance, but like any mechanical device, parts can wear out over time. Luckily, Hunter Fan Company offers a wide selection of genuine replacement parts that are designed to fit perfectly and maintain the fan’s efficiency and performance.
In this comprehensive guide, we’ll cover everything you need to know about Hunter ceiling fan replacement parts. From common parts that need replacing to where you can buy them, how to install them, and the costs involved, we’ll ensure that you have all the information to keep your Hunter ceiling fan running as good as new.
Let’s dive into the world of Hunter ceiling fan parts, how to identify when they need replacing, and how to easily replace them yourself!
Common Hunter Ceiling Fan Parts That Need Replacing
Over time, Hunter ceiling fans may require maintenance or replacement of certain parts to ensure that they continue to perform at their best. Whether you’re dealing with a malfunctioning motor, worn-out blades, or a flickering light kit, understanding which parts are likely to wear out or fail is key to ensuring the longevity of your fan. Below are some of the most common parts that may need replacing:
1. Fan Blades
Fan blades are the most commonly replaced part of a Hunter ceiling fan. Over time, they can get damaged, warped, or accumulate dust, which may impact their aesthetic appeal and performance.
- When to Replace: If your fan blades are causing the fan to wobble, are broken, or if they appear warped, it’s time to replace them.
- Replacement Options: Hunter offers reversible blades in various styles and finishes, such as Dark Gray Oak, Drifted Oak, and Fresh White, allowing you to not only replace the blades but also update the fan’s appearance to suit your décor.
2. Motor
The motor is the heart of any ceiling fan, and it’s crucial for providing smooth operation and optimal airflow. Hunter fans are equipped with WhisperWind® motors known for silent and efficient operation.
- When to Replace: If your fan is no longer spinning properly, the motor is noisy, or if the fan won’t start, it’s likely that the motor needs to be replaced.
- What to Expect: Replacing the motor can be a bit more technical and may require professional installation unless you’re familiar with ceiling fan mechanics.
3. Remote Control

The remote control allows you to control fan speed, light settings, and fan direction with ease. Over time, the remote may fail to pair with the receiver or become unresponsive due to battery depletion or wiring issues.
- When to Replace: If the remote is no longer syncing with the fan, doesn’t work despite new batteries, or stops controlling the fan altogether, it may need to be replaced.
- Replacement Options: You can purchase genuine Hunter replacement remotes that are pre-programmed for easy syncing with your Hunter ceiling fan.
4. Receiver
The receiver allows communication between the remote control and the fan motor. If the fan isn’t responding to the remote or the fan stops working after a remote replacement, it could be an issue with the receiver.
- When to Replace: If you’ve replaced the remote and the fan still isn’t responding, it’s possible that the receiver is malfunctioning.
- What to Expect: Replacing the receiver is relatively simple, but it may require accessing the fan’s wiring to install the new receiver. Ensure that the new receiver is compatible with your fan model.
5. Light Kit

The light kit on Hunter ceiling fans provides essential lighting and often includes LED bulbs that help to illuminate the room while the fan operates. Over time, the light fixture or bulbs can burn out or become damaged.
- When to Replace: If the light kit is flickering, dim, or the bulbs no longer work, it’s time to replace the light kit. This may also be the case if you want to upgrade to a more energy-efficient light kit.
- Replacement Options: Hunter offers a variety of light kits with LED bulbs, providing ambient, warm light. You can also upgrade to a dimmable light kit if you want more control over your fan’s lighting.
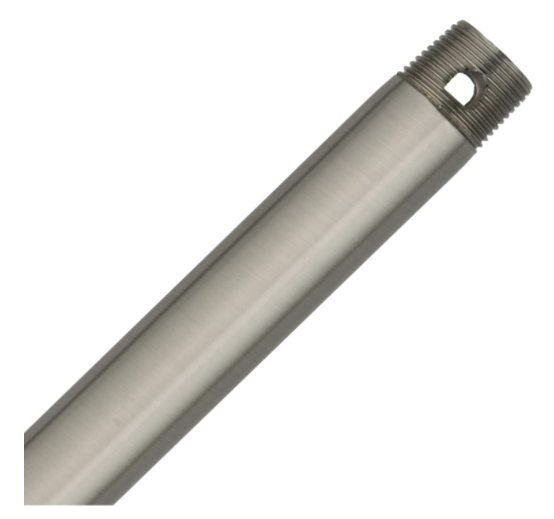
6. Downrod and Mounting Hardware
The downrod connects the fan to the ceiling and ensures the proper height and stability. Over time, the downrod may need replacing if it becomes damaged, or if you need a longer downrod to fit a higher ceiling.
- When to Replace: If you experience wobbling or instability in the fan, or if the downrod is rusting, it’s time to replace it.
- What to Expect: Ensure that the replacement downrod is the right length for your ceiling height. Hunter provides various sizes of downrods to fit different room specifications.
7. Pull Chains
The pull chains on your ceiling fan control the fan speed and the light. Over time, pull chains can wear out or break.
- When to Replace: If the pull chain is broken, stuck, or if you are unable to adjust the fan speed or light with it, it’s time for a replacement.
- Replacement Options: Hunter pull chains are available for purchase, and they are easy to replace if you follow the instructions in the fan’s manual.
8. Capacitors
The capacitor helps regulate the fan’s speed and ensures that the motor runs smoothly. Over time, the capacitor may burn out or stop working properly.
- When to Replace: If the fan is running slowly, not turning on, or not responding to speed adjustments, it may be due to a faulty capacitor.
- What to Expect: Replacing the capacitor is more technical and may require assistance from a professional unless you have experience with electrical components.
Where to Buy Hunter Ceiling Fan Replacement Parts
When it comes to replacing parts for your Hunter ceiling fan, it’s crucial to ensure that you are purchasing genuine replacement parts. Not only do these parts fit perfectly, but they also maintain the fan’s performance and longevity. In this section, we’ll discuss the best places to buy Hunter ceiling fan replacement parts.
1. Official Hunter Fan Company Website
The Hunter Fan Company website is the most reliable source for purchasing genuine replacement parts. It’s the best place to find parts specifically designed for Hunter ceiling fans, ensuring compatibility and performance.
- Genuine Parts: The Hunter Fan website carries an extensive selection of replacement parts, from motor replacements to fan blades, remote controls, and light kits.
- Quick Shipping: The official website often offers quick shipping for replacement parts, so you can get your Hunter fan back up and running in no time.
- Customer Support: If you’re unsure which part is right for your fan, Hunter’s customer support can help guide you through selecting the correct part and provide installation instructions.
Buy Replacement Parts Directly from Hunter – Affiliate Link
2. Authorized Retailers
Many trusted retailers carry Hunter fan parts, either online or in-store. Some of the most reliable places to purchase Hunter fan parts include:
- Amazon: One of the largest online retailers, Amazon offers a wide selection of Hunter ceiling fan parts. You can find everything from remote controls to fan blades and light kits.
- Home Depot: Home Depot is an authorized retailer for Hunter fans and offers various replacement parts for your ceiling fan, including batteries, remote controls, and motors.
- Lowe’s: Another major retailer, Lowe’s stocks Hunter ceiling fan parts and provides both online shopping and in-store pickup options.
Using these authorized retailers ensures that you are getting genuine parts that are designed to work perfectly with your Hunter ceiling fan.
Shop for Hunter Fan Parts on Amazon – Affiliate Link
Find Hunter Fan Parts at Home Depot – Affiliate Link
3. Third-Party Suppliers
If you are unable to find a specific part on the Hunter Fan website or authorized retailers, there are trusted third-party suppliers that also offer Hunter fan parts. Websites such as CeilingFanParts.com, Fanimation, and FanParts.com provide a range of genuine and compatible replacement parts for Hunter ceiling fans.
- Variety: These suppliers often carry hard-to-find parts or older parts for out-of-production Hunter fans.
- Compatibility: Make sure that the parts you purchase from third-party suppliers are Hunter-approved and are compatible with your specific model.
Find Replacement Parts from Flushmountedceilingfans.com – Affiliate Link
4. Local Fan Shops and Electricians
If you prefer shopping in person, local fan shops and electricians often carry replacement parts for Hunter fans. Local stores may provide the benefit of speaking to someone who can help you choose the right part and even assist with installation if needed.
- Local Availability: Check with local home improvement stores or specialty fan stores in your area to see if they carry Hunter fan parts.
- Professional Installation: Some electricians may also have access to Hunter replacement parts and offer installation services.
Why It’s Important to Choose Genuine Hunter Parts
When purchasing Hunter ceiling fan replacement parts, always opt for genuine Hunter parts. While third-party parts may appear less expensive, they often do not meet the same quality standards and can lead to incompatibility, performance issues, and safety hazards. By choosing Hunter-approved parts, you ensure that your fan continues to operate efficiently and safely, extending its lifespan.
How to Identify the Right Replacement Parts for Your Hunter Ceiling Fan
Finding the right replacement parts for your Hunter ceiling fan is crucial to ensure optimal performance and compatibility. Hunter fans are designed with specific part numbers, and knowing how to identify the correct parts can save you time, money, and frustration. Here’s how to ensure you’re purchasing the right replacement parts for your fan.
1. Locate Your Hunter Ceiling Fan Model Number
The first step in finding the correct replacement parts for your Hunter ceiling fan is identifying the model number. The model number tells you which Hunter fan you have, ensuring compatibility with replacement parts like motors, fan blades, light kits, and more.
- Where to Find the Model Number:
- The model number can be found on the ceiling fan’s motor housing, usually on the top of the fan. It’s often labeled on a small sticker or metal plate that includes both the model and serial number.
- Check the user manual: If you still have the user manual, the model number will also be listed on the first page.
- Online Lookup: If you don’t have the manual or can’t find the label, you can use the Hunter website or the serial number to help identify the model.
2. Check Part Numbers for Compatibility
Once you’ve identified the model number, the next step is to check the part numbers for compatibility. Hunter provides specific part numbers for each fan model, ensuring that only the correct replacement parts fit your fan.
- How to Find Compatible Parts:
- Visit the Hunter Fan website and search for your fan model number. This will provide a list of compatible parts that can be purchased, including motors, blades, and light kits.
- Check the part numbers on replacement parts (e.g., fan blades or motors) before purchasing to ensure they match your fan model.
- If you are unsure about the compatibility, you can always contact Hunter customer support to confirm the correct parts for your model.
3. Use the Hunter Fan Manual for Specific Part Information
If you still have the original manual that came with your Hunter ceiling fan, it will provide detailed information about compatible parts and their part numbers.
- Using the Manual:
- The manual includes information on motor types, fan blade sizes, and light kit compatibility for your specific Hunter model.
- If you don’t have the manual, you can access digital copies of the Hunter ceiling fan manuals on the official Hunter website.
4. Consider Model Series and Variations
Hunter fans come in different series (e.g., 5-series, 2-series), each with specific parts and features. If your fan is part of a certain series, it’s important to ensure that the replacement parts you purchase are designed for that series.
- Check Your Fan Series:
- Identify whether your Hunter fan belongs to a 5-series or 2-series fan. 5-series fans are generally newer models, while 2-series fans are older and may require different parts.
- The serial number or model number will often indicate the series.
5. Use the Hunter Website or Customer Support for Assistance
If you’re unsure about which parts are compatible with your Hunter ceiling fan, Hunter customer service is a great resource for assistance.
- Customer Support: Hunter offers phone support, email support, and a contact form to help you find the right parts. You can get detailed information on part numbers, availability, and compatibility from the support team.
Contact Hunter Fan Support for Assistance
Why Proper Part Identification is Crucial
Ensuring that you purchase the correct replacement parts for your Hunter ceiling fan is essential for maintaining optimal performance and safety. Incorrect parts can lead to issues like motor malfunction, increased noise, and reduced air circulation, which will ultimately affect your fan’s longevity and effectiveness.
By taking the time to identify the right parts and purchasing genuine Hunter replacement parts, you can ensure that your Hunter ceiling fan continues to operate smoothly, providing comfort for years to come.
DIY Installation of Hunter Ceiling Fan Replacement Parts
Installing replacement parts for your Hunter ceiling fan can be a simple and rewarding process if done correctly. Whether you’re replacing fan blades, the motor, or the light kit, DIY installation is possible for many users, as long as proper steps are followed for safety and functionality. Here’s a step-by-step guide for replacing common parts in Hunter ceiling fans.
1. Fan Blade Replacement
Over time, fan blades can become damaged, bent, or simply dirty, affecting the performance and aesthetic of your fan. Replacing the blades is an easy DIY task that can restore the airflow and appearance of your Hunter fan.
- How to Replace Fan Blades:
- Step 1: Turn off the power to your Hunter fan at the wall switch or circuit breaker.
- Step 2: Use a screwdriver to remove the screws securing the old blades to the motor assembly.
- Step 3: Attach the new fan blades using the same screws or hardware that came with the replacement blades. Make sure each blade is securely fastened.
- Step 4: Turn the power back on and test the fan to ensure the new blades are working properly.
2. Motor Replacement
The motor is the heart of any Hunter ceiling fan. If your fan is making unusual noises, has stopped working, or is not responding to the remote control, it may be time to replace the motor.
- How to Replace the Motor:
- Step 1: Turn off the fan and disconnect it from the power source.
- Step 2: Remove the fan blades and light kit (if applicable).
- Step 3: Unmount the fan motor by loosening the screws holding the motor in place.
- Step 4: Disconnect the motor’s wiring from the ceiling and remove the old motor.
- Step 5: Install the new motor by reversing the steps, ensuring the wiring is securely connected.
- Step 6: Reattach the blades and light kit, turn the power back on, and test the fan.
3. Remote Control Syncing
If your Hunter fan remote is not syncing with the fan, it may need to be reprogrammed. If the remote is broken or unresponsive, it may need replacement. Here’s how you can sync a new remote with your fan:
- How to Sync the Remote:
- Step 1: Turn off the fan at the wall switch for at least 10 seconds to ensure the receiver has time to reset.
- Step 2: Turn the power back on to the fan.
- Step 3: On the remote, press and hold the “Fan” and “Speed” buttons simultaneously for about 5 seconds.
- Step 4: The fan’s light will blink and stay on, confirming the remote is paired.
- Step 5: Test the remote to ensure it works properly with the fan.
4. Light Kit Installation
If your Hunter ceiling fan light kit is malfunctioning or outdated, replacing it can enhance the light quality and provide better ambiance in your room. Here’s how you can replace or upgrade your light kit:
- How to Replace the Light Kit:
- Step 1: Turn off the fan and disconnect power at the wall.
- Step 2: Remove the old light kit by unscrewing the mounting screws.
- Step 3: Disconnect the wiring from the old light kit and attach the wiring of the new light kit.
- Step 4: Secure the new light kit in place and reassemble any parts that were removed.
- Step 5: Turn the power back on and test the light to ensure it works properly.
5. Downrod Replacement
The downrod determines the height of your fan, and if you need to adjust it for a higher ceiling or to correct wobbling, you may need to replace or adjust it.
- How to Replace the Downrod:
- Step 1: Turn off the fan and disconnect power.
- Step 2: Lower the fan by removing the fan blades and motor mount.
- Step 3: Loosen the downrod from the fan’s mounting bracket and remove it.
- Step 4: Attach a new downrod with the correct length for your ceiling height.
- Step 5: Reassemble the fan by reversing the disassembly steps.
6. Pull Chain Replacement
If the pull chain is broken or stuck, it can prevent you from adjusting the fan’s speed or light. Fortunately, Hunter replacement pull chains are easy to install.
- How to Replace the Pull Chain:
- Step 1: Turn off the fan and disconnect it from the power.
- Step 2: Locate the pull chain mechanism (usually under the motor housing).
- Step 3: Remove the old pull chain and install the new one.
- Step 4: Test the fan to ensure the pull chain functions properly.
Tips for a Successful DIY Fan Repair:
- Always turn off the power before starting any installation or replacement.
- Use appropriate tools and make sure all screws are securely tightened to avoid future issues.
- If you’re unsure about any step, consult your Hunter ceiling fan manual or contact customer support for guidance.
By following these steps, you can keep your Hunter ceiling fan running smoothly and extend its lifespan. Regular maintenance and part replacement can improve your fan’s performance and efficiency.
Troubleshooting Before Replacing Parts
Before diving into part replacements, it’s important to troubleshoot your Hunter ceiling fan to determine if the issue really requires a replacement part. Many problems with ceiling fans can be resolved with simple fixes, saving you time and money. Below are some common issues with Hunter ceiling fans and possible troubleshooting solutions.
1. Fan Not Turning On
If your Hunter ceiling fan isn’t turning on, there are a few potential reasons for this.
- Power Supply: The first thing to check is whether the fan is receiving power. Ensure the wall switch is turned on, and check if the breaker has tripped. If everything seems fine, move on to the next step.
- Remote Control: If you’re using a remote control, ensure that the batteries are working. A dead battery can cause the fan to stop responding. Try replacing the batteries or re-syncing the remote with the fan.
- Motor Connection: If the fan still doesn’t work, there could be an issue with the motor wiring. Check the motor connections and ensure they are properly connected.
2. Fan Wobbling
Fan wobble is a common issue that can occur due to several factors. While wobble-free operation is a feature of Hunter fans, external factors can still cause wobbling over time.
- Fan Blades: Over time, fan blades can become warped, which will cause wobbling. Check if any of the blades are damaged or uneven. Replacing damaged blades or swapping them out for new blades often fixes the issue.
- Tighten the Screws: Make sure that all screws holding the fan blades and motor in place are securely tightened. Loose connections can also lead to wobbling.
- Downrod and Mounting: If your fan has been installed improperly or if the downrod isn’t properly aligned, it can cause wobbling. In such cases, reinstalling the fan or adjusting the downrod may be necessary.
3. Noisy Fan Operation
If your Hunter ceiling fan is making an unusual noise (buzzing, grinding, or clicking), here are some common causes:
- Fan Blades: Ensure that the fan blades are properly aligned. If they are uneven or have accumulated dirt, it can cause noise. Clean the blades regularly to avoid buildup.
- Motor: A noisy motor could indicate a malfunction or lack of lubrication. If the motor is making grinding or squealing sounds, the motor may need to be replaced. However, it’s worth trying to lubricate the motor before deciding to replace it.
- Loose Components: Check for any loose screws in the fan’s mounting bracket, motor housing, or light kit. Tighten any loose screws to reduce vibrations and noise.
4. Light Flickering or Not Turning On
If your Hunter ceiling fan light is flickering or won’t turn on, there are a few things to check before replacing the light kit.
- Bulb: The most common reason for flickering lights is a faulty bulb. Make sure the LED bulbs or incandescent bulbs are securely screwed in and replace them if necessary.
- Wiring: If the light still flickers or doesn’t work after replacing the bulb, there may be an issue with the wiring. Check the light kit connections and make sure they are secure.
- Remote Control: If the fan is using a remote control to operate the light, try resetting the remote or replacing its batteries. Also, make sure the receiver is working properly.
5. Fan Speed Not Working
If the fan speed is not responding or is stuck on one setting, this can be caused by a malfunctioning receiver or remote control.
- Remote Control Issues: Sometimes, the remote control can lose its sync with the fan receiver. Try reprogramming the remote and ensure that the batteries are functioning.
- Receiver Problems: If the issue persists, it could be the receiver that needs replacing. The receiver is responsible for regulating the fan’s speed, and if it fails, it may cause the fan to get stuck on one speed.
Why Troubleshooting is Important Before Replacing Parts
Before investing in replacement parts, it’s essential to troubleshoot and eliminate simpler issues first. Many common problems with Hunter ceiling fans can be fixed without replacing major parts. Properly identifying the issue will help you determine whether a simple fix (like replacing a bulb or battery) will solve the problem, or if a major component, like the motor or receiver, needs to be replaced.
By following the troubleshooting steps outlined above, you can ensure that you don’t waste time or money on replacement parts you don’t need.
Cost of Hunter Ceiling Fan Replacement Parts
When it comes to maintaining your Hunter ceiling fan, replacing parts is often necessary to keep the fan running at its best. The cost of replacement parts can vary depending on the part itself and where you purchase it from. Below, we’ll break down the average cost of various Hunter ceiling fan replacement parts to help you understand what to expect.
1. Fan Blades
Fan blades are one of the most common parts that need replacing, especially if they become damaged or warped. The price of Hunter fan blades can vary based on the material (wood, plastic, metal) and the size of the blades.
- Average Price Range: $30 – $70 for a set of 5 blades.
- Factors Affecting Price: The material of the blades (e.g., wooden blades may be more expensive than plastic blades) and the blade size (e.g., 42-inch blades will typically cost less than 52-inch blades).
If you’re looking to upgrade your fan’s appearance or improve performance, choosing higher-end Hunter blades may come at a premium, but they are made with high-quality materials that ensure longevity and optimal airflow.
2. Motor Replacement
The motor is one of the more expensive parts of your Hunter ceiling fan. While Hunter fans are known for their WhisperWind® motors, these motors may eventually need replacing if they malfunction or fail to work properly.
- Average Price Range: $100 – $200 for a replacement motor.
- Installation: Since replacing a fan motor can be a complex task, consider professional installation, which may add $50 – $150 depending on your location and the complexity of the job.
When replacing the motor, it’s important to ensure that the replacement is compatible with your Hunter fan model.
3. Remote Control
If your Hunter ceiling fan remote stops working, replacing it is usually straightforward and affordable. Hunter remotes can be purchased directly from Hunter or from third-party retailers.
- Average Price Range: $20 – $50 for a Hunter replacement remote.
- Smart Remotes: If you’re replacing a smart remote with Wi-Fi capabilities, you can expect the price to be on the higher end of the range.
Having a replacement remote ensures you can continue enjoying the convenience of controlling your fan’s speed, direction, and lighting from a distance.
4. Light Kit
Light kits are an essential component of many Hunter ceiling fans, providing illumination to your room. The price of replacing a light kit can vary based on the type of light (e.g., LED light kits tend to be more expensive) and the design.
- Average Price Range: $30 – $80 for a replacement light kit.
- Upgrading the Light Kit: If you decide to upgrade to an LED light kit for better energy efficiency and longer-lasting bulbs, the cost may be slightly higher, but it will save on electricity costs in the long run.
5. Downrod and Mounting Hardware
If you’re replacing the downrod or mounting hardware, the cost is generally affordable and will depend on the length of the downrod and whether you need additional mounting accessories.
- Average Price Range: $10 – $30 for replacement downrods.
- Considerations: The price can vary depending on the length (longer downrods cost more) and material (e.g., metal downrods tend to cost more than plastic downrods).
Hunter fans offer various length options, making it easy to find the right downrod to fit your room height.
6. Capacitors
The capacitor regulates the fan’s speed, and if it malfunctions, the fan will not work properly. Replacing the capacitor is often necessary if your fan is running slowly or not responding to the speed settings.
- Average Price Range: $15 – $30 for a replacement capacitor.
- Installation: If you’re comfortable with electrical work, you may be able to replace the capacitor yourself. However, if you’re unsure, it’s best to hire a professional to handle the installation.
7. Pull Chains
Pull chains are relatively inexpensive to replace and can often be fixed yourself if they become stuck or broken.
- Average Price Range: $5 – $15 for replacement pull chains.
- DIY Replacement: Replacing the pull chain is a simple process and can be done in under 30 minutes.
What Affects the Cost of Replacement Parts?
- Part Type: More complex parts, like the motor, receiver, or light kit, will generally be more expensive than basic parts like pull chains or capacitors.
- Model Compatibility: Some Hunter fan models may require specialized or custom parts, which can increase the cost.
- Installation: If you choose to have a professional install the replacement part, you may need to factor in the cost of labor, which can range from $50 – $150 per hour, depending on your location and the complexity of the installation.
Understanding the Cost of Hunter Ceiling Fan Replacement Parts
Understanding the costs associated with replacement parts can help you make an informed decision when maintaining your Hunter ceiling fan. While some parts, such as fan blades and pull chains, are relatively inexpensive, others like the motor or light kit may require a more significant investment. Regardless of the part, opting for genuine Hunter replacement parts ensures that your fan continues to perform optimally and last longer.
If you’re unsure about which part needs replacing, consider reviewing your fan model and checking out our Hunter Ceiling Fan Troubleshooting Guide for additional tips. And remember, choosing quality replacement parts and professional installation can save you money in the long run by maintaining the fan’s performance and energy efficiency.
Benefits of Regularly Replacing Hunter Ceiling Fan Parts
Maintaining your Hunter ceiling fan by replacing worn-out or malfunctioning parts offers a variety of benefits that extend far beyond the immediate improvement in performance. Regular part replacement not only enhances your fan’s efficiency and lifespan but also contributes to energy savings, enhanced comfort, and improved aesthetics. Below are the top reasons why it’s important to stay on top of Hunter ceiling fan replacement parts.
1. Improved Performance and Efficiency
Over time, parts like motor bearings, capacitors, and fan blades can wear out, reducing your fan’s ability to provide optimal airflow. When you replace these worn parts, your fan operates at peak efficiency, providing better cooling and circulation. This means:
- Increased Airflow: Replaced fan blades and a new motor help maintain optimal airflow, ensuring that your fan works efficiently in hot summer months and aids air circulation in the winter.
- Energy Savings: A well-maintained fan will use less energy, meaning lower electricity bills. A WhisperWind® motor in a Hunter fan, for example, provides powerful airflow without consuming excessive energy.
Replacing damaged parts ensures your fan continues to deliver high-efficiency cooling, making your home more comfortable without spiking your energy consumption.
2. Extended Lifespan
When you regularly replace parts such as light kits, remote controls, or fan motors, you’re extending the overall lifespan of your Hunter ceiling fan. Worn parts can put strain on the fan’s motor or wiring, leading to further damage and potential fan failure. Replacing these parts proactively helps:
- Prevent Breakdowns: Timely replacement of faulty components prevents complete system failures, meaning your fan will serve you for years.
- Protect Other Parts: Replacing one malfunctioning part prevents damaging other components, such as the motor or electrical wiring, thus saving you the cost of major repairs.
3. Safety
Regular replacement of parts like remote controls, fan blades, and motors ensures that your Hunter ceiling fan remains safe for use. Broken blades or malfunctioning motors can pose serious safety risks, such as fire hazards or falling blades. By keeping your fan in proper working order:
- Avoid Electrical Issues: Old wiring or malfunctioning parts can lead to short circuits or overheating. Replacing worn components like capacitors or motors ensures that the electrical system remains safe and efficient.
- Prevent Fan Failure: A wobbly fan or improperly secured blades can fall, causing accidents. Replacing broken pull chains or fan blades ensures your fan remains stable and secure.
4. Enhanced Comfort
By replacing fan blades, light kits, or remote controls, you are ensuring that your Hunter ceiling fan continues to provide the comfort you need. Some specific reasons include:
- Better Airflow Control: Replacing a faulty remote control or receiver ensures you can adjust the fan speed and direction with ease, allowing you to customize your comfort levels throughout the year.
- Improved Lighting: Replacing light bulbs or light kits can brighten up your space, making it more comfortable and cozy for family gatherings, movie nights, or reading.
Having a fully functioning fan ensures that you can enjoy optimal comfort in your home, year-round.
5. Aesthetic Improvements
Sometimes, replacing old fan blades or a damaged light kit can dramatically improve the look of your Hunter ceiling fan. Since ceiling fans are often a focal point of room decor, maintaining a fresh, modern appearance is essential:
- Upgrade to Modern Designs: If your fan blades are outdated or damaged, replacing them with new, stylish blades can give your fan a fresh new look.
- Brighten Up with New Lights: If your light kit is dimming or the bulbs are burnt out, replacing the light fixture with a new LED light kit can improve both the aesthetic appeal and lighting quality in your room.
By replacing outdated parts, you can keep your Hunter ceiling fan looking brand new, matching any new home decor or renovations.
Conclusion: Keep Your Hunter Ceiling Fan Running Smoothly
Replacing parts of your Hunter ceiling fan is an essential task that can enhance its performance, longevity, and overall functionality. Whether you’re upgrading the light kit, replacing worn fan blades, or fixing a broken pull chain, maintaining your fan with genuine Hunter parts will ensure that it operates at its best, year after year.
By following the DIY installation tips for replacement parts and choosing genuine Hunter products, you can continue enjoying the comfort and efficiency that Hunter ceiling fans are known for. Regular maintenance not only helps you avoid costly repairs but also improves safety, airflow, and energy savings.
Remember, a well-maintained Hunter ceiling fan is an investment in comfort, safety, and style. If you ever encounter issues or need specific replacement parts, make sure to visit Hunter ceiling fans website or consult our detailed guides for further assistance.
Leave a Reply