If you’ve found yourself in a situation where your Hunter ceiling fan remote isn’t working, or you simply lost your remote, don’t worry. There are still several ways to control your Hunter ceiling fan and keep enjoying a comfortable atmosphere in your home. Whether you need to manually operate your fan or simply adjust the settings, we’ve got you covered.
In this guide, we’ll walk you through the step-by-step process of turning on your Hunter fan without using the remote control. You’ll learn how to operate the fan using manual methods, including the pull chain, wall switch, and ceiling-mounted control, ensuring you stay in control no matter what!
1. Tools and Safety Precautions
Before you begin, make sure you have the necessary tools and safety precautions to operate your Hunter ceiling fan:
Essential Tools:
- Step Ladder: To safely reach your fan if it’s mounted high.
- Screwdriver (optional): In case you need to adjust or remove any components.
Safety Precautions:
- Turn off the power at the wall switch or circuit breaker to avoid any electrical accidents.
- Wear safety glasses to protect your eyes from any falling debris when working with the fan.
- Use gloves to protect your hands from sharp edges.
2. How to Turn On a Hunter Ceiling Fan Without Remote
If your Hunter ceiling fan is equipped with a pull chain, wall switch, or ceiling-mounted controls, you can still enjoy its cooling effects without a remote control. Here’s how to turn on your Hunter fan manually.

Step 1: Locate the Pull Chain
- Most Hunter ceiling fans are equipped with a pull chain located on the motor housing or downrod. This is the most common manual control for turning the fan on or off and adjusting its speed.
Step 2: Turn on the Fan with the Pull Chain
- Simply pull the chain once to turn the fan on. Each pull typically toggles through the fan speed settings (low, medium, high). Keep pulling until the fan is set to your desired speed.
Step 3: Adjust Fan Speed Using the Pull Chain
- If you want to adjust the speed, continue pulling the chain. Each pull will cycle the fan through its speed settings. Some Hunter fans may have separate chains for controlling the fan and the light, so ensure you’re adjusting the right function.
Step 4: Turn the Fan Off Using the Pull Chain
- To turn off the fan, continue pulling the chain until the fan shuts off. Most fans will toggle off after going through all available speed settings.
3. Using the Wall Switch to Operate the Hunter Fan
In addition to the pull chain, some Hunter fans can be controlled using the wall switch, especially if the fan is wired directly to your home’s electrical system.
Step 1: Locate the Wall Switch
- Look for the wall switch connected to the Hunter fan. Depending on the fan, this switch may control the fan speed, lighting, or both.
Step 2: Flip the Wall Switch to Turn the Fan On
- Simply flip the wall switch to the on position to activate the fan. This will turn the fan on at its default speed (typically low or medium). If the fan is connected to a multi-speed wall switch, you can adjust the fan speed.
Step 3: Adjust Fan Speed Using the Wall Switch
- If the wall switch is multi-speed, use it to increase or decrease the fan speed to your liking.
4. Turning On the Fan Using the Ceiling Mount Switch
Some Hunter fans are designed with a ceiling-mounted switch or fan speed control for easier access and control.
Step 1: Find the Ceiling-Mounted Switch
- Some ceiling fans come with a mounted switch near the canopy. This is a manual speed control used for operating the fan.
Step 2: Adjust the Fan Speed Using the Ceiling-Mounted Switch
- Use the ceiling-mounted switch to select the fan speed (low, medium, or high). This switch may also allow you to control the light settings, depending on your model.
5. Troubleshooting Common Issues When Turning on the Hunter Fan Without Remote
If your Hunter ceiling fan isn’t turning on manually, there may be a few issues you need to address. Here are some common problems and how to fix them:
1. Pull Chain Not Working
- If the pull chain doesn’t work, ensure that the chain is intact and that it’s properly connected to the motor. If the chain is broken, you may need to replace it.
2. Wall Switch Not Turning On the Fan
- If the wall switch isn’t turning on the fan, check if the switch is functional or if there’s an issue with the wiring. If needed, consult an electrician for wiring issues.
3. Fan Not Turning On
- If the fan doesn’t respond at all, ensure that power is reaching the fan. Check the breaker box for any tripped breakers. If the power supply is fine, there may be an issue with the fan motor or wiring.
6. Alternative Methods for Turning on the Hunter Ceiling Fan
If you are still having trouble operating your Hunter ceiling fan without the remote, consider using an alternative method:
Use a Universal Fan Remote
- A universal fan remote is a great option if you’ve lost or damaged the original remote control. Make sure the remote is compatible with your Hunter ceiling fan and follow the pairing instructions.
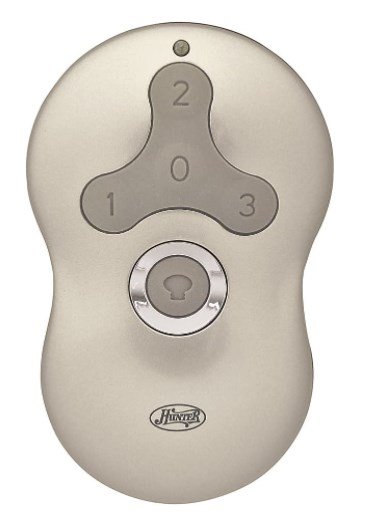
Install a New Remote Control
- If the Hunter fan remote is no longer working, you can purchase a replacement remote. Be sure to get the right model for your specific fan. Some models even offer smart fan remote control options, allowing you to control your fan via Wi-Fi or smartphones.
7. Conclusion
You don’t always need the Hunter ceiling fan remote to enjoy your ceiling fan. By using the pull chain, wall switch, or ceiling-mounted switch, you can still control your Hunter fan with ease. These manual methods ensure that your Hunter fan operates smoothly even if the remote is missing or not working.
If you’re looking for more control options or need a replacement remote, Hunter offers a variety of accessories to enhance your fan experience. For replacement parts or any other fan-related needs, don’t hesitate to check out our Hunter Ceiling Fan Replacement Parts Guide.
Leave a Reply